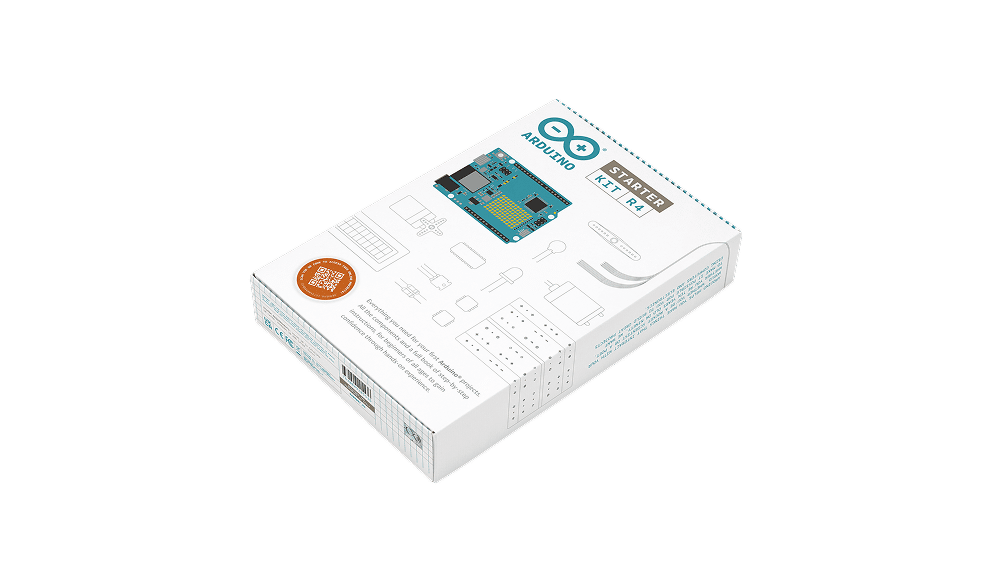
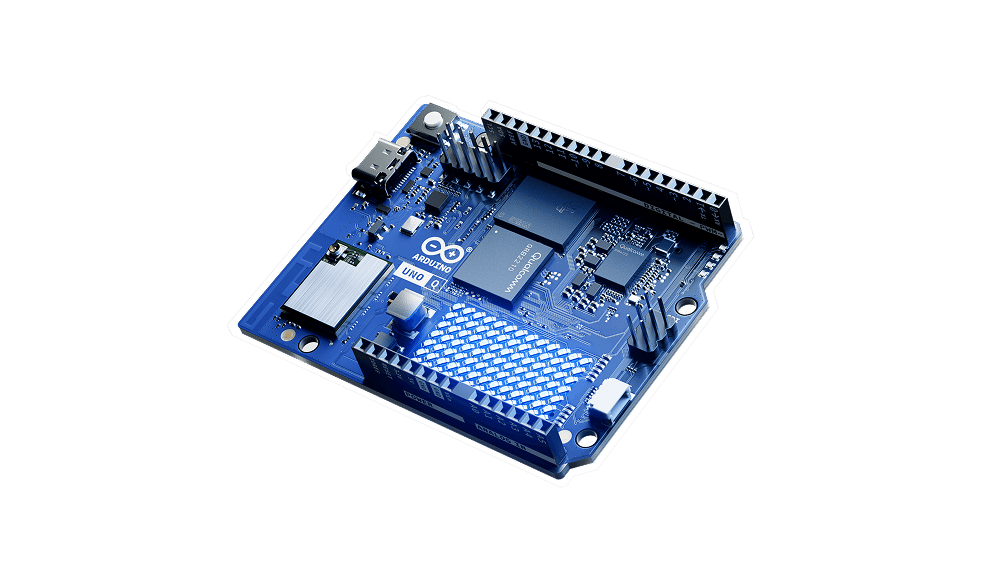
<!DOCTYPE html><html lang="en"><head><meta charSet="utf-8" data-next-head=""/><meta name="viewport" content="width=device-width" data-next-head=""/><title data-next-head="">Arduino - Home</title><meta name="description" content="Open-source electronic prototyping platform enabling users to create interactive electronic objects." data-next-head=""/><meta name="og:title" content="Arduino - Home" data-next-head=""/><meta name="og:image" content="https://www.datocms-assets.com/150482/1742470244-logo.png" data-next-head=""/><meta name="twitter:card" data-next-head=""/><meta name="twitter:image" content="https://www.datocms-assets.com/150482/1742470244-logo.png" data-next-head=""/><meta name="twitter:title" content="Arduino - Home" data-next-head=""/><meta name="twitter:description" content="Open-source electronic prototyping platform enabling users to create interactive electronic objects." data-next-head=""/><meta charSet="utf-8"/><meta name="theme-color" content="#00979d"/><meta name="robots" content="index,follow"/><link rel="shortcut icon" href="https://cdn.arduino.cc/header-footer/prod/assets/favicon-arduino/favicon.ico"/><link rel="preconnect" href="https://content.arduino.cc/" crossorigin="anonymous"/><link rel="preconnect" href="https://www.google.com" crossorigin="anonymous"/><link rel="preconnect" href="https://www.google-analytics.com" crossorigin="anonymous"/><link rel="preconnect" href="https://stats.g.doubleclick.net" crossorigin="anonymous"/><link rel="preconnect" href="https://undefined" crossorigin="anonymous"/><link rel="preconnect" href="https://graphql.datocms.com/" crossorigin="anonymous"/><link rel="preload" href="https://content.arduino.cc/fonts/Roboto-Mono-Bold-webfont.woff" as="font" type="font/woff" crossorigin="anonymous"/><link rel="preload" href="https://content.arduino.cc/fonts/OpenSans-Bold-webfont.woff" as="font" type="font/woff" crossorigin="anonymous"/><link rel="preload" href="https://content.arduino.cc/fonts/OpenSans-Regular-webfont.woff" as="font" type="font/woff" crossorigin="anonymous"/><link rel="preload" href="https://content.arduino.cc/fonts/Roboto-Mono-Regular-webfont.woff" as="font" type="font/woff" crossorigin="anonymous"/><link rel="preload" href="https://content.arduino.cc/fonts/OpenSans-Semibold-webfont.woff" as="font" type="font/woff" crossorigin="anonymous"/><link rel="preload" href="https://content.arduino.cc/fonts/OpenSans-Italic-webfont.woff" as="font" type="font/woff" crossorigin="anonymous"/><link rel="stylesheet" type="text/css" href="https://cdn.arduino.cc/header-footer/prod/cookieSolution.css"/><link rel="preload" href="/_next/static/css/0c54aefbf9508262.css" as="style"/><link rel="stylesheet" href="/_next/static/css/0c54aefbf9508262.css" data-n-g=""/><link rel="preload" href="/_next/static/css/90dfe282a754efa7.css" as="style"/><link rel="stylesheet" href="/_next/static/css/90dfe282a754efa7.css" data-n-p=""/><link rel="preload" href="/_next/static/css/2f39f2f3537629df.css" as="style"/><link rel="stylesheet" href="/_next/static/css/2f39f2f3537629df.css"/><link rel="preload" href="/_next/static/css/05bbcaf0cd7b1140.css" as="style"/><link rel="stylesheet" href="/_next/static/css/05bbcaf0cd7b1140.css"/><link rel="preload" href="/_next/static/css/1877494b167afcc1.css" as="style"/><link rel="stylesheet" href="/_next/static/css/1877494b167afcc1.css"/><link rel="preload" href="/_next/static/css/2a27b0f8beda6f70.css" as="style"/><link rel="stylesheet" href="/_next/static/css/2a27b0f8beda6f70.css"/><link rel="preload" href="/_next/static/css/4440a680f9832684.css" as="style"/><link rel="stylesheet" href="/_next/static/css/4440a680f9832684.css"/><noscript data-n-css=""></noscript><script defer="" nomodule="" src="/_next/static/chunks/polyfills-42372ed130431b0a.js"></script><script defer="" src="/_next/static/chunks/9722.c2b8bde5b8d6faad.js"></script><script defer="" src="/_next/static/chunks/4010.7dea937280a39aed.js"></script><script defer="" src="/_next/static/chunks/1510.e05f8159188fb939.js"></script><script defer="" src="/_next/static/chunks/3497.65c93a24360e7844.js"></script><script defer="" src="/_next/static/chunks/9227.1f419087c9995014.js"></script><script defer="" src="/_next/static/chunks/6519.0f787cd5b7f0683d.js"></script><script defer="" src="/_next/static/chunks/6461.9e42b0a871b0b457.js"></script><script defer="" src="/_next/static/chunks/3016-0ef45adcd6aa804f.js"></script><script defer="" src="/_next/static/chunks/3568.cf5b764d88524bdb.js"></script><script defer="" src="/_next/static/chunks/9742.cfecb3637b05db11.js"></script><script defer="" src="/_next/static/chunks/3533.c6a83da34a41c65d.js"></script><script defer="" src="/_next/static/chunks/7297.79c941b442efb2ed.js"></script><script defer="" src="/_next/static/chunks/5008.576d11af94b5cf9f.js"></script><script defer="" src="/_next/static/chunks/9391.080359a8a2b941d1.js"></script><script src="/_next/static/chunks/webpack-4e22d9e23d4e9702.js" defer=""></script><script src="/_next/static/chunks/framework-f00fddb9800f9292.js" defer=""></script><script src="/_next/static/chunks/main-695e353efc0a2998.js" defer=""></script><script src="/_next/static/chunks/pages/_app-d427fc5fc7d7e28a.js" defer=""></script><script src="/_next/static/chunks/6996-71912038b9d8576e.js" defer=""></script><script src="/_next/static/chunks/7978-b97da4e4bbeeaa18.js" defer=""></script><script src="/_next/static/chunks/pages/%5B%5B...slug%5D%5D-15ac60aa47a96268.js" defer=""></script><script src="/_next/static/1r5y5DCrmta4CuTlUvlyN/_buildManifest.js" defer=""></script><script src="/_next/static/1r5y5DCrmta4CuTlUvlyN/_ssgManifest.js" defer=""></script></head><body class="homepage-website"><noscript><iframe src="https://www.googletagmanager.com/ns.html?id=GTM-NK2TW8L" height="0" width="0" style="display:none;visibility:hidden"></iframe></noscript><div class="layout"><div id="__next"><div data-art-theme="light" style="display:contents"><div style="position:fixed;left:0;right:0;z-index:9999"><div data-mobile="false" data-brand="false" data-ah-theme="light" data-ah-accent="mkr" class="_Root_1djo6_1 _Header_c7jlt_1" style="z-index:9999"><div class="_Header-overlay_c7jlt_133" data-show="false"></div><div class="_Header-inner_c7jlt_13"><div class="_Header-logo_c7jlt_30"><a class="_Header-logo_link_c7jlt_40" data-logo="full" href="https://arduino.cc" title="Go to arduino.cc" target="_self" rel="noopener noreferrer"><svg xmlns="http://www.w3.org/2000/svg" width="40" height="20" fill="none" viewBox="0 0 40 20"><g clip-path="url(#clip0_4730_4256)"><path fill="currentColor" fill-rule="evenodd" d="M40 10C40 4.616 35.572.244 30.146.244c-.5 0-1.014.028-1.513.114-4.22.612-7.05 3.731-8.633 6.124C18.418 4.09 15.586.97 11.367.358c-.5-.071-1.013-.114-1.513-.114C4.414.244 0 4.616 0 10s4.427 9.756 9.854 9.756c.5 0 1.014-.028 1.527-.114 4.22-.626 7.05-3.746 8.633-6.138 1.582 2.392 4.413 5.512 8.633 6.138.5.071 1.013.114 1.527.114C35.572 19.756 40 15.384 40 10m-29.119 6.224a6.4 6.4 0 0 1-1.04.071c-3.581 0-6.482-2.834-6.482-6.295 0-3.475 2.914-6.295 6.495-6.295.347 0 .694.028 1.041.071C14.88 4.36 17.307 8.391 18.14 10c-.846 1.624-3.29 5.64-7.259 6.224M29.105 3.776C25.122 4.36 22.679 8.391 21.86 10c.819 1.61 3.262 5.64 7.245 6.224.347.043.694.071 1.04.071 3.568 0 6.482-2.82 6.482-6.295 0-3.46-2.9-6.295-6.481-6.295a9 9 0 0 0-1.041.071M7.075 8.955h5.96v1.876h-5.96zm25.82 1.89h-2.009v1.97H28.96v-1.97h-2.01v-1.89h2.01V6.983h1.926v1.972h2.01zm4.568-9.52c0-.59.483-1.081 1.069-1.081.603 0 1.086.49 1.086 1.082 0 .625-.483 1.082-1.086 1.082-.586 0-1.069-.49-1.069-1.082M38.547.65h-.534v1.352h.345v-.457h.19l.189.457h.379l-.259-.507c.173-.068.259-.203.259-.389 0-.287-.155-.456-.569-.456m.88.676a.9.9 0 0 0-.896-.913c-.517 0-.88.372-.88.913 0 .558.414.913.88.913.516 0 .896-.355.896-.913m-.673-.237c0 .17-.086.22-.241.22l-.173.017v-.44h.173c.19 0 .241.05.241.203" clip-rule="evenodd"></path></g><defs><clipPath id="clip0_4730_4256"><path fill="currentColor" d="M0 .244h40v19.512H0z"></path></clipPath></defs></svg></a></div><div class="_Header-content_c7jlt_86"><div class="_StandardHeader-content_54kft_1"><div class="_MenuList-wrapper_1djo6_16"><ul class="_MenuList_1djo6_6 _StandardHeader-links_54kft_23"><li class="_MenuItem_1djo6_23"><button type="button" aria-disabled="false" tabindex="0" aria-expanded="false" data-base-ui-navigation-menu-trigger="" class="_Trigger_1djo6_28"><div data-font="" data-font-size="x-small" data-font-weight="bold">Solutions</div><svg xmlns="http://www.w3.org/2000/svg" width="1em" height="1em" fill="none" viewBox="0 0 32 32"><path fill="currentColor" d="M16 21a1 1 0 0 1-.71-.29l-6-6a1.004 1.004 0 0 1 1.42-1.42l5.29 5.3 5.29-5.3a1.004 1.004 0 1 1 1.42 1.42l-6 6A1 1 0 0 1 16 21"></path></svg></button></li><a href="https://www.arduino.cc/pro" data-font="" data-font-size="x-small" data-font-weight="bold" class="_Trigger_1djo6_28 _MenuItem_1djo6_23">For Professionals</a><a href="https://www.arduino.cc/edu" data-font="" data-font-size="x-small" data-font-weight="bold" class="_Trigger_1djo6_28 _MenuItem_1djo6_23">For Education </a><a href="https://www.arduino.cc/maker" data-font="" data-font-size="x-small" data-font-weight="bold" class="_Trigger_1djo6_28 _MenuItem_1djo6_23">For Makers</a></ul></div><div style="flex:1"></div><div class="_MenuList-wrapper_1djo6_16"><ul class="_MenuList_1djo6_6"><li class="_MenuItem_1djo6_23"><button type="button" aria-disabled="false" tabindex="0" aria-expanded="false" data-base-ui-navigation-menu-trigger="" class="_Trigger_1djo6_28"><div data-font="" data-font-size="x-small" data-font-weight="bold">Products</div><svg xmlns="http://www.w3.org/2000/svg" width="1em" height="1em" fill="none" viewBox="0 0 32 32"><path fill="currentColor" d="M16 21a1 1 0 0 1-.71-.29l-6-6a1.004 1.004 0 0 1 1.42-1.42l5.29 5.3 5.29-5.3a1.004 1.004 0 1 1 1.42 1.42l-6 6A1 1 0 0 1 16 21"></path></svg></button></li><li class="_MenuItem_1djo6_23"><button type="button" aria-disabled="false" tabindex="0" aria-expanded="false" data-base-ui-navigation-menu-trigger="" class="_Trigger_1djo6_28"><div data-font="" data-font-size="x-small" data-font-weight="bold">Community</div><svg xmlns="http://www.w3.org/2000/svg" width="1em" height="1em" fill="none" viewBox="0 0 32 32"><path fill="currentColor" d="M16 21a1 1 0 0 1-.71-.29l-6-6a1.004 1.004 0 0 1 1.42-1.42l5.29 5.3 5.29-5.3a1.004 1.004 0 1 1 1.42 1.42l-6 6A1 1 0 0 1 16 21"></path></svg></button></li><li class="_MenuItem_1djo6_23"><button type="button" aria-disabled="false" tabindex="0" aria-expanded="false" data-base-ui-navigation-menu-trigger="" class="_Trigger_1djo6_28"><div data-font="" data-font-size="x-small" data-font-weight="bold">Documentation</div><svg xmlns="http://www.w3.org/2000/svg" width="1em" height="1em" fill="none" viewBox="0 0 32 32"><path fill="currentColor" d="M16 21a1 1 0 0 1-.71-.29l-6-6a1.004 1.004 0 0 1 1.42-1.42l5.29 5.3 5.29-5.3a1.004 1.004 0 1 1 1.42 1.42l-6 6A1 1 0 0 1 16 21"></path></svg></button></li></ul></div><div class="_StandardHeader-mobile-buttons_54kft_9" data-mobile="false"><div style="flex:1"><a href="https://store.arduino.cc" type="button" tabindex="0" data-font="" data-font-size="x-small" data-font-weight="bold" class="_btn_1gv5b_6 _btn--small_1gv5b_195 _btn--default_1gv5b_45">Shop</a></div><a href="https://search.arduino.cc" rel="noopener noreferrer" class="_btn_w1ht0_1" type="button" data-iconcolor="currentColor" data-font="" data-font-size="x-small" data-font-weight="bold"><svg xmlns="http://www.w3.org/2000/svg" width="1em" height="1em" fill="none" viewBox="0 0 32 32"><path fill="currentColor" d="m28.71 27.29-7-7a10 10 0 1 0-1.42 1.42l7 7a1.002 1.002 0 0 0 1.639-.325 1 1 0 0 0-.219-1.095M14 22a8 8 0 1 1 0-16 8 8 0 0 1 0 16"></path></svg></a><div class="_StandardHeader-mobile-buttons-separator_54kft_18"></div><a href="https://app.arduino.cc" class="_btn_1kedw_1" type="button" data-iconcolor="teal" data-font="" data-font-size="x-small" data-font-weight="bold"><svg xmlns="http://www.w3.org/2000/svg" width="1em" height="1em" fill="none" viewBox="0 0 32 32"><path fill="currentColor" d="M31 17.95c.01 1.8-.7 3.54-2.03 4.88a7.4 7.4 0 0 1-5.2 2.17c-3.16 0-5.84-1.73-7.97-5.13l-1.45-2.75c-1.15-1.85-3.16-4.11-6.17-4.05a5.02 5.02 0 0 0-5.03 4.9 4.7 4.7 0 0 0 1.41 3.33 5.2 5.2 0 0 0 3.67 1.54h6.55c.58.76 1.28 1.5 2.07 2.16H8.23a7.4 7.4 0 0 1-5.2-2.18A6.86 6.86 0 0 1 1 17.95a7.14 7.14 0 0 1 7.13-7.04c3.14-.08 6.01 1.76 8.08 5.14l1.45 2.73c1.7 2.72 3.7 4.06 6.1 4.06a5.2 5.2 0 0 0 3.68-1.54 4.7 4.7 0 0 0 1.41-3.33 5.02 5.02 0 0 0-5.03-4.9h-.08a5.5 5.5 0 0 0-2.12.4 6 6 0 0 0-1.75-3.67 5.42 5.42 0 0 0-3.83-1.64h-.03c-1.24 0-2.4.43-3.33 1.15a10 10 0 0 0-2.35-.75A7.65 7.65 0 0 1 15.99 6a7.43 7.43 0 0 1 5.4 2.27 8.4 8.4 0 0 1 1.78 2.66A7.15 7.15 0 0 1 31 17.94Z"></path></svg>Cloud</a></div></div></div><button class="_Header-hamburgher_c7jlt_97" data-state="closed"><svg xmlns="http://www.w3.org/2000/svg" width="1em" height="1em" fill="none" viewBox="0 0 32 32" data-show="true" class="_Header-hamburgher-icon_c7jlt_120"><path fill="currentColor" fill-rule="evenodd" d="M27 10H5a1 1 0 0 1 0-2h22a1 1 0 1 1 0 2m0 7H5a1 1 0 0 1 0-2h22a1 1 0 0 1 0 2M5 24h22a1 1 0 0 0 0-2H5a1 1 0 0 0 0 2" clip-rule="evenodd"></path></svg><svg xmlns="http://www.w3.org/2000/svg" width="1em" height="1em" fill="none" viewBox="0 0 32 32" data-show="false" class="_Header-hamburgher-icon_c7jlt_120"><path fill="currentColor" d="M24.71 23.29a1.002 1.002 0 0 1-.325 1.639 1 1 0 0 1-1.095-.219L16 17.42l-7.29 7.29a1 1 0 0 1-1.639-.325 1 1 0 0 1 .219-1.095L14.58 16 7.29 8.71a1.004 1.004 0 1 1 1.42-1.42L16 14.58l7.29-7.29a1.004 1.004 0 0 1 1.42 1.42L17.42 16z"></path></svg></button></div><div class="_Header-menusheet_c7jlt_151" data-show="false"><div data-orientation="vertical" data-activation-direction="none" class="_Header-menusheet_root_c7jlt_175"><div data-orientation="vertical" data-activation-direction="none" aria-orientation="vertical" role="tablist"><div class="_Header-menusheet-group_c7jlt_231"><div class="_StandardHeader-mobile-buttons_54kft_9" data-mobile="true"><div style="flex:1"><a href="https://store.arduino.cc" type="button" tabindex="0" data-font="" data-font-size="x-small" data-font-weight="bold" class="_btn_1gv5b_6 _btn--small_1gv5b_195 _btn--default_1gv5b_45">Shop</a></div><a href="https://search.arduino.cc" rel="noopener noreferrer" class="_btn_w1ht0_1" type="button" data-iconcolor="currentColor" data-font="" data-font-size="x-small" data-font-weight="bold"><svg xmlns="http://www.w3.org/2000/svg" width="1em" height="1em" fill="none" viewBox="0 0 32 32"><path fill="currentColor" d="m28.71 27.29-7-7a10 10 0 1 0-1.42 1.42l7 7a1.002 1.002 0 0 0 1.639-.325 1 1 0 0 0-.219-1.095M14 22a8 8 0 1 1 0-16 8 8 0 0 1 0 16"></path></svg></a><div class="_StandardHeader-mobile-buttons-separator_54kft_18"></div><a href="https://app.arduino.cc" class="_btn_1kedw_1" type="button" data-iconcolor="teal" data-font="" data-font-size="x-small" data-font-weight="bold"><svg xmlns="http://www.w3.org/2000/svg" width="1em" height="1em" fill="none" viewBox="0 0 32 32"><path fill="currentColor" d="M31 17.95c.01 1.8-.7 3.54-2.03 4.88a7.4 7.4 0 0 1-5.2 2.17c-3.16 0-5.84-1.73-7.97-5.13l-1.45-2.75c-1.15-1.85-3.16-4.11-6.17-4.05a5.02 5.02 0 0 0-5.03 4.9 4.7 4.7 0 0 0 1.41 3.33 5.2 5.2 0 0 0 3.67 1.54h6.55c.58.76 1.28 1.5 2.07 2.16H8.23a7.4 7.4 0 0 1-5.2-2.18A6.86 6.86 0 0 1 1 17.95a7.14 7.14 0 0 1 7.13-7.04c3.14-.08 6.01 1.76 8.08 5.14l1.45 2.73c1.7 2.72 3.7 4.06 6.1 4.06a5.2 5.2 0 0 0 3.68-1.54 4.7 4.7 0 0 0 1.41-3.33 5.02 5.02 0 0 0-5.03-4.9h-.08a5.5 5.5 0 0 0-2.12.4 6 6 0 0 0-1.75-3.67 5.42 5.42 0 0 0-3.83-1.64h-.03c-1.24 0-2.4.43-3.33 1.15a10 10 0 0 0-2.35-.75A7.65 7.65 0 0 1 15.99 6a7.43 7.43 0 0 1 5.4 2.27 8.4 8.4 0 0 1 1.78 2.66A7.15 7.15 0 0 1 31 17.94Z"></path></svg>Cloud</a></div></div><div class="_Header-menusheet-group_c7jlt_231"><div class="_Header-menusheet-item_c7jlt_234"><div data-font="" data-font-size="small" data-font-weight="bold" class="_Header-menusheet-item-trigger_c7jlt_240"><a href="https://www.arduino.cc/pro">For Professionals</a></div></div><div class="_Header-menusheet-item_c7jlt_234"><div data-font="" data-font-size="small" data-font-weight="bold" class="_Header-menusheet-item-trigger_c7jlt_240"><a href="https://www.arduino.cc/edu">For Education </a></div></div><div class="_Header-menusheet-item_c7jlt_234"><div data-font="" data-font-size="small" data-font-weight="bold" class="_Header-menusheet-item-trigger_c7jlt_240"><a href="https://www.arduino.cc/maker">For Makers </a></div></div></div><div class="_Header-menusheet-group_c7jlt_231"><div class="_Header-menusheet-item_c7jlt_234"><div data-font="" data-font-size="small" data-font-weight="bold" style="flex:1"><button type="button" data-orientation="vertical" aria-disabled="false" tabindex="-1" role="tab" aria-selected="false" id="base-ui-:R1neukm:" class="_Header-menusheet-item-trigger_c7jlt_240"><span>Products</span><svg xmlns="http://www.w3.org/2000/svg" width="1em" height="1em" fill="none" viewBox="0 0 32 32" class="_Header-menusheet-item-trigger_chevron_c7jlt_267"><path fill="currentColor" d="M14 23a1 1 0 0 1-.71-1.71l5.3-5.29-5.3-5.29a1.004 1.004 0 1 1 1.42-1.42l6 6a1 1 0 0 1 0 1.42l-6 6A1 1 0 0 1 14 23"></path></svg></button></div></div><div class="_Header-menusheet-item_c7jlt_234"><div data-font="" data-font-size="small" data-font-weight="bold" style="flex:1"><button type="button" data-orientation="vertical" aria-disabled="false" tabindex="-1" role="tab" aria-selected="false" id="base-ui-:R1reukm:" class="_Header-menusheet-item-trigger_c7jlt_240"><span>Community</span><svg xmlns="http://www.w3.org/2000/svg" width="1em" height="1em" fill="none" viewBox="0 0 32 32" class="_Header-menusheet-item-trigger_chevron_c7jlt_267"><path fill="currentColor" d="M14 23a1 1 0 0 1-.71-1.71l5.3-5.29-5.3-5.29a1.004 1.004 0 1 1 1.42-1.42l6 6a1 1 0 0 1 0 1.42l-6 6A1 1 0 0 1 14 23"></path></svg></button></div></div><div class="_Header-menusheet-item_c7jlt_234"><div data-font="" data-font-size="small" data-font-weight="bold" style="flex:1"><button type="button" data-orientation="vertical" aria-disabled="false" tabindex="-1" role="tab" aria-selected="false" id="base-ui-:R1veukm:" class="_Header-menusheet-item-trigger_c7jlt_240"><span>Documentation</span><svg xmlns="http://www.w3.org/2000/svg" width="1em" height="1em" fill="none" viewBox="0 0 32 32" class="_Header-menusheet-item-trigger_chevron_c7jlt_267"><path fill="currentColor" d="M14 23a1 1 0 0 1-.71-1.71l5.3-5.29-5.3-5.29a1.004 1.004 0 1 1 1.42-1.42l6 6a1 1 0 0 1 0 1.42l-6 6A1 1 0 0 1 14 23"></path></svg></button></div></div></div></div><div class="_Header-menusheet_root_second_c7jlt_190" data-show="false"></div></div></div><div class="_ViewportPosition_1djo6_98"></div></div></div><div class="page-content"><div class="primary-hero-banner"><div class="primary-hero-banner__background" style="transform:scale(1);transform-origin:top center;transition:transform 0.3s linear;overflow:hidden;clip-path:inset(0 0 0 0);width:120%;margin-left:-10%"><div class="primary-hero-banner__play-button"><svg xmlns="http://www.w3.org/2000/svg" width="1em" height="1em" fill="none" viewBox="0 0 32 32"><path fill="currentColor" fill-rule="evenodd" d="M8 7h4a1 1 0 0 1 1 1v16a1 1 0 0 1-1 1H8a1 1 0 0 1-1-1V8a1 1 0 0 1 1-1m12 0h4a1 1 0 0 1 1 1v16a1 1 0 0 1-1 1h-4a1 1 0 0 1-1-1V8a1 1 0 0 1 1-1" clip-rule="evenodd"></path></svg></div><div class="primary-hero-banner__arrow"><img alt="" loading="lazy" width="16" height="43" decoding="async" data-nimg="1" style="color:transparent" srcSet="/images/arrow.svg 1x, /images/arrow.svg 2x" src="/images/arrow.svg"/></div></div><div class="primary-hero-banner__text-wrapper" style="transform:translateY(-50%) scale(1);transition:transform 0.3s linear;transform-origin:top center"><h3 class="primary-hero-banner__text white">Arduino UNO Q: From blink to think</h3><div class="button-list primary-hero-banner__buttons"><a data-type="router" custom-attr="" class="button-list__item secondary-white-btn dark" href="/product-uno-q/"><span>discover more</span></a><a href="https://store-usa.arduino.cc/pages/uno-q" target="_self" rel="noopener noreferrer" custom-attr="" class="button-list__item primary-teal-btn dark"><span>Buy now</span></a></div></div></div><div class="homepage-overlay"></div><div id="Homepage" class="content-page homepage content-page-FcHfRE1KSJ-fRD1iA1MYAw homepage__light light-button"><div id="homepage-content" class="page-content"><div id="content-page-cRxHrrg9SD2c58bY5VmNug" class="content-page-cRxHrrg9SD2c58bY5VmNug product-highlights-content--light light-button"><div class="product-list"><div class="product-list__item product-list__item--light-teal product-list__item--light light-button"><div class="product-list__title">Arduino Starter Kit R4</div><div class="product-list__description">Whatever your path to innovation, start here</div><div class="product-list__image"><img alt="Arduino Starter Kit R4" loading="lazy" width="980" height="980" decoding="async" data-nimg="1" style="color:transparent;width:100%;background-size:cover;background-position:50% 50%;background-repeat:no-repeat;background-image:url(&quot;data:image/svg+xml;charset=utf-8,%3Csvg xmlns=&#x27;http://www.w3.org/2000/svg&#x27; viewBox=&#x27;0 0 980 980&#x27;%3E%3Cfilter id=&#x27;b&#x27; color-interpolation-filters=&#x27;sRGB&#x27;%3E%3CfeGaussianBlur stdDeviation=&#x27;20&#x27;/%3E%3CfeColorMatrix values=&#x27;1 0 0 0 0 0 1 0 0 0 0 0 1 0 0 0 0 0 100 -1&#x27; result=&#x27;s&#x27;/%3E%3CfeFlood x=&#x27;0&#x27; y=&#x27;0&#x27; width=&#x27;100%25&#x27; height=&#x27;100%25&#x27;/%3E%3CfeComposite operator=&#x27;out&#x27; in=&#x27;s&#x27;/%3E%3CfeComposite in2=&#x27;SourceGraphic&#x27;/%3E%3CfeGaussianBlur stdDeviation=&#x27;20&#x27;/%3E%3C/filter%3E%3Cimage width=&#x27;100%25&#x27; height=&#x27;100%25&#x27; x=&#x27;0&#x27; y=&#x27;0&#x27; preserveAspectRatio=&#x27;none&#x27; style=&#x27;filter: url(%23b);&#x27; href=&#x27;data:image/png;base64,iVBORw0KGgoAAAANSUhEUgAAABgAAAAPCAMAAADJev/pAAABIFBMVEXj5+nj5+nj5+nj5+nj5+nj5+nj5+nj5+nj5+nj5+nj5+nj5+nj5+nj5+nj5+nj5+nj5+nj5+nj5+nj5+nj5+nj5+nj5+nj5+nj5+nj5+nj5+nj5+nj5+nj5+nj5+nj5+nj5+nj5+nj5+nj5+nj5+nj5+nj5+nj5+nj5+nj5+nj5+nj5+nj5+nj5+nj5+nj5+nj5+nj5+nj5+nj5+nj5+nj5+nj5+nj5+nj5+nj5+nj5+nj5+nj5+nj5+nj5+nj5+nj5+nj5+nj5+nj5+nj5+nj5+nj5+nj5+nj5+nj5+nj5+nj5+nj5+nj5+nj5+nj5+nj5+nj5+nj5+nj5+nj5+nj5+nj5+nj5+nj5+nj5+nj5+nj5+nj5+nj5+nj5+nj5+lNJFWbAAAAYHRSTlMAAQIDBAUGBwgJCgsNDg8QExUWFxgZGhscHiEiIyUmKCotMTIzNDc4PT4/QUNGR0lKS0xNUldYXF5gYWJlaWtsbXB0dXt8gIKHjY6Qk5SXmpudnp+pq660uLq8vr/ByMuUk9AlAAAAq0lEQVR42nXQ2w6CMAwGYNg5QIaH938/oySAOMe2rpMLRQTsVZMv6d+WZX+KLfo8S7tQixT6LRSHgmVQds8VnI+15CmMqm2XoE4HXU3gPeeiiTNUtda6FBylTQjQxTdIKaSgTBCCnBLK6AechBARPUMYg3PGz6PuiZA8CYbeDn1jFuEDxOgUi870V/ezrr2AUxTd4warO6AJBUXbweZyMMin7J1feZ6S/37uBdG2WJfiwe4mAAAAAElFTkSuQmCC&#x27;/%3E%3C/svg%3E&quot;)" srcSet="https://arduino.cc/cdn-cgi/image/width=1080,quality=60,format=auto/https://www.datocms-assets.com/150482/1764063710-img.png 1x, https://arduino.cc/cdn-cgi/image/width=2048,quality=60,format=auto/https://www.datocms-assets.com/150482/1764063710-img.png 2x" src="https://arduino.cc/cdn-cgi/image/width=2048,quality=60,format=auto/https://www.datocms-assets.com/150482/1764063710-img.png"/></div><div class="product-list__buttons"><div class="button-list product-list--button"><a data-type="router" custom-attr="" class="button-list__item secondary-charcoal-btn" href="/starterkit/"><span>Discover Starter Kit R4</span></a></div></div></div><div class="product-list__item product-list__item--dark product-list__item--light light-button"><div class="product-list__title">Arduino UNO Q</div><div class="product-list__description">High-performance computing with real-time control.</div><div class="product-list__image"><img alt="Arduino UNO Q" loading="lazy" width="980" height="980" decoding="async" data-nimg="1" style="color:transparent;width:100%;background-size:cover;background-position:50% 50%;background-repeat:no-repeat;background-image:url(&quot;data:image/svg+xml;charset=utf-8,%3Csvg xmlns=&#x27;http://www.w3.org/2000/svg&#x27; viewBox=&#x27;0 0 980 980&#x27;%3E%3Cfilter id=&#x27;b&#x27; color-interpolation-filters=&#x27;sRGB&#x27;%3E%3CfeGaussianBlur stdDeviation=&#x27;20&#x27;/%3E%3CfeColorMatrix values=&#x27;1 0 0 0 0 0 1 0 0 0 0 0 1 0 0 0 0 0 100 -1&#x27; result=&#x27;s&#x27;/%3E%3CfeFlood x=&#x27;0&#x27; y=&#x27;0&#x27; width=&#x27;100%25&#x27; height=&#x27;100%25&#x27;/%3E%3CfeComposite operator=&#x27;out&#x27; in=&#x27;s&#x27;/%3E%3CfeComposite in2=&#x27;SourceGraphic&#x27;/%3E%3CfeGaussianBlur stdDeviation=&#x27;20&#x27;/%3E%3C/filter%3E%3Cimage width=&#x27;100%25&#x27; height=&#x27;100%25&#x27; x=&#x27;0&#x27; y=&#x27;0&#x27; preserveAspectRatio=&#x27;none&#x27; style=&#x27;filter: url(%23b);&#x27; href=&#x27;data:image/png;base64,iVBORw0KGgoAAAANSUhEUgAAABgAAAAPCAMAAADJev/pAAABHVBMVEVhdqBhdqBhdqBhdqBhdqBhdqBhdqBhdqBhdqBhdqBhdqBhdqBhdqBhdqBhdqBhdqBhdqBhdqBhdqBhdqBhdqBhdqBhdqBhdqBhdqBhdqBhdqBhdqBhdqBhdqBhdqBhdqBhdqBhdqBhdqBhdqBhdqBhdqBhdqBhdqBhdqBhdqBhdqBhdqBhdqBhdqBhdqBhdqBhdqBhdqBhdqBhdqBhdqBhdqBhdqBhdqBhdqBhdqBhdqBhdqBhdqBhdqBhdqBhdqBhdqBhdqBhdqBhdqBhdqBhdqBhdqBhdqBhdqBhdqBhdqBhdqBhdqBhdqBhdqBhdqBhdqBhdqBhdqBhdqBhdqBhdqBhdqBhdqBhdqBhdqBhdqBhdqBhdqBhdqBhdqDTTJnOAAAAX3RSTlMAAQIDBgcICgsNDhASFBUWGBkbHB0fIiMkJSkqKywtLi8yMzQ3ODo7P0FCREVGSUpMT1BSVFVXWVpbX2JjZ2lrbG5zdnl8f4CDhIaHio+SlJudoaKkqaqvsbO4ur2/wj7wU+0AAAClSURBVHjadZDdDoMwCIUFrdXqEp3v/4RL3FbX2hXQeeVfHNxAPsKBkyV/IttKlScUL0BVaSA3zGfQtHUO7M0rHEHXNVUGUhe6H/agubc3kyHrFAE/soLSGFMWCgSEQkF+BalaBpecEAFgt4piJCYA5hhjCBv4WqVQGGR09j1MO3E3C98Usrf9cz6c6yn6HMVZe36QHl6nPIYLr9yIMl+ZmEzTrvkB9sRMuanfl3cAAAAASUVORK5CYII=&#x27;/%3E%3C/svg%3E&quot;)" srcSet="https://arduino.cc/cdn-cgi/image/width=1080,quality=60,format=auto/https://www.datocms-assets.com/150482/1769011155-img.png 1x, https://arduino.cc/cdn-cgi/image/width=2048,quality=60,format=auto/https://www.datocms-assets.com/150482/1769011155-img.png 2x" src="https://arduino.cc/cdn-cgi/image/width=2048,quality=60,format=auto/https://www.datocms-assets.com/150482/1769011155-img.png"/></div><div class="product-list__buttons"><div class="button-list product-list--button"><a href="https://store.arduino.cc/pages/uno-q" target="_blank" rel="noopener noreferrer" custom-attr="" class="button-list__item secondary-white-btn"><span>Buy Now</span></a></div></div></div><div class="product-list__item product-list__item--teal product-list__item--light light-button"><div class="product-list__title">Arduino Cloud</div><div class="product-list__description">Bring your IoT projects to life quickly</div><div class="product-list__image"><img alt="Arduino Cloud" loading="lazy" width="980" height="980" decoding="async" data-nimg="1" style="color:transparent;width:100%;background-size:cover;background-position:50% 50%;background-repeat:no-repeat;background-image:url(&quot;data:image/svg+xml;charset=utf-8,%3Csvg xmlns=&#x27;http://www.w3.org/2000/svg&#x27; viewBox=&#x27;0 0 980 980&#x27;%3E%3Cfilter id=&#x27;b&#x27; color-interpolation-filters=&#x27;sRGB&#x27;%3E%3CfeGaussianBlur stdDeviation=&#x27;20&#x27;/%3E%3CfeColorMatrix values=&#x27;1 0 0 0 0 0 1 0 0 0 0 0 1 0 0 0 0 0 100 -1&#x27; result=&#x27;s&#x27;/%3E%3CfeFlood x=&#x27;0&#x27; y=&#x27;0&#x27; width=&#x27;100%25&#x27; height=&#x27;100%25&#x27;/%3E%3CfeComposite operator=&#x27;out&#x27; in=&#x27;s&#x27;/%3E%3CfeComposite in2=&#x27;SourceGraphic&#x27;/%3E%3CfeGaussianBlur stdDeviation=&#x27;20&#x27;/%3E%3C/filter%3E%3Cimage width=&#x27;100%25&#x27; height=&#x27;100%25&#x27; x=&#x27;0&#x27; y=&#x27;0&#x27; preserveAspectRatio=&#x27;none&#x27; style=&#x27;filter: url(%23b);&#x27; href=&#x27;data:image/png;base64,iVBORw0KGgoAAAANSUhEUgAAABgAAAANCAMAAACEsl7iAAABI1BMVEXFwb/Fwb/Fwb/Fwb/Fwb/Fwb/Fwb/Fwb/Fwb/Fwb/Fwb/Fwb/Fwb/Fwb/Fwb/Fwb/Fwb/Fwb/Fwb/Fwb/Fwb/Fwb/Fwb/Fwb/Fwb/Fwb/Fwb/Fwb/Fwb/Fwb/Fwb/Fwb/Fwb/Fwb/Fwb/Fwb/Fwb/Fwb/Fwb/Fwb/Fwb/Fwb/Fwb/Fwb/Fwb/Fwb/Fwb/Fwb/Fwb/Fwb/Fwb/Fwb/Fwb/Fwb/Fwb/Fwb/Fwb/Fwb/Fwb/Fwb/Fwb/Fwb/Fwb/Fwb/Fwb/Fwb/Fwb/Fwb/Fwb/Fwb/Fwb/Fwb/Fwb/Fwb/Fwb/Fwb/Fwb/Fwb/Fwb/Fwb/Fwb/Fwb/Fwb/Fwb/Fwb/Fwb/Fwb/Fwb/Fwb/Fwb/Fwb/Fwb/Fwb/Fwb/Fwb/Fwb/Fwb9qttysAAAAYXRSTlMAAgMEBQYHCAoLDA0ODxETFBUYGRscHR4hJScoKissLS4vMDIzNjc5PD1AQUtPUVJTVFVXXF1iY2dpamtub3BxcnN6e31/goSFiImLjI2QkZKTlJaYmZucnZ6goqOlpqut/uA84AAAAKFJREFUeNpd0NkOgyAQBVDBYavaJfb/f68PTdriVmFgKC8a6p0XJieXEKDaAxxTsW2Hq1Hc47gcoL9pDYxwtXYq4d63rVE1ficObCwbjNfyxIGCA1Y25k6aEIAoBnQlONdEopSLeUowuhYgBSTU8bIW0CiZhTOlQzjjaweeIrqFieSdjwwEbkBP3+Gcb4roh+ldPtfaR6d5RW6Ixy+Jn+ovP47cSgK9JRQjAAAAAElFTkSuQmCC&#x27;/%3E%3C/svg%3E&quot;)" srcSet="https://arduino.cc/cdn-cgi/image/width=1080,quality=60,format=auto/https://www.datocms-assets.com/150482/1738746652-opta.png 1x, https://arduino.cc/cdn-cgi/image/width=2048,quality=60,format=auto/https://www.datocms-assets.com/150482/1738746652-opta.png 2x" src="https://arduino.cc/cdn-cgi/image/width=2048,quality=60,format=auto/https://www.datocms-assets.com/150482/1738746652-opta.png"/></div><div class="product-list__buttons"><div class="button-list product-list--button"><a href="https://cloud.arduino.cc/" target="_self" rel="noopener noreferrer" custom-attr="" class="button-list__item secondary-teal-btn"><span>DISCOVER CLOUD</span></a></div></div></div></div></div><div class="component-wrapper BannerComponentWrapper_b1h9ekr1 ComponentWrapper_c1ijnv48" data-fullscreen="false" style="--b1h9ekr1-0:280px"><div style="--b1cx5ywd-0:8px;--b1cx5ywd-1:280px" class="BannerContent_b1cx5ywd"><img alt="Save up to 25% on boards, kits and Arduino® UNO™ Q Bundles." loading="lazy" width="980" height="980" decoding="async" data-nimg="1" class="BackgroundImage_bbimcle" style="color:transparent;--bbimcle-0:8px" srcSet="https://arduino.cc/cdn-cgi/image/width=1080,quality=60,format=auto/https://www.datocms-assets.com/150482/1785739461-arduino-cc-homepage-banner-desktop-3000x1758-background.png 1x, https://arduino.cc/cdn-cgi/image/width=2048,quality=60,format=auto/https://www.datocms-assets.com/150482/1785739461-arduino-cc-homepage-banner-desktop-3000x1758-background.png 2x" src="https://arduino.cc/cdn-cgi/image/width=2048,quality=60,format=auto/https://www.datocms-assets.com/150482/1785739461-arduino-cc-homepage-banner-desktop-3000x1758-background.png"/><div class="BannerContentLeft_biy9zl7" style="--biy9zl7-0:16px;--biy9zl7-1:48px;--biy9zl7-2:24px;--biy9zl7-3:64px;--biy9zl7-4:none"><div class="TagsWrapper_twztb7f"><div class="tag-content tag-content__bg--orange mono"><span>Back to school promo</span></div></div><div class="TextContainer_t1lx1yni" style="--t1lx1yni-0:8px"><div data-font="" data-font-size="medium" data-font-weight="bold" style="--bvp7tq7-0:var(--text-default)" class="BannerTitle_bvp7tq7">Save up to 25% on boards, kits and Arduino® UNO™ Q Bundles.</div><div data-font="" data-font-size="x-small" style="--b1ektsc7-0:var(--text-nevada)" class="BannerSubtitle_b1ektsc7"><p>Promo ends September 10th, and while supplies last</p>
</div></div><div class="buttons ButtonsWrapper_b19ja5h2"><a href="https://store-usa.arduino.cc/pages/back-to-school" target="_self" rel="noopener noreferrer" custom-attr="" class="button-list__item primary-teal-btn"><span>SHOP THE SALE NOW</span></a></div></div><div class="BannerContentRight_b13u8oog" style="--b13u8oog-0:280px;--b13u8oog-1:280px;--b13u8oog-2:none"><img alt="Save up to 25% on boards, kits and Arduino® UNO™ Q Bundles." loading="lazy" width="980" height="980" decoding="async" data-nimg="1" class="spotlight-image SpotlightImage_s2wdx43" style="color:transparent" srcSet="https://arduino.cc/cdn-cgi/image/width=1080,quality=60,format=auto/https://www.datocms-assets.com/150482/1785739466-arduino-cc-homepage-banner-elements.png 1x, https://arduino.cc/cdn-cgi/image/width=2048,quality=60,format=auto/https://www.datocms-assets.com/150482/1785739466-arduino-cc-homepage-banner-elements.png 2x" src="https://arduino.cc/cdn-cgi/image/width=2048,quality=60,format=auto/https://www.datocms-assets.com/150482/1785739466-arduino-cc-homepage-banner-elements.png"/></div></div></div><div class="component-wrapper BannerComponentWrapper_b1h9ekr1 ComponentWrapper_c1ijnv48" data-fullscreen="true" style="--b1h9ekr1-0:280px"><div style="--b1cx5ywd-0:0px;--b1cx5ywd-1:280px" class="BannerContent_b1cx5ywd"><img alt="Arduino is now a Qualcomm company" loading="lazy" width="980" height="980" decoding="async" data-nimg="1" class="BackgroundImage_bbimcle" style="color:transparent;--bbimcle-0:0px" srcSet="https://arduino.cc/cdn-cgi/image/width=1080,quality=60,format=auto/https://www.datocms-assets.com/150482/1772726112-qualcomm-banner.png 1x, https://arduino.cc/cdn-cgi/image/width=2048,quality=60,format=auto/https://www.datocms-assets.com/150482/1772726112-qualcomm-banner.png 2x" src="https://arduino.cc/cdn-cgi/image/width=2048,quality=60,format=auto/https://www.datocms-assets.com/150482/1772726112-qualcomm-banner.png"/><div class="BannerContentLeft_biy9zl7" style="--biy9zl7-0:16px;--biy9zl7-1:48px;--biy9zl7-2:24px;--biy9zl7-3:64px;--biy9zl7-4:none"><div class="TextContainer_t1lx1yni" style="--t1lx1yni-0:8px"><div data-font="" data-font-size="medium" data-font-weight="bold" style="--bvp7tq7-0:var(--text-inverted)" class="BannerTitle_bvp7tq7">Arduino is now a Qualcomm company</div></div><div class="buttons ButtonsWrapper_b19ja5h2"><a href="https://www.arduino.cc/qualcomm" target="_self" rel="noopener noreferrer" custom-attr="" class="button-list__item secondary-white"><span>Learn More</span></a></div></div><div class="BannerContentRight_b13u8oog" style="--b13u8oog-0:280px;--b13u8oog-1:280px;--b13u8oog-2:800px"><img alt="Arduino is now a Qualcomm company" loading="lazy" width="980" height="980" decoding="async" data-nimg="1" class="spotlight-image SpotlightImage_s2wdx43" style="color:transparent" srcSet="https://arduino.cc/cdn-cgi/image/width=1080,quality=60,format=auto/https://www.datocms-assets.com/150482/1777475656-banner-qualcomm.png 1x, https://arduino.cc/cdn-cgi/image/width=2048,quality=60,format=auto/https://www.datocms-assets.com/150482/1777475656-banner-qualcomm.png 2x" src="https://arduino.cc/cdn-cgi/image/width=2048,quality=60,format=auto/https://www.datocms-assets.com/150482/1777475656-banner-qualcomm.png"/></div></div></div><div id="content-page-aRhTEnfATE259Zx3vdGM9w" class="content-page-aRhTEnfATE259Zx3vdGM9w solutions-section product-highlights-content--light light-button"><div class="solutions-cards"><span class="solutions-cards-title">Our Solutions</span><div class="solutions-cards-wrapper"><div class="solutions-cards__motion-wrapper"><div class="solution-card pro"><div class="solution-card--info"><div class="tag-content tag-content__bg--lime mono"><span>Professional</span></div><span class="solution-card--info-title">Innovate your industry</span><span class="solution-card--info-description">Cutting-edge, out-of-the-box solutions for professionals in any field</span><div class="button-list solution-card--info-buttons"><a href="https://www.arduino.cc/pro/" target="_blank" rel="noopener noreferrer" custom-attr="" class="button-list__item secondary-white-btn"><span>discover</span></a><a href="https://www.arduino.cc/pro/contact-us/" target="_blank" rel="noopener noreferrer" custom-attr="" class="button-list__item tertiary-white"><span>Contact sales</span></a></div></div><div class="solution-card-image-container"><img alt="Innovate your industry" loading="lazy" width="500" height="400" decoding="async" data-nimg="1" class="solution-card-image" style="color:transparent" srcSet="https://arduino.cc/cdn-cgi/image/width=640,quality=60,format=auto/https://www.datocms-assets.com/150482/1738941205-pro-solution-card.svg 1x, https://arduino.cc/cdn-cgi/image/width=1080,quality=60,format=auto/https://www.datocms-assets.com/150482/1738941205-pro-solution-card.svg 2x" src="https://arduino.cc/cdn-cgi/image/width=1080,quality=60,format=auto/https://www.datocms-assets.com/150482/1738941205-pro-solution-card.svg"/></div></div></div><div class="solutions-cards__motion-wrapper"><div class="solution-card maker"><div class="solution-card--info"><div class="tag-content tag-content__bg--teal mono"><span>Maker</span></div><span class="solution-card--info-title">Together, we build</span><span class="solution-card--info-description">A community of millions, united by creativity and passion for innovation</span><div class="button-list solution-card--info-buttons"><a href="https://arduino.cc/maker" target="_blank" rel="noopener noreferrer" custom-attr="" class="button-list__item secondary-white-btn"><span>discover</span></a></div></div><div class="solution-card-image-container"><img alt="Together, we build" loading="lazy" width="500" height="400" decoding="async" data-nimg="1" class="solution-card-image" style="color:transparent" srcSet="https://arduino.cc/cdn-cgi/image/width=640,quality=60,format=auto/https://www.datocms-assets.com/150482/1738946024-maker-solution-card.svg 1x, https://arduino.cc/cdn-cgi/image/width=1080,quality=60,format=auto/https://www.datocms-assets.com/150482/1738946024-maker-solution-card.svg 2x" src="https://arduino.cc/cdn-cgi/image/width=1080,quality=60,format=auto/https://www.datocms-assets.com/150482/1738946024-maker-solution-card.svg"/></div></div></div><div class="solutions-cards__motion-wrapper"><div class="solution-card edu"><div class="solution-card--info"><div class="tag-content tag-content__bg--tangerine mono"><span>Education</span></div><span class="solution-card--info-title">Inspire the future</span><span class="solution-card--info-description">Shaping minds, sparking curiosity, and building skills for tomorrow</span><div class="button-list solution-card--info-buttons"><a href="https://www.arduino.cc/education" target="_blank" rel="noopener noreferrer" custom-attr="" class="button-list__item secondary-white-btn"><span>discover</span></a></div></div><div class="solution-card-image-container"><img alt="Inspire the future" loading="lazy" width="500" height="400" decoding="async" data-nimg="1" class="solution-card-image" style="color:transparent" srcSet="https://arduino.cc/cdn-cgi/image/width=640,quality=60,format=auto/https://www.datocms-assets.com/150482/1739176609-edu-solution-card.svg 1x, https://arduino.cc/cdn-cgi/image/width=1080,quality=60,format=auto/https://www.datocms-assets.com/150482/1739176609-edu-solution-card.svg 2x" src="https://arduino.cc/cdn-cgi/image/width=1080,quality=60,format=auto/https://www.datocms-assets.com/150482/1739176609-edu-solution-card.svg"/></div></div></div></div></div></div><div id="success-stories" class="success-stories-carousel-content content-page-YUQ4xUkXTKOWd34Rd2TPZw"><div class="homepage-container"><div class="success-stories-carousel__title">Success Stories</div><div><div class="success-stories-carousel"><div class="swiper-pagination"></div><div class="success-stories-carousel__holder"><div class="swiper-container"><div class="swiper-wrapper"><div class="swiper-slide"><a class="success-stories-card" href="https://blog.arduino.cc/2024/09/10/two-new-arduino-plug-and-make-kit-projects-recreate-iconic-vintage-games/"><div class="success-stories-card__text"><div class="success-stories-card__badge"><div class="tag-content tag-content__bg--teal mono"><span>Maker</span></div></div><div class="success-stories-card__title">Two NEW Arduino Plug and Make Kit projects recreate iconic vintage games</div></div><div class="success-stories-card__image"><img alt="Arduino featured: Two NEW Arduino Plug and Make Kit projects recreate iconic vintage games" loading="lazy" width="300" height="200" decoding="async" data-nimg="1" style="color:transparent;background-size:cover;background-position:50% 50%;background-repeat:no-repeat;background-image:url(&quot;data:image/svg+xml;charset=utf-8,%3Csvg xmlns=&#x27;http://www.w3.org/2000/svg&#x27; viewBox=&#x27;0 0 300 200&#x27;%3E%3Cfilter id=&#x27;b&#x27; color-interpolation-filters=&#x27;sRGB&#x27;%3E%3CfeGaussianBlur stdDeviation=&#x27;20&#x27;/%3E%3CfeColorMatrix values=&#x27;1 0 0 0 0 0 1 0 0 0 0 0 1 0 0 0 0 0 100 -1&#x27; result=&#x27;s&#x27;/%3E%3CfeFlood x=&#x27;0&#x27; y=&#x27;0&#x27; width=&#x27;100%25&#x27; height=&#x27;100%25&#x27;/%3E%3CfeComposite operator=&#x27;out&#x27; in=&#x27;s&#x27;/%3E%3CfeComposite in2=&#x27;SourceGraphic&#x27;/%3E%3CfeGaussianBlur stdDeviation=&#x27;20&#x27;/%3E%3C/filter%3E%3Cimage width=&#x27;100%25&#x27; height=&#x27;100%25&#x27; x=&#x27;0&#x27; y=&#x27;0&#x27; preserveAspectRatio=&#x27;none&#x27; style=&#x27;filter: url(%23b);&#x27; href=&#x27;data:image/jpeg;base64,/9j/4AAQSkZJRgABAQAAAQABAAD/2wCEAAoHBwgHBgoICAgLERQQDhUODQ4VGhgNDQ0NFx8aGBYTFiEmJysjGh0oHRUiJDUlKC0vMjIyGSI4PTcwPCsxMi8BCgsLDg0OHA4NHS8dFhwvLy8vLy8vLy8vLy8vNS8vLy8vLy8vLy8vLy8vLy8vLy8vLy8vLy8vLy8vLy8vLy8vL//AABEIABIAGAMBIgACEQEDEQH/xAAYAAEBAQEBAAAAAAAAAAAAAAAFAAYHAf/EACAQAAEDBAIDAAAAAAAAAAAAAAEAAgQDBRExEyESFSL/xAAVAQEBAAAAAAAAAAAAAAAAAAAEA//EABkRAAMBAQEAAAAAAAAAAAAAAAABMUEhAv/aAAwDAQACEQMRAD8A2VG4Gjayco+neHV6ZaCiqtWWbO7DTpBQJExnl8nag+srh0q3SHihnKllolxmcGA0qV154HdFS0end0NIGK0eLuhtSlDRDg3AaOHQXilJagZ0/9k=&#x27;/%3E%3C/svg%3E&quot;)" srcSet="https://arduino.cc/cdn-cgi/image/width=384,quality=60,format=auto/https://www.datocms-assets.com/150482/1741354670-c6ff7a171422510116cada7b312db11b.jpeg 1x, https://arduino.cc/cdn-cgi/image/width=640,quality=60,format=auto/https://www.datocms-assets.com/150482/1741354670-c6ff7a171422510116cada7b312db11b.jpeg 2x" src="https://arduino.cc/cdn-cgi/image/width=640,quality=60,format=auto/https://www.datocms-assets.com/150482/1741354670-c6ff7a171422510116cada7b312db11b.jpeg"/></div></a></div><div class="swiper-slide"><a class="success-stories-card" href="https://www.arduino.cc/pro/success-story-atlas-machine-and-supply/"><div class="success-stories-card__text"><div class="success-stories-card__badge"><div class="tag-content tag-content__bg--charcoal mono"><span>Professional</span></div></div><div class="success-stories-card__title">To “fix the biggest machines in the world, anytime and anywhere,” requires remote... </div></div><div class="success-stories-card__image"><img alt="Arduino featured: To “fix the biggest machines in the world, anytime and anywhere,” requires remote... " loading="lazy" width="300" height="200" decoding="async" data-nimg="1" style="color:transparent;background-size:cover;background-position:50% 50%;background-repeat:no-repeat;background-image:url(&quot;data:image/svg+xml;charset=utf-8,%3Csvg xmlns=&#x27;http://www.w3.org/2000/svg&#x27; viewBox=&#x27;0 0 300 200&#x27;%3E%3Cfilter id=&#x27;b&#x27; color-interpolation-filters=&#x27;sRGB&#x27;%3E%3CfeGaussianBlur stdDeviation=&#x27;20&#x27;/%3E%3CfeColorMatrix values=&#x27;1 0 0 0 0 0 1 0 0 0 0 0 1 0 0 0 0 0 100 -1&#x27; result=&#x27;s&#x27;/%3E%3CfeFlood x=&#x27;0&#x27; y=&#x27;0&#x27; width=&#x27;100%25&#x27; height=&#x27;100%25&#x27;/%3E%3CfeComposite operator=&#x27;out&#x27; in=&#x27;s&#x27;/%3E%3CfeComposite in2=&#x27;SourceGraphic&#x27;/%3E%3CfeGaussianBlur stdDeviation=&#x27;20&#x27;/%3E%3C/filter%3E%3Cimage width=&#x27;100%25&#x27; height=&#x27;100%25&#x27; x=&#x27;0&#x27; y=&#x27;0&#x27; preserveAspectRatio=&#x27;none&#x27; style=&#x27;filter: url(%23b);&#x27; href=&#x27;data:image/jpeg;base64,/9j/4AAQSkZJRgABAQAAAQABAAD/2wCEAAoHBwgHBgoICAgLDxALDhgODQwNDhINFg0PFx8ZGBYTFhUaHysjGh0oHSEWJDUlKC0vMjIyGSI4PTcwPCsxMi8BCgsLDg0OHA8QEC8cFh0vLy8vLy8vLy8vLy8vLy8vLy8vLy8vLy8vLy8vLy8vLy8vLy8vLy8vLy8vLy8vLy8vL//AABEIABAAGAMBIgACEQEDEQH/xAAZAAABBQAAAAAAAAAAAAAAAAAFAAEEBgf/xAAfEAABBAEFAQAAAAAAAAAAAAABAAIDBAUTFCFRYRH/xAAXAQADAQAAAAAAAAAAAAAAAAABAwQA/8QAFhEBAQEAAAAAAAAAAAAAAAAAAQAC/9oADAMBAAIRAxEAPwCFbz0L2kAoXRtB+RDh2qybBDuSUSw9lu5CyBL22jSzatZo8ToS278jASU6kC//2Q==&#x27;/%3E%3C/svg%3E&quot;)" srcSet="https://arduino.cc/cdn-cgi/image/width=384,quality=60,format=auto/https://www.datocms-assets.com/150482/1741354706-23c6592450ef71869726c2743d757f4f.png 1x, https://arduino.cc/cdn-cgi/image/width=640,quality=60,format=auto/https://www.datocms-assets.com/150482/1741354706-23c6592450ef71869726c2743d757f4f.png 2x" src="https://arduino.cc/cdn-cgi/image/width=640,quality=60,format=auto/https://www.datocms-assets.com/150482/1741354706-23c6592450ef71869726c2743d757f4f.png"/></div></a></div><div class="swiper-slide"><a class="success-stories-card" href="https://www.arduino.cc/education/exploring-the-moon-and-cultivating-earth-stem-projects-that-inspire-featuring-rol/"><div class="success-stories-card__text"><div class="success-stories-card__badge"><div class="tag-content tag-content__bg--tangerine mono"><span>Education</span></div></div><div class="success-stories-card__title">Exploring the Moon and cultivating Earth - STEM projects that inspire, featuring Roland Schulz</div></div><div class="success-stories-card__image"><img alt="Arduino featured: Exploring the Moon and cultivating Earth - STEM projects that inspire, featuring Roland Schulz" loading="lazy" width="300" height="200" decoding="async" data-nimg="1" style="color:transparent;background-size:cover;background-position:50% 50%;background-repeat:no-repeat;background-image:url(&quot;data:image/svg+xml;charset=utf-8,%3Csvg xmlns=&#x27;http://www.w3.org/2000/svg&#x27; viewBox=&#x27;0 0 300 200&#x27;%3E%3Cfilter id=&#x27;b&#x27; color-interpolation-filters=&#x27;sRGB&#x27;%3E%3CfeGaussianBlur stdDeviation=&#x27;20&#x27;/%3E%3CfeColorMatrix values=&#x27;1 0 0 0 0 0 1 0 0 0 0 0 1 0 0 0 0 0 100 -1&#x27; result=&#x27;s&#x27;/%3E%3CfeFlood x=&#x27;0&#x27; y=&#x27;0&#x27; width=&#x27;100%25&#x27; height=&#x27;100%25&#x27;/%3E%3CfeComposite operator=&#x27;out&#x27; in=&#x27;s&#x27;/%3E%3CfeComposite in2=&#x27;SourceGraphic&#x27;/%3E%3CfeGaussianBlur stdDeviation=&#x27;20&#x27;/%3E%3C/filter%3E%3Cimage width=&#x27;100%25&#x27; height=&#x27;100%25&#x27; x=&#x27;0&#x27; y=&#x27;0&#x27; preserveAspectRatio=&#x27;none&#x27; style=&#x27;filter: url(%23b);&#x27; href=&#x27;data:image/jpeg;base64,/9j/4AAQSkZJRgABAQAAAQABAAD/2wCEAAoHBwgHBgoICAgLDRULDhgQFQ0VDhsOFhUNFx0dGBYTFhUdHysjHR0oKRUWJDUlKC0vMjIyGSI4PTcwPCsxMi8BCgsLDg0OHRANHS8cFhwvLy8vLy8vLy8vLy8vLy8vLy8vLy8vLy8vLy8vLy8vLy8vLy8vLy8vLy8vLy8vLy8vL//AABEIABAAGAMBIgACEQEDEQH/xAAYAAACAwAAAAAAAAAAAAAAAAAEBgABBf/EABwQAAIDAAMBAAAAAAAAAAAAAAEDAAIEBRIxIf/EABcBAAMBAAAAAAAAAAAAAAAAAAEDBAD/xAAaEQABBQEAAAAAAAAAAAAAAAAAAhESEzEB/9oADAMBAAIRAxEAPwBwVfEUkCwmW2metr2FhAk5mqSbGx+Rb5Lmr523X2MQnrlOBT+SUndYdh7LiPq3sbqNuxkhiaw//9k=&#x27;/%3E%3C/svg%3E&quot;)" srcSet="https://arduino.cc/cdn-cgi/image/width=384,quality=60,format=auto/https://www.datocms-assets.com/150482/1741354743-d482bd26c8bb05e9582a1b4927fd956c.jpeg 1x, https://arduino.cc/cdn-cgi/image/width=640,quality=60,format=auto/https://www.datocms-assets.com/150482/1741354743-d482bd26c8bb05e9582a1b4927fd956c.jpeg 2x" src="https://arduino.cc/cdn-cgi/image/width=640,quality=60,format=auto/https://www.datocms-assets.com/150482/1741354743-d482bd26c8bb05e9582a1b4927fd956c.jpeg"/></div></a></div><div class="swiper-slide"><a class="success-stories-card" href="https://www.arduino.cc/pro/case-studies-steelcase/"><div class="success-stories-card__text"><div class="success-stories-card__badge"><div class="tag-content tag-content__bg--charcoal mono"><span>Professional</span></div></div><div class="success-stories-card__title">Innovating the future of automotive with rapid prototyping</div></div><div class="success-stories-card__image"><img alt="Arduino featured: Innovating the future of automotive with rapid prototyping" loading="lazy" width="300" height="200" decoding="async" data-nimg="1" style="color:transparent;background-size:cover;background-position:50% 50%;background-repeat:no-repeat;background-image:url(&quot;data:image/svg+xml;charset=utf-8,%3Csvg xmlns=&#x27;http://www.w3.org/2000/svg&#x27; viewBox=&#x27;0 0 300 200&#x27;%3E%3Cfilter id=&#x27;b&#x27; color-interpolation-filters=&#x27;sRGB&#x27;%3E%3CfeGaussianBlur stdDeviation=&#x27;20&#x27;/%3E%3CfeColorMatrix values=&#x27;1 0 0 0 0 0 1 0 0 0 0 0 1 0 0 0 0 0 100 -1&#x27; result=&#x27;s&#x27;/%3E%3CfeFlood x=&#x27;0&#x27; y=&#x27;0&#x27; width=&#x27;100%25&#x27; height=&#x27;100%25&#x27;/%3E%3CfeComposite operator=&#x27;out&#x27; in=&#x27;s&#x27;/%3E%3CfeComposite in2=&#x27;SourceGraphic&#x27;/%3E%3CfeGaussianBlur stdDeviation=&#x27;20&#x27;/%3E%3C/filter%3E%3Cimage width=&#x27;100%25&#x27; height=&#x27;100%25&#x27; x=&#x27;0&#x27; y=&#x27;0&#x27; preserveAspectRatio=&#x27;none&#x27; style=&#x27;filter: url(%23b);&#x27; href=&#x27;data:image/jpeg;base64,/9j/4AAQSkZJRgABAQAAAQABAAD/2wCEAAoHBwgHBgoICAgLCgoUDhgbFRUNDhUVHhUVHR8dHRYTFhUdHysjGh0oHSEWJDUlKC0vMjIyGSI4PTcwPCsxMi8BCgsLDg0OHA0KHDscFhwvLy8vLy8vLy8vLy8vLy8vLy8vLy8vLy8vLy8vLy8vLy8vLy8vLy8vLy8vLy8vLy8vL//AABEIAA4AGAMBIgACEQEDEQH/xAAYAAEAAwEAAAAAAAAAAAAAAAAGAQIFAP/EAB4QAAEEAgMBAAAAAAAAAAAAAAIAAQMEBUESEyIR/8QAFgEBAQEAAAAAAAAAAAAAAAAAAwIB/8QAGBEAAwEBAAAAAAAAAAAAAAAAAAECEgP/2gAMAwEAAhEDEQA/AEN2pDDi3+OjdrHxzUXJMJqQzY70SzL9AIMORC+kagVdJA1ypGNLizqVcg7IyZ32uW5ZDuT/2Q==&#x27;/%3E%3C/svg%3E&quot;)" srcSet="https://arduino.cc/cdn-cgi/image/width=384,quality=60,format=auto/https://www.datocms-assets.com/150482/1742303880-47ea25f46c304e5862ca44ae830438e0.png 1x, https://arduino.cc/cdn-cgi/image/width=640,quality=60,format=auto/https://www.datocms-assets.com/150482/1742303880-47ea25f46c304e5862ca44ae830438e0.png 2x" src="https://arduino.cc/cdn-cgi/image/width=640,quality=60,format=auto/https://www.datocms-assets.com/150482/1742303880-47ea25f46c304e5862ca44ae830438e0.png"/></div></a></div><div class="swiper-slide"><a class="success-stories-card" href="https://blog.arduino.cc/2024/11/27/its-silver-its-green-its-the-batteryrunner-an-arduino-powered-fully-custom-electric-car/?_gl=1*1a2tfsf*_up*MQ..*_ga*OTI1ODUyNzgwLjE3NDI0MDQ0MTA.*_ga_NEXN8H46L5*MTc0MjQwNDQwOS4xLjEuMTc0MjQwNDQ3MS4wLjAuNzg2MDY0MTQ5"><div class="success-stories-card__text"><div class="success-stories-card__badge"><div class="tag-content tag-content__bg--teal mono"><span>Maker</span></div></div><div class="success-stories-card__title">It’s silver, it’s green, it’s the Batteryrunner! An Arduino-powered, fully custom electric car</div></div><div class="success-stories-card__image"><img alt="Arduino featured: It’s silver, it’s green, it’s the Batteryrunner! An Arduino-powered, fully custom electric car" loading="lazy" width="300" height="200" decoding="async" data-nimg="1" style="color:transparent;background-size:cover;background-position:50% 50%;background-repeat:no-repeat;background-image:url(&quot;data:image/svg+xml;charset=utf-8,%3Csvg xmlns=&#x27;http://www.w3.org/2000/svg&#x27; viewBox=&#x27;0 0 300 200&#x27;%3E%3Cfilter id=&#x27;b&#x27; color-interpolation-filters=&#x27;sRGB&#x27;%3E%3CfeGaussianBlur stdDeviation=&#x27;20&#x27;/%3E%3CfeColorMatrix values=&#x27;1 0 0 0 0 0 1 0 0 0 0 0 1 0 0 0 0 0 100 -1&#x27; result=&#x27;s&#x27;/%3E%3CfeFlood x=&#x27;0&#x27; y=&#x27;0&#x27; width=&#x27;100%25&#x27; height=&#x27;100%25&#x27;/%3E%3CfeComposite operator=&#x27;out&#x27; in=&#x27;s&#x27;/%3E%3CfeComposite in2=&#x27;SourceGraphic&#x27;/%3E%3CfeGaussianBlur stdDeviation=&#x27;20&#x27;/%3E%3C/filter%3E%3Cimage width=&#x27;100%25&#x27; height=&#x27;100%25&#x27; x=&#x27;0&#x27; y=&#x27;0&#x27; preserveAspectRatio=&#x27;none&#x27; style=&#x27;filter: url(%23b);&#x27; href=&#x27;data:image/jpeg;base64,/9j/4AAQSkZJRgABAQAAAQABAAD/2wCEAAoHBwgHBgoICAgLFhMLDhgSGhUNDhYQFhENIxMbGCIVIhUdHysjGikoHSEiJDUlKC0vMjIyGSI4PTcwPCsxMi8BCgsLDg0OFQ4NEy8cFhwvLy8vLy8vLy8vLy8vLy8vLy8vLy8vLy8vLy8vLy8vLy8vLy8vLy8vLy8vLy8vLy8vL//AABEIABIAGAMBIgACEQEDEQH/xAAaAAACAgMAAAAAAAAAAAAAAAAABgQFAQID/8QAJRAAAQMCBQQDAAAAAAAAAAAAAQACAwQFFSFBUZEGIzFhEhMi/8QAFgEBAQEAAAAAAAAAAAAAAAAAAgEA/8QAFxEBAQEBAAAAAAAAAAAAAAAAAAECEv/aAAwDAQACEQMRAD8A7vu90MJ7ZUCLGKsuc2M8Joqpmx0LniEZDZVto6lMQkH0DL0jnMa7VtudfYqstEZ4QplD1hM+7OaKbXZClxE7MNWBhT8h4SvbGj5S5DVCEshWtna3GX/kedlhCFqj/9k=&#x27;/%3E%3C/svg%3E&quot;)" srcSet="https://arduino.cc/cdn-cgi/image/width=384,quality=60,format=auto/https://www.datocms-assets.com/150482/1742547498-548aa5d5935bd5928845e1c3bd13f46a.jpeg 1x, https://arduino.cc/cdn-cgi/image/width=640,quality=60,format=auto/https://www.datocms-assets.com/150482/1742547498-548aa5d5935bd5928845e1c3bd13f46a.jpeg 2x" src="https://arduino.cc/cdn-cgi/image/width=640,quality=60,format=auto/https://www.datocms-assets.com/150482/1742547498-548aa5d5935bd5928845e1c3bd13f46a.jpeg"/></div></a></div><div class="swiper-slide"><a class="success-stories-card" href="https://www.arduino.cc/pro/case-studies-amb-vapor-monitoring/"><div class="success-stories-card__text"><div class="success-stories-card__badge"><div class="tag-content tag-content__bg--charcoal mono"><span>Professional</span></div></div><div class="success-stories-card__title">AMB Vapor Monitoring leverages the Arduino Cloud for faster, more connected reporting</div></div><div class="success-stories-card__image"><img alt="Arduino featured: AMB Vapor Monitoring leverages the Arduino Cloud for faster, more connected reporting" loading="lazy" width="300" height="200" decoding="async" data-nimg="1" style="color:transparent;background-size:cover;background-position:50% 50%;background-repeat:no-repeat;background-image:url(&quot;data:image/svg+xml;charset=utf-8,%3Csvg xmlns=&#x27;http://www.w3.org/2000/svg&#x27; viewBox=&#x27;0 0 300 200&#x27;%3E%3Cfilter id=&#x27;b&#x27; color-interpolation-filters=&#x27;sRGB&#x27;%3E%3CfeGaussianBlur stdDeviation=&#x27;20&#x27;/%3E%3CfeColorMatrix values=&#x27;1 0 0 0 0 0 1 0 0 0 0 0 1 0 0 0 0 0 100 -1&#x27; result=&#x27;s&#x27;/%3E%3CfeFlood x=&#x27;0&#x27; y=&#x27;0&#x27; width=&#x27;100%25&#x27; height=&#x27;100%25&#x27;/%3E%3CfeComposite operator=&#x27;out&#x27; in=&#x27;s&#x27;/%3E%3CfeComposite in2=&#x27;SourceGraphic&#x27;/%3E%3CfeGaussianBlur stdDeviation=&#x27;20&#x27;/%3E%3C/filter%3E%3Cimage width=&#x27;100%25&#x27; height=&#x27;100%25&#x27; x=&#x27;0&#x27; y=&#x27;0&#x27; preserveAspectRatio=&#x27;none&#x27; style=&#x27;filter: url(%23b);&#x27; href=&#x27;data:image/png;base64,iVBORw0KGgoAAAANSUhEUgAAABgAAAASCAIAAADOjonJAAADHUlEQVR42j2U647bNhCFeRneJNnYTRMgSIsg7/8afYv+K4p2s0HXlkRSEu8dytsIHwYELZ05PBwY2h+/E2vn1+9//v3PXz9e36xLnJmn54+//frl27fPX78+ffrIhdpz+Pf29vLy8uP1+3y/5Ri1FE/X66dfPnx4fh7HAUgpJJecay6l5FpKLQ33Sl+806houIu02mrt9Z3zIa2vgRyxHTF0UggRyZzzkBMSc0o5p0wYz+cip3JSC7ZlrKZasXfuFYjbve9snWPfAh6NqLDv4dhj2CNWaDTE3ikeEUnYLCZWadIJ+2WEZ/Crt7az9rpZ79FRBT24zXd2YXaRK2pu7uzU6W5JrodQhwmHipwCzLNdMezZLrNbFrucQplJfXXT4sfFMWlESGjFLu7EYy0pFSUlE4MyGjSpBO7zuliL9cTOp1CkIC52mFdzXQkooRU6mu/rAzuvmFNSEgjT0OUwLLijiy5kcdG1fgpN6/C06MvSQAqlMLHbfb69zfc37DxXvAylMCbJBVDAmGCx7sQ/6uxdZjxxIRY7LFbNKwqBknsIt9vcud/tvKBQ1IoTqrANgxwzuCP4I7jjcDuyu+1IjBWplPeTdcY6KlUXOo77st6XZZ5Xu6ytpBy14GCUxqxqqRBKeSeXI+cjpcQojXELwYfD7zsgJaOQ8975zW2b37ZWMq1t03rfDwQnDxpnFUeL0YJQminJhKTWUquxIOg6FUr6DOHQPMiJloKDmcs5jDjztQLXkkfJ8cBaMiVYEJQQKngD1jitvQ0ljFT6TmOEsP4K5YwB5wLNACYOahxVLdIZOXZEQTcEjw4awZgFR3V8tWQugSvgUmBkrFZpNIJjpEetBwPmOkZSzTaZdTR+NLWw1tQ4qMFIxGhhFPYspKrHZ4PB0/BWzTgMl3G8TJ1pguEyodCwjeYyGTfqM0W0pjtand3QUaVN7bpvbqa1wkkb8UGh6zQhKKTwt5Kwvxp0rzGSVuXQbUv9QKEQ/ot0R7qbwisD0lC0m+qMCAghcKYeD2BmEvoV4OJ/MEg8GuQzUdHfzxgTabiQ+OEDJf8DAEC83NLJsT8AAAAASUVORK5CYII=&#x27;/%3E%3C/svg%3E&quot;)" srcSet="https://arduino.cc/cdn-cgi/image/width=384,quality=60,format=auto/https://www.datocms-assets.com/150482/1742551590-image.png 1x, https://arduino.cc/cdn-cgi/image/width=640,quality=60,format=auto/https://www.datocms-assets.com/150482/1742551590-image.png 2x" src="https://arduino.cc/cdn-cgi/image/width=640,quality=60,format=auto/https://www.datocms-assets.com/150482/1742551590-image.png"/></div></a></div><div class="swiper-slide"><a class="success-stories-card" href="https://www.arduino.cc/education/meet-the-teacher-science-kit/"><div class="success-stories-card__text"><div class="success-stories-card__badge"><div class="tag-content tag-content__bg--tangerine mono"><span>Education</span></div></div><div class="success-stories-card__title">By Educators, For Educators: Meet The Teacher Behind The Arduino Science Kit R3</div></div><div class="success-stories-card__image"><img alt="Arduino featured: By Educators, For Educators: Meet The Teacher Behind The Arduino Science Kit R3" loading="lazy" width="300" height="200" decoding="async" data-nimg="1" style="color:transparent;background-size:cover;background-position:50% 50%;background-repeat:no-repeat;background-image:url(&quot;data:image/svg+xml;charset=utf-8,%3Csvg xmlns=&#x27;http://www.w3.org/2000/svg&#x27; viewBox=&#x27;0 0 300 200&#x27;%3E%3Cfilter id=&#x27;b&#x27; color-interpolation-filters=&#x27;sRGB&#x27;%3E%3CfeGaussianBlur stdDeviation=&#x27;20&#x27;/%3E%3CfeColorMatrix values=&#x27;1 0 0 0 0 0 1 0 0 0 0 0 1 0 0 0 0 0 100 -1&#x27; result=&#x27;s&#x27;/%3E%3CfeFlood x=&#x27;0&#x27; y=&#x27;0&#x27; width=&#x27;100%25&#x27; height=&#x27;100%25&#x27;/%3E%3CfeComposite operator=&#x27;out&#x27; in=&#x27;s&#x27;/%3E%3CfeComposite in2=&#x27;SourceGraphic&#x27;/%3E%3CfeGaussianBlur stdDeviation=&#x27;20&#x27;/%3E%3C/filter%3E%3Cimage width=&#x27;100%25&#x27; height=&#x27;100%25&#x27; x=&#x27;0&#x27; y=&#x27;0&#x27; preserveAspectRatio=&#x27;none&#x27; style=&#x27;filter: url(%23b);&#x27; href=&#x27;data:image/jpeg;base64,/9j/4AAQSkZJRgABAQAAAQABAAD/2wCEAAoHBwgHBgoICAgLFQoXDhcaFhUZDhIVDQ0PFxoaGBYVFhUdISsjGh0oHRUiJDUlKC0vMjIyHSI4PTcwPCsxMi8BCgsLBQ0OHBENHC8dFhwvNS8vLy8vLy8vLy8vLy8vLy8vLy8vLy8vLy8vLy8vLy8vLy8vLy8vLy8vLy8vLy8vL//AABEIABIAGAMBIgACEQEDEQH/xAAZAAACAwEAAAAAAAAAAAAAAAAABAMFBgH/xAAfEAACAgEEAwAAAAAAAAAAAAABBAACAxESEzEhQZH/xAAWAQEBAQAAAAAAAAAAAAAAAAADBAL/xAAcEQABAwUAAAAAAAAAAAAAAAAAAgMRAQQUMTL/2gAMAwEAAhEDEQA/ALN5sWZFdZZq4AF9+vqYzNR2ztbbTNAuwzwDGQeoTWNSht7JknWsLvEawiya7FGjcgwhKVbSOilzA3krXn6HyT4gOUeJyEJGjbvQ7UDf1OQhJlbKkcn/2Q==&#x27;/%3E%3C/svg%3E&quot;)" srcSet="https://arduino.cc/cdn-cgi/image/width=384,quality=60,format=auto/https://www.datocms-assets.com/150482/1742547772-43588221d8e652f925e71b5b347790ab.jpeg 1x, https://arduino.cc/cdn-cgi/image/width=640,quality=60,format=auto/https://www.datocms-assets.com/150482/1742547772-43588221d8e652f925e71b5b347790ab.jpeg 2x" src="https://arduino.cc/cdn-cgi/image/width=640,quality=60,format=auto/https://www.datocms-assets.com/150482/1742547772-43588221d8e652f925e71b5b347790ab.jpeg"/></div></a></div><div class="swiper-slide"><a class="success-stories-card" href="https://blog.arduino.cc/2024/11/15/a-riddle-wrapped-in-an-enigma-made-easy-with-arduino-plug-and-make-kit/?_gl=1*1vmef3y*_up*MQ..*_ga*MTg2MDYzNTIxNi4xNzQyNTQ4MjM4*_ga_NEXN8H46L5*MTc0MjU0ODIzNy4xLjEuMTc0MjU0ODI3MC4wLjAuMjMwNjc3OTk."><div class="success-stories-card__text"><div class="success-stories-card__badge"><div class="tag-content tag-content__bg--teal mono"><span>Maker</span></div></div><div class="success-stories-card__title">A riddle wrapped in an enigma… made easy, with Arduino Plug and Make Kit</div></div><div class="success-stories-card__image"><img alt="Arduino featured: A riddle wrapped in an enigma… made easy, with Arduino Plug and Make Kit" loading="lazy" width="300" height="200" decoding="async" data-nimg="1" style="color:transparent;background-size:cover;background-position:50% 50%;background-repeat:no-repeat;background-image:url(&quot;data:image/svg+xml;charset=utf-8,%3Csvg xmlns=&#x27;http://www.w3.org/2000/svg&#x27; viewBox=&#x27;0 0 300 200&#x27;%3E%3Cfilter id=&#x27;b&#x27; color-interpolation-filters=&#x27;sRGB&#x27;%3E%3CfeGaussianBlur stdDeviation=&#x27;20&#x27;/%3E%3CfeColorMatrix values=&#x27;1 0 0 0 0 0 1 0 0 0 0 0 1 0 0 0 0 0 100 -1&#x27; result=&#x27;s&#x27;/%3E%3CfeFlood x=&#x27;0&#x27; y=&#x27;0&#x27; width=&#x27;100%25&#x27; height=&#x27;100%25&#x27;/%3E%3CfeComposite operator=&#x27;out&#x27; in=&#x27;s&#x27;/%3E%3CfeComposite in2=&#x27;SourceGraphic&#x27;/%3E%3CfeGaussianBlur stdDeviation=&#x27;20&#x27;/%3E%3C/filter%3E%3Cimage width=&#x27;100%25&#x27; height=&#x27;100%25&#x27; x=&#x27;0&#x27; y=&#x27;0&#x27; preserveAspectRatio=&#x27;none&#x27; style=&#x27;filter: url(%23b);&#x27; href=&#x27;data:image/jpeg;base64,/9j/4AAQSkZJRgABAQAAAQABAAD/2wCEAAoHBwgHBgoICAgLFgoVDiQODg0WFh0VFQ0iFysZHhYfFiEeHysjGh0oHRUiJDUlKC0vMjIyGSI4PTcwPCsxMi8BCgsLDg4OHA0NHC8cFhw7Ly8vLy8vLy8vLy8vLy8vLy8vLy8vLy8vLy8vLy8vLy8vLy8vLy8vLy8vLy8vLy8vL//AABEIABIAGAMBIgACEQEDEQH/xAAYAAEAAwEAAAAAAAAAAAAAAAAABQYHA//EACIQAAICAgEDBQAAAAAAAAAAAAECAAMEBREGFDESFTVBUf/EABYBAQEBAAAAAAAAAAAAAAAAAAMEAv/EABwRAAIBBQEAAAAAAAAAAAAAAAACAwQRIjEyAf/aAAwDAQACEQMRAD8A0WtxYrhvyVSu+jG3b+ph5klm7VaLWRT9TN9rm3e9llY8cwqmTI1H41jTtW1ORtuVMSv9GZwOcDY8RUlxDZWucdmT3xlR2XyMRJanosj0TfSxPf8AmIiInJhtn//Z&#x27;/%3E%3C/svg%3E&quot;)" srcSet="https://arduino.cc/cdn-cgi/image/width=384,quality=60,format=auto/https://www.datocms-assets.com/150482/1742547971-cd7a4c4170727bda365ee13b563802f8.jpeg 1x, https://arduino.cc/cdn-cgi/image/width=640,quality=60,format=auto/https://www.datocms-assets.com/150482/1742547971-cd7a4c4170727bda365ee13b563802f8.jpeg 2x" src="https://arduino.cc/cdn-cgi/image/width=640,quality=60,format=auto/https://www.datocms-assets.com/150482/1742547971-cd7a4c4170727bda365ee13b563802f8.jpeg"/></div></a></div><div class="swiper-slide"><a class="success-stories-card" href="https://www.arduino.cc/pro/case-studies-abinsula/"><div class="success-stories-card__text"><div class="success-stories-card__badge"><div class="tag-content tag-content__bg--charcoal mono"><span>Professional</span></div></div><div class="success-stories-card__title">Abinsula innovates e-mobility with a powerful, compact, and customizable smart EV charger</div></div><div class="success-stories-card__image"><img alt="Arduino featured: Abinsula innovates e-mobility with a powerful, compact, and customizable smart EV charger" loading="lazy" width="300" height="200" decoding="async" data-nimg="1" style="color:transparent;background-size:cover;background-position:50% 50%;background-repeat:no-repeat;background-image:url(&quot;data:image/svg+xml;charset=utf-8,%3Csvg xmlns=&#x27;http://www.w3.org/2000/svg&#x27; viewBox=&#x27;0 0 300 200&#x27;%3E%3Cfilter id=&#x27;b&#x27; color-interpolation-filters=&#x27;sRGB&#x27;%3E%3CfeGaussianBlur stdDeviation=&#x27;20&#x27;/%3E%3CfeColorMatrix values=&#x27;1 0 0 0 0 0 1 0 0 0 0 0 1 0 0 0 0 0 100 -1&#x27; result=&#x27;s&#x27;/%3E%3CfeFlood x=&#x27;0&#x27; y=&#x27;0&#x27; width=&#x27;100%25&#x27; height=&#x27;100%25&#x27;/%3E%3CfeComposite operator=&#x27;out&#x27; in=&#x27;s&#x27;/%3E%3CfeComposite in2=&#x27;SourceGraphic&#x27;/%3E%3CfeGaussianBlur stdDeviation=&#x27;20&#x27;/%3E%3C/filter%3E%3Cimage width=&#x27;100%25&#x27; height=&#x27;100%25&#x27; x=&#x27;0&#x27; y=&#x27;0&#x27; preserveAspectRatio=&#x27;none&#x27; style=&#x27;filter: url(%23b);&#x27; href=&#x27;data:image/jpeg;base64,/9j/4AAQSkZJRgABAQAAAQABAAD/2wCEAAoHBwgHBgoICAgLFhULFRgZDRUVDhcODRYNGhUdHSIfFiEaHysjHR0oHRUWJDUlKC0vMjIyHSI4PTcwPCsxMi8BCgsLDg0OHA0KHS8cFhw7Ly8vLy8vLy8vLy8vLy8vLy8vLy8vLy8vLy8vLy8vLy8vLy8vLy8vLy8vLy8vLy8vL//AABEIABAAGAMBIgACEQEDEQH/xAAYAAACAwAAAAAAAAAAAAAAAAAABQMEBv/EABwQAAEFAQEBAAAAAAAAAAAAAAQAAQIDBREhFP/EABUBAQEAAAAAAAAAAAAAAAAAAAQD/8QAGBEAAwEBAAAAAAAAAAAAAAAAAAExIQL/2gAMAwEAAhEDEQA/AH2kWNA3rTZSAa9P1caTLF2QJIL9m6v5wF0S+vJ1HRCg/wBk+uZHjoSPRrsiTx3QrJMN1T//2Q==&#x27;/%3E%3C/svg%3E&quot;)" srcSet="https://arduino.cc/cdn-cgi/image/width=384,quality=60,format=auto/https://www.datocms-assets.com/150482/1742548029-feb56abe7e18e49ad192b6468f5c0ded.png 1x, https://arduino.cc/cdn-cgi/image/width=640,quality=60,format=auto/https://www.datocms-assets.com/150482/1742548029-feb56abe7e18e49ad192b6468f5c0ded.png 2x" src="https://arduino.cc/cdn-cgi/image/width=640,quality=60,format=auto/https://www.datocms-assets.com/150482/1742548029-feb56abe7e18e49ad192b6468f5c0ded.png"/></div></a></div><div class="swiper-slide"><a class="success-stories-card" href="https://www.arduino.cc/education/case-study-how-arduino-is-inspiring-active-learning-at-acera-school/"><div class="success-stories-card__text"><div class="success-stories-card__badge"><div class="tag-content tag-content__bg--tangerine mono"><span>Education</span></div></div><div class="success-stories-card__title">“I want to try that!”: How Arduino is inspiring active learning at Acera School</div></div><div class="success-stories-card__image"><img alt="Arduino featured: “I want to try that!”: How Arduino is inspiring active learning at Acera School" loading="lazy" width="300" height="200" decoding="async" data-nimg="1" style="color:transparent;background-size:cover;background-position:50% 50%;background-repeat:no-repeat;background-image:url(&quot;data:image/svg+xml;charset=utf-8,%3Csvg xmlns=&#x27;http://www.w3.org/2000/svg&#x27; viewBox=&#x27;0 0 300 200&#x27;%3E%3Cfilter id=&#x27;b&#x27; color-interpolation-filters=&#x27;sRGB&#x27;%3E%3CfeGaussianBlur stdDeviation=&#x27;20&#x27;/%3E%3CfeColorMatrix values=&#x27;1 0 0 0 0 0 1 0 0 0 0 0 1 0 0 0 0 0 100 -1&#x27; result=&#x27;s&#x27;/%3E%3CfeFlood x=&#x27;0&#x27; y=&#x27;0&#x27; width=&#x27;100%25&#x27; height=&#x27;100%25&#x27;/%3E%3CfeComposite operator=&#x27;out&#x27; in=&#x27;s&#x27;/%3E%3CfeComposite in2=&#x27;SourceGraphic&#x27;/%3E%3CfeGaussianBlur stdDeviation=&#x27;20&#x27;/%3E%3C/filter%3E%3Cimage width=&#x27;100%25&#x27; height=&#x27;100%25&#x27; x=&#x27;0&#x27; y=&#x27;0&#x27; preserveAspectRatio=&#x27;none&#x27; style=&#x27;filter: url(%23b);&#x27; href=&#x27;data:image/png;base64,iVBORw0KGgoAAAANSUhEUgAAABgAAAASCAIAAADOjonJAAACqklEQVR42i1UC3bcMAjkK3uTY/VEPVRv2Ca2JaCDNi9ET/bKw8AMsj+/f4mqjcPGy8bJfiT7Kr5mfN3z67q/7/t57ohJlKY1XF5DX6diPQ8dJqYiQpbFVJLJ2GQJlxT97It21PuRiTiSEAsRHRMJuZBAkm0G4LhUKARvOKVYcSAQGZGySqN0ZVZVIgmzCI4jZxIwspayMNm9REuTNUUCJFlLGmgGwmbGivWErohKUQEcgQNVJnitciOVDfT9sCobsYsYTpKQNtC9+I68lyKepXMpvhWipRlZ0XXFUDIFEGiSfV0sxl7s1HDgQ8qr5An0O+/ZQFjnQh+RuGwxiEzLR8txdpeJ/tnfi9TIk7zIiRS8lYP4Cboe/p5yTUH5c0oGgFKZphR0NUlrFMC3XvbvSrXyLKcOTRCrIJrZQNeka/I9eU2GspCo2yGQDEBlvNXprhd6BFVyVg2uBSBqIwTVzLonghDParETPFE7AxHyIiqg9qbTjJ4Jw0CQqlmp2QXjkRJAz+qY0YHu4i33H/T/cVY/Uv93j2IjwmZtPnCEVSA02MEgsQXKtk+zp5a5a4NJkA8rts2ImxHmg0W5zbBl3GmqP6v3urM2D8D00S15h7BxV4paG2gcLmrmbo4VjpLOSS0ckN+Bjzc+0okrDeOh2GzVdrO7tI/XAUeaDR2u7mzWBkajuGIPynvKqraJgKI8nA6roXhsEwj1xNnH5yk9/kAZ4oMUlpKJkqBLTxIgmj1WtMRVhtHhO2CaLnD7CJ74/DhRA4DEBpuTWKAajBSjx7LvAPwOUdFbfFmH8zneQKgRQPgBScnOE0OmQBKgGEZF2y7QG75J7uiimlE3CCyc3Wl4F7iBaN8E1V3uiwG3k77fdcmwpeJ60ZYYr/tga997iPyOH+1wdezS/wNRGNGXDZuAKAAAAABJRU5ErkJggg==&#x27;/%3E%3C/svg%3E&quot;)" srcSet="https://arduino.cc/cdn-cgi/image/width=384,quality=60,format=auto/https://www.datocms-assets.com/150482/1742551693-image-2.png 1x, https://arduino.cc/cdn-cgi/image/width=640,quality=60,format=auto/https://www.datocms-assets.com/150482/1742551693-image-2.png 2x" src="https://arduino.cc/cdn-cgi/image/width=640,quality=60,format=auto/https://www.datocms-assets.com/150482/1742551693-image-2.png"/></div></a></div><div class="swiper-slide"><a class="success-stories-card" href="https://www.arduino.cc/pro/case-studies-snaptron/"><div class="success-stories-card__text"><div class="success-stories-card__badge"><div class="tag-content tag-content__bg--charcoal mono"><span>Professional</span></div></div><div class="success-stories-card__title">Snaptron accelerates prototyping and innovates tactile dome switch testing</div></div><div class="success-stories-card__image"><img alt="Arduino featured: Snaptron accelerates prototyping and innovates tactile dome switch testing" loading="lazy" width="300" height="200" decoding="async" data-nimg="1" style="color:transparent;background-size:cover;background-position:50% 50%;background-repeat:no-repeat;background-image:url(&quot;data:image/svg+xml;charset=utf-8,%3Csvg xmlns=&#x27;http://www.w3.org/2000/svg&#x27; viewBox=&#x27;0 0 300 200&#x27;%3E%3Cfilter id=&#x27;b&#x27; color-interpolation-filters=&#x27;sRGB&#x27;%3E%3CfeGaussianBlur stdDeviation=&#x27;20&#x27;/%3E%3CfeColorMatrix values=&#x27;1 0 0 0 0 0 1 0 0 0 0 0 1 0 0 0 0 0 100 -1&#x27; result=&#x27;s&#x27;/%3E%3CfeFlood x=&#x27;0&#x27; y=&#x27;0&#x27; width=&#x27;100%25&#x27; height=&#x27;100%25&#x27;/%3E%3CfeComposite operator=&#x27;out&#x27; in=&#x27;s&#x27;/%3E%3CfeComposite in2=&#x27;SourceGraphic&#x27;/%3E%3CfeGaussianBlur stdDeviation=&#x27;20&#x27;/%3E%3C/filter%3E%3Cimage width=&#x27;100%25&#x27; height=&#x27;100%25&#x27; x=&#x27;0&#x27; y=&#x27;0&#x27; preserveAspectRatio=&#x27;none&#x27; style=&#x27;filter: url(%23b);&#x27; href=&#x27;data:image/jpeg;base64,/9j/4AAQSkZJRgABAQAAAQABAAD/2wCEAAoHBwgHBgoICAgXCgoLDhgNCg0OGhENFg4YFxUZGBYTFhUaHysjHR0oHRUWJDUlKC0vMjIyGSI4PTcwPCsxMi8BCgsLDg0OGA0NHDscFhwvLy8vLy81Ly8vLy8vLy8vLy8vLy8vLy8vLy8vLy8vLy8vLy8vLy8vLy8vLy8vLy8vL//AABEIAA4AGAMBIgACEQEDEQH/xAAXAAADAQAAAAAAAAAAAAAAAAAABQYC/8QAHhAAAgMAAQUAAAAAAAAAAAAAAQIAAwUEBhIhJUH/xAAWAQEBAQAAAAAAAAAAAAAAAAADAgD/xAAYEQADAQEAAAAAAAAAAAAAAAAAAQISA//aAAwDAQACEQMRAD8AaaesUqMmn3XXuImtzksKzJ+uwvSxMOZTFbke43UFj8siERYFnsG8fYTPmidyf//Z&#x27;/%3E%3C/svg%3E&quot;)" srcSet="https://arduino.cc/cdn-cgi/image/width=384,quality=60,format=auto/https://www.datocms-assets.com/150482/1742548154-0ab822dbcb1335e692968bd08564a972.jpeg 1x, https://arduino.cc/cdn-cgi/image/width=640,quality=60,format=auto/https://www.datocms-assets.com/150482/1742548154-0ab822dbcb1335e692968bd08564a972.jpeg 2x" src="https://arduino.cc/cdn-cgi/image/width=640,quality=60,format=auto/https://www.datocms-assets.com/150482/1742548154-0ab822dbcb1335e692968bd08564a972.jpeg"/></div></a></div><div class="swiper-slide"><a class="success-stories-card" href="https://cloud.arduino.cc/building-automated-greenhouse/"><div class="success-stories-card__text"><div class="success-stories-card__badge"><div class="tag-content tag-content__bg--tangerine mono"><span>Education</span></div></div><div class="success-stories-card__title">How White Mountains Regional High School Used Arduino &amp; the IoT to Build an Automated Greenhouse</div></div><div class="success-stories-card__image"><img alt="Arduino featured: How White Mountains Regional High School Used Arduino &amp; the IoT to Build an Automated Greenhouse" loading="lazy" width="300" height="200" decoding="async" data-nimg="1" style="color:transparent;background-size:cover;background-position:50% 50%;background-repeat:no-repeat;background-image:url(&quot;data:image/svg+xml;charset=utf-8,%3Csvg xmlns=&#x27;http://www.w3.org/2000/svg&#x27; viewBox=&#x27;0 0 300 200&#x27;%3E%3Cfilter id=&#x27;b&#x27; color-interpolation-filters=&#x27;sRGB&#x27;%3E%3CfeGaussianBlur stdDeviation=&#x27;20&#x27;/%3E%3CfeColorMatrix values=&#x27;1 0 0 0 0 0 1 0 0 0 0 0 1 0 0 0 0 0 100 -1&#x27; result=&#x27;s&#x27;/%3E%3CfeFlood x=&#x27;0&#x27; y=&#x27;0&#x27; width=&#x27;100%25&#x27; height=&#x27;100%25&#x27;/%3E%3CfeComposite operator=&#x27;out&#x27; in=&#x27;s&#x27;/%3E%3CfeComposite in2=&#x27;SourceGraphic&#x27;/%3E%3CfeGaussianBlur stdDeviation=&#x27;20&#x27;/%3E%3C/filter%3E%3Cimage width=&#x27;100%25&#x27; height=&#x27;100%25&#x27; x=&#x27;0&#x27; y=&#x27;0&#x27; preserveAspectRatio=&#x27;none&#x27; style=&#x27;filter: url(%23b);&#x27; href=&#x27;data:image/png;base64,iVBORw0KGgoAAAANSUhEUgAAABgAAAASCAIAAADOjonJAAACr0lEQVR42j1UC3LdIAwESeA0TdsT9g49Qy/cSZ4fPD5CXeGXeHYYjPGyklbI399/UuKX1/z97fjx89vbr+P7Wz5eiZNp6K2Xs94+bu//3vF8fJz3e+m9L10UYxY5RF5EMpGIRbMYLIQQL8SAPXgoEF6YaIMFm5lFWJTBAlzvyUefrBBWAJetGACQgigwBTbQsDFja8KpSY4kPSU1o7UWb0VPuCL13+MMCARc2BQc2MaQtimV+UjcUjpyGjNDPJsTURY+JB2biAXxmgUxnbZmWJ+MYVFwXZCXmBIz/vIfEy9jgiYQbakJapMTNZ2gwrF5zbYUvN1UjDxV4RkvEgKNQAAECTL/HqOJr/g6RamjT4QxogzOQ44paTJrNEXaccQcSzeWSwbWGohsIYO68H1NUUJQUnpLJsaBGqUmqTF3im1Ngl5V64/hqKPV3i90sEIkhE5D2YXVk33WR1JZZDETP5hrpANq9QhONK09er1X4IHxrKUWJ1JFdZG5ITxQV8/RvbY0FQ6IEhlcGdXwswbOFNW1iUq9neV2v9/OWktrXVVRB1grQ/+TqNQOItiHEklmOYgSHICkRFcEogaict7LedbzLOUimnETdSYcvokej+GCEGXinHs6WBJMZPOLqLdSOoSAom60NidCMxAhO4t57vI3JD/gpWXFHJsy8i3RAojmXLP32Ruge9x4KoIB4H3ytiOTObzVMCIrYyyfdJt5ERy3DHXFCnL+9CvMup1hu5sieTvuFiVZ6g2IEwBsVQBdg0X30W5oePxypDvd7cj+BUBoibfxPTRvsKd/MaHLyBijt5xtLzPqB+AfoSlkyMpWclUtP6vm/f4JnLJb1qViAjIIoehg8htkj+bGjuREu/2cKILo8x5y2HUhfcFvJlw8X8C9hOQu2p0WnXev+I31H7TOC7fMwhQWAAAAAElFTkSuQmCC&#x27;/%3E%3C/svg%3E&quot;)" srcSet="https://arduino.cc/cdn-cgi/image/width=384,quality=60,format=auto/https://www.datocms-assets.com/150482/1742551729-image-3.png 1x, https://arduino.cc/cdn-cgi/image/width=640,quality=60,format=auto/https://www.datocms-assets.com/150482/1742551729-image-3.png 2x" src="https://arduino.cc/cdn-cgi/image/width=640,quality=60,format=auto/https://www.datocms-assets.com/150482/1742551729-image-3.png"/></div></a></div></div></div></div></div></div></div></div><div class="about-section"><div class="about-section__main-section" style="background-image:url(https://www.datocms-assets.com/150482/1742310237-brand-dark.jpg)"><div class="about-section__wrapper"><div style="opacity:0;transform:translateX(-100px)"><div class="about-section__main-section--top-title">What is Arduino?</div><h2>The easy-to-use hardware and software platform</h2><div class="button-list about-section__main-section__buttons"><a href="https://www.arduino.cc/en/about" target="_self" rel="noopener noreferrer" custom-attr="" class="button-list__item primary"><span>ABOUT ARDUINO</span></a></div></div></div></div><div class="about-section__cards"><div class="about-section__top-card"><h3>Mission &amp; Vision</h3><div class="about-section__description">Our goal is to create a world where there are no barriers to technology and innovation</div><div class="button-list about-section__top-card__buttons"><a href="https://www.arduino.cc/en/about#our-mission--vision" target="_self" rel="noopener noreferrer" custom-attr="" class="button-list__item tertiary-white"><span>LEARN MORE</span><img src="https://www.datocms-assets.com/150482/1738840518-iconrow.svg" alt="LEARN MORE"/></a></div></div><div class="about-section__bottom-card"><h3>Learn Arduino</h3><div class="about-section__description">What is a board, how do I write code to it, and what tools do I need to create my own project?</div><div class="button-list about-section__bottom-card__buttons"><a href="https://docs.arduino.cc/learn/ " target="_self" rel="noopener noreferrer" custom-attr="" class="button-list__item tertiary-white"><span>START NOW</span><img src="https://www.datocms-assets.com/150482/1738840518-iconrow.svg" alt="START NOW"/></a></div></div></div></div><div id="latest-news" class="external-data-carousel-content content-page-external-carousel-blog"><div class="homepage-container"><div class="external-data-carousel__title">Latest News<a class="content-page__button tertiary" data-type="router" href="https://blog.arduino.cc/"><span>Blog</span><img alt="Arrow Icon" loading="lazy" width="10" height="10" decoding="async" data-nimg="1" style="color:transparent" srcSet="/images/arrow-top.svg 1x, /images/arrow-top.svg 2x" src="/images/arrow-top.svg"/></a></div><div><div class="external-data-carousel"><div class="swiper-pagination"></div><div class="external-data-carousel__holder"><div class="swiper-container"><div class="swiper-wrapper"><div class="swiper-slide"><a class="external-data-cards__item" href="https://blog.arduino.cc/2026/07/29/arduino-core-on-zephyr-0-90-0-is-officially-stable-and-leaving-beta/"><img alt="Arduino blog: Arduino Core on Zephyr 0.90.0 is officially stable and leaving beta" loading="lazy" width="300" height="200" decoding="async" data-nimg="1" style="color:transparent" src="https://blog.arduino.cc/wp-content/uploads/2026/07/Arduino.cc-Blogpost-Featured385x289-1.jpg"/><div class="external-data-cards__content"><div class="external-data-cards__info"><div class="external-data-cards__info--tag"><div class="tag-content tag-content__bg--teal mono"><span>Announcements</span></div></div><div class="external-data-cards__info--date"><div class="date"><p class="date__content">29 Jul 2026</p></div></div></div><div class="external-data-cards__title">Arduino Core on Zephyr 0.90.0 is officially stable and leaving beta</div></div></a></div><div class="swiper-slide"><a class="external-data-cards__item" href="https://blog.arduino.cc/2026/07/28/mission-44-students-at-silverstone-go-from-zero-to-ai-powered-racing-telemetry-in-90-minutes/"><img alt="Arduino blog: Mission 44 students at Silverstone go from zero to AI-powered racing telemetry in 90 minutes!" loading="lazy" width="300" height="200" decoding="async" data-nimg="1" style="color:transparent" src="https://blog.arduino.cc/wp-content/uploads/2026/07/image-3-1.png"/><div class="external-data-cards__content"><div class="external-data-cards__info"><div class="external-data-cards__info--tag"><div class="tag-content tag-content__bg--teal mono"><span>Modulino Nodes</span></div><div class="tag-content tag-content__bg--teal mono"><span>UNO Q</span></div></div><div class="external-data-cards__info--date"><div class="date"><p class="date__content">28 Jul 2026</p></div></div></div><div class="external-data-cards__title">Mission 44 students at Silverstone go from zero to AI-powered racing telemetry in 90 minutes!</div></div></a></div><div class="swiper-slide"><a class="external-data-cards__item" href="https://blog.arduino.cc/2026/07/20/build-a-retro-home-arcade-with-an-arduino-uno-q-board/"><img alt="Arduino blog: Build a retro home arcade with an Arduino® UNO™ Q board!" loading="lazy" width="300" height="200" decoding="async" data-nimg="1" style="color:transparent" src="https://blog.arduino.cc/wp-content/uploads/2026/07/Arduino.cc-Blogpost-Featured385x289.jpg"/><div class="external-data-cards__content"><div class="external-data-cards__info"><div class="external-data-cards__info--tag"><div class="tag-content tag-content__bg--teal mono"><span>UNO Q</span></div></div><div class="external-data-cards__info--date"><div class="date"><p class="date__content">20 Jul 2026</p></div></div></div><div class="external-data-cards__title">Build a retro home arcade with an Arduino® UNO™ Q board!</div></div></a></div><div class="swiper-slide"><a class="external-data-cards__item" href="https://blog.arduino.cc/2026/07/02/how-to-achieve-cost-effective-predictive-maintenance-with-the-arduino-uno-q-board/"><img alt="Arduino blog: How to achieve cost-effective predictive maintenance with the Arduino® UNO™ Q board" loading="lazy" width="300" height="200" decoding="async" data-nimg="1" style="color:transparent" src="https://blog.arduino.cc/wp-content/uploads/2026/07/Arduino.cc-Blogpost-Featured385x289-3.jpg"/><div class="external-data-cards__content"><div class="external-data-cards__info"><div class="external-data-cards__info--tag"><div class="tag-content tag-content__bg--teal mono"><span>UNO Q</span></div></div><div class="external-data-cards__info--date"><div class="date"><p class="date__content">2 Jul 2026</p></div></div></div><div class="external-data-cards__title">How to achieve cost-effective predictive maintenance with the Arduino® UNO™ Q board</div></div></a></div><div class="swiper-slide"><a class="external-data-cards__item" href="https://blog.arduino.cc/2026/06/30/arduino-core-zephyr-0-56-0-try-it-out-now-and-help-us-get-closer-to-stable/"><img alt="Arduino blog: Arduino Core-zephyr 0.56.0: try it out now, and help us get closer to Stable" loading="lazy" width="300" height="200" decoding="async" data-nimg="1" style="color:transparent" src="https://blog.arduino.cc/wp-content/uploads/2026/06/Arduino.cc-Blogpost-Featured385x289-3.jpg"/><div class="external-data-cards__content"><div class="external-data-cards__info"><div class="external-data-cards__info--tag"><div class="tag-content tag-content__bg--teal mono"><span>GIGA Display Shield</span></div><div class="tag-content tag-content__bg--teal mono"><span>Giga R1 WiFi</span></div></div><div class="external-data-cards__info--date"><div class="date"><p class="date__content">30 Jun 2026</p></div></div></div><div class="external-data-cards__title">Arduino Core-zephyr 0.56.0: try it out now, and help us get closer to Stable</div></div></a></div><div class="swiper-slide"><a class="external-data-cards__item" href="https://blog.arduino.cc/2026/06/26/a-heads-up-on-the-arduino-uno-q-board-pricing-straight-from-marcello-majonchi/"><img alt="Arduino blog: A heads-up on the Arduino® UNO™ Q board pricing – straight from Marcello Majonchi" loading="lazy" width="300" height="200" decoding="async" data-nimg="1" style="color:transparent" src="https://blog.arduino.cc/wp-content/uploads/2026/06/Arduino.cc-Blogpost-Featured385x289-11.jpg"/><div class="external-data-cards__content"><div class="external-data-cards__info"><div class="external-data-cards__info--tag"><div class="tag-content tag-content__bg--teal mono"><span>UNO Q</span></div></div><div class="external-data-cards__info--date"><div class="date"><p class="date__content">26 Jun 2026</p></div></div></div><div class="external-data-cards__title">A heads-up on the Arduino® UNO™ Q board pricing – straight from Marcello Majonchi</div></div></a></div><div class="swiper-slide"><a class="external-data-cards__item" href="https://blog.arduino.cc/2026/06/26/three-new-arduino-modulino-modules-are-here-bigger-ideas-now-come-with-zero-added-stress/"><img alt="Arduino blog: Three new Arduino® Modulino™ modules are here! Bigger ideas now come with zero added stress" loading="lazy" width="300" height="200" decoding="async" data-nimg="1" style="color:transparent" src="https://blog.arduino.cc/wp-content/uploads/2026/06/Arduino.cc-Blogpost-Featured385x289-9.jpg"/><div class="external-data-cards__content"><div class="external-data-cards__info"><div class="external-data-cards__info--tag"><div class="tag-content tag-content__bg--teal mono"><span>Modulino Nodes</span></div></div><div class="external-data-cards__info--date"><div class="date"><p class="date__content">26 Jun 2026</p></div></div></div><div class="external-data-cards__title">Three new Arduino® Modulino™ modules are here! Bigger ideas now come with zero added stress</div></div></a></div><div class="swiper-slide"><a class="external-data-cards__item" href="https://blog.arduino.cc/2026/06/18/running-local-llms-on-the-arduino-uno-q-board-a-practical-guide/"><img alt="Arduino blog: Running local LLMs on the Arduino® UNO™ Q board: a practical guide" loading="lazy" width="300" height="200" decoding="async" data-nimg="1" style="color:transparent" src="https://blog.arduino.cc/wp-content/uploads/2026/06/Arduino.cc-Blogpost-Featured385x289-1.jpg"/><div class="external-data-cards__content"><div class="external-data-cards__info"><div class="external-data-cards__info--tag"><div class="tag-content tag-content__bg--teal mono"><span>UNO Q</span></div></div><div class="external-data-cards__info--date"><div class="date"><p class="date__content">18 Jun 2026</p></div></div></div><div class="external-data-cards__title">Running local LLMs on the Arduino® UNO™ Q board: a practical guide</div></div></a></div><div class="swiper-slide"><a class="external-data-cards__item" href="https://blog.arduino.cc/2026/06/11/ditch-overpriced-hardware-4-ways-the-arduino-uno-q-board-helps-you-do-more-for-less/"><img alt="Arduino blog: Ditch overpriced hardware: 4 ways the Arduino® UNO™ Q board helps you do more for less" loading="lazy" width="300" height="200" decoding="async" data-nimg="1" style="color:transparent" src="https://blog.arduino.cc/wp-content/uploads/2026/06/Arduino.cc-Blogpost-Featured385x289-2.jpg"/><div class="external-data-cards__content"><div class="external-data-cards__info"><div class="external-data-cards__info--tag"><div class="tag-content tag-content__bg--teal mono"><span>UNO Q</span></div></div><div class="external-data-cards__info--date"><div class="date"><p class="date__content">11 Jun 2026</p></div></div></div><div class="external-data-cards__title">Ditch overpriced hardware: 4 ways the Arduino® UNO™ Q board helps you do more for less</div></div></a></div><div class="swiper-slide"><a class="external-data-cards__item" href="https://blog.arduino.cc/2026/06/09/local-ai-agents-on-arduino-uno-q/"><img alt="Arduino blog: Local AI agents on Arduino UNO Q" loading="lazy" width="300" height="200" decoding="async" data-nimg="1" style="color:transparent" src="https://blog.arduino.cc/wp-content/uploads/2026/06/Arduino.cc-Blogpost-Featured385x289.jpg"/><div class="external-data-cards__content"><div class="external-data-cards__info"><div class="external-data-cards__info--tag"><div class="tag-content tag-content__bg--teal mono"><span>UNO Q</span></div></div><div class="external-data-cards__info--date"><div class="date"><p class="date__content">9 Jun 2026</p></div></div></div><div class="external-data-cards__title">Local AI agents on Arduino UNO Q</div></div></a></div><div class="swiper-slide"><div class="last-card"><img alt="blob 1" loading="lazy" width="152" height="138" decoding="async" data-nimg="1" class="last-card__top-blob" style="color:transparent" srcSet="/images/blob1.svg 1x, /images/blob1.svg 2x" src="/images/blob1.svg"/><img alt="blob 2" loading="lazy" width="75" height="75" decoding="async" data-nimg="1" class="last-card__bottom-blob" style="color:transparent" srcSet="/images/blob2.svg 1x, /images/blob2.svg 2x" src="/images/blob2.svg"/><div class="last-card__title">View all articles</div><a class="content-page__button primary no-hover" data-type="router" href="https://blog.arduino.cc/"><span>blog</span><img alt="Arrow Icon" loading="lazy" width="10" height="10" decoding="async" data-nimg="1" style="color:transparent" srcSet="/images/arrow-icon.svg 1x, /images/arrow-icon.svg 2x" src="/images/arrow-icon.svg"/></a></div></div></div></div></div></div></div></div></div><div class="component-wrapper BannerComponentWrapper_b1h9ekr1 ComponentWrapper_c1ijnv48" data-fullscreen="true" style="--b1h9ekr1-0:280px"><div style="--b1cx5ywd-0:0px;--b1cx5ywd-1:280px;background-color:#ECF1F1" class="BannerContent_b1cx5ywd"><div class="BannerContentLeft_biy9zl7" style="--biy9zl7-0:16px;--biy9zl7-1:48px;--biy9zl7-2:24px;--biy9zl7-3:64px;--biy9zl7-4:none"><div class="TextContainer_t1lx1yni" style="--t1lx1yni-0:8px"><div data-font="" data-font-size="medium" data-font-weight="bold" style="--bvp7tq7-0:var(--text-default)" class="BannerTitle_bvp7tq7">Open source is love</div><div data-font="" data-font-size="x-small" style="--b1ektsc7-0:var(--text-nevada)" class="BannerSubtitle_b1ektsc7"><p>Discover our 2025 Open Source Report!</p>
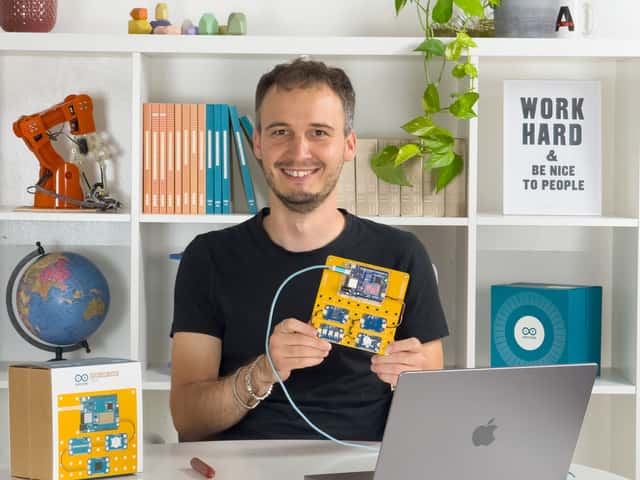
</div></div><div class="buttons ButtonsWrapper_b19ja5h2"><a href="https://content.arduino.cc/assets/ArduinoOpenSourceReport2025.pdf" target="_blank" rel="noopener noreferrer" custom-attr="" class="button-list__item secondary-teal-btn"><span>Download PDF</span></a></div></div><div class="BannerContentRight_b13u8oog" style="--b13u8oog-0:280px;--b13u8oog-1:280px;--b13u8oog-2:800px"><img alt="Open source is love" loading="lazy" width="980" height="980" decoding="async" data-nimg="1" class="spotlight-image SpotlightImage_s2wdx43" style="color:transparent" srcSet="https://arduino.cc/cdn-cgi/image/width=1080,quality=60,format=auto/https://www.datocms-assets.com/150482/1777475666-report-2025.png 1x, https://arduino.cc/cdn-cgi/image/width=2048,quality=60,format=auto/https://www.datocms-assets.com/150482/1777475666-report-2025.png 2x" src="https://arduino.cc/cdn-cgi/image/width=2048,quality=60,format=auto/https://www.datocms-assets.com/150482/1777475666-report-2025.png"/></div></div></div></div></div></div><div class="_Footer_1kn9u_1" style="z-index:1000" data-ah-theme="light" data-ah-accent="mkr"><div class="_Footer__row_1kn9u_14"><svg xmlns="http://www.w3.org/2000/svg" width="102" height="14" fill="none" viewBox="0 0 102 14" class="_Footer__logo_1kn9u_8"><g id="Inline" fill="currentColor"><path id="Vector" d="M0 13.812 4.162.19h3.784l4.351 13.622H8.703l-.757-2.65H4.162l-.757 2.65zM6.054 3.595 4.73 8.515h2.648z"></path><path id="Vector_2" d="M14.379.189h5.486c3.784 0 5.109 1.892 5.109 4.54q0 2.839-2.27 3.973l2.648 4.92h-3.973l-1.892-4.163h-1.703v4.352H14.38zm7.19 4.54c0-1.135-.38-1.891-2.082-1.891h-1.703V6.62h1.703c1.324.19 2.081-.378 2.081-1.891"></path><path id="Vector_3" d="M27.81.189h4.352c5.108 0 6.81 2.46 6.81 6.622 0 3.216-.946 6.81-6.81 6.81h-4.54V.19zm3.406 2.649v7.946h1.324c2.838 0 3.027-1.703 3.027-3.973 0-2.65-.19-3.973-3.216-3.973z"></path><path id="Vector_4" d="M48.812.189h3.216v8.892C52.028 13.054 49 14 46.54 14c-2.27 0-5.297-.757-5.297-4.92V.19h3.406v8.324c0 2.27.756 2.838 2.08 2.838 1.514 0 2.082-.757 2.082-2.838z"></path><path id="Vector_5" d="M55.055 10.973h3.594V3.027h-3.405V.189h10.405v2.838h-3.594v7.946h3.594v2.838H55.244v-2.838z"></path><path id="Vector_6" d="M71.324 13.621h-3.217V.19h3.784l4.352 8.135V.19h3.216v13.622h-3.406l-4.54-8.703z"></path><path id="Vector_7" d="M93.082 7c0 3.973-1.514 7-5.865 7-3.973 0-5.676-2.27-5.676-6.81 0-4.163 1.514-7.19 5.676-7.19 3.973 0 5.865 1.703 5.865 7m-3.595 0c0-3.405-.19-4.162-2.27-4.162-1.703-.19-2.081.946-2.081 4.351 0 2.649.189 4.162 2.08 4.162 2.082-.189 2.271-1.324 2.271-4.351"></path><path id="Vector_8" d="M95.352 3.027C95.352 1.324 96.676 0 98.189 0c1.703 0 3.027 1.324 3.027 3.027s-1.324 3.027-3.027 3.027c-1.513-.19-2.837-1.513-2.837-3.027m5.297 0c0-1.324-.946-2.46-2.46-2.46-1.324 0-2.27.947-2.27 2.46 0 1.514 1.135 2.46 2.27 2.46 1.514 0 2.46-.946 2.46-2.46m-3.973-1.892h1.703c1.135 0 1.513.568 1.513 1.135q0 .568-.567 1.135l.567 1.325h-1.135l-.378-1.135H98V4.73h-1.135V1.135zm1.513 1.703q.568 0 .568-.568c0-.378-.19-.378-.568-.378h-.378v.946z"></path></g></svg><button class="_Footer__back-to-top--btn_1kn9u_161"><div data-font="" data-font-size="xx-small"><svg xmlns="http://www.w3.org/2000/svg" width="13" height="13" fill="none" viewBox="0 0 28 28"><path fill="currentColor" fill-rule="evenodd" d="M6.222 25.64A14 14 0 1 0 21.778 2.36 14 14 0 0 0 6.222 25.64M7.333 4.023a12 12 0 1 1 13.334 19.955A12 12 0 0 1 7.333 4.022m12.283 12.904A1 1 0 0 0 20 17a1 1 0 0 0 .71-1.71l-6-6a1 1 0 0 0-1.42 0l-6 6a1.003 1.003 0 1 0 1.42 1.42l5.29-5.3 5.29 5.3a1 1 0 0 0 .326.216" clip-rule="evenodd"></path></svg>Back to top</div></button></div><div class="_Footer__separator_1kn9u_11"></div><div class="_Footer__row_1kn9u_14"><div class="_Footer__column_1kn9u_69 _Footer__column--special-layout_1kn9u_75"><div data-font="" data-font-size="small" data-font-weight="bold" class="_Footer__column--title_1kn9u_94">Follow us</div><div class="_Footer__social-links-wrapper_1kn9u_178"><a href="https://www.youtube.com/user/arduinoteam" aria-label="YouTube" rel="noopener noreferrer" class="_Footer__social-link_1kn9u_178"><svg xmlns="http://www.w3.org/2000/svg" width="1em" height="1em" fill="none" viewBox="0 0 32 32"><path fill="currentColor" d="M29.41 9.22a3.5 3.5 0 0 0-2.47-2.49C24.76 6.14 16 6.14 16 6.14s-8.76 0-10.94.59a3.49 3.49 0 0 0-2.47 2.49A36.5 36.5 0 0 0 2 16a36.5 36.5 0 0 0 .59 6.78 3.49 3.49 0 0 0 2.47 2.49c2.18.59 10.94.59 10.94.59s8.76 0 10.94-.59a3.49 3.49 0 0 0 2.47-2.49c.407-2.237.605-4.507.59-6.78a36.5 36.5 0 0 0-.59-6.78M13.14 20.16v-8.32L20.45 16z"></path></svg></a><a href="https://www.instagram.com/arduino.cc/" aria-label="Instagram" rel="noopener noreferrer" class="_Footer__social-link_1kn9u_178"><svg xmlns="http://www.w3.org/2000/svg" width="1em" height="1em" fill="none" viewBox="0 0 32 32"><path fill="currentColor" fill-rule="evenodd" d="M27.93 11.05a8.8 8.8 0 0 0-.56-2.91 6.07 6.07 0 0 0-3.51-3.51 8.8 8.8 0 0 0-2.91-.56C19.67 4.01 19.26 4 16 4s-3.67.01-4.95.07a8.8 8.8 0 0 0-2.91.56 6.07 6.07 0 0 0-3.51 3.51 8.8 8.8 0 0 0-.56 2.91C4.01 12.33 4 12.74 4 16s.01 3.67.07 4.95c.02.995.21 1.979.56 2.91a6.07 6.07 0 0 0 3.51 3.51c.931.35 1.915.54 2.91.56 1.28.06 1.69.07 4.95.07s3.67-.01 4.95-.07a8.8 8.8 0 0 0 2.91-.56 6.07 6.07 0 0 0 3.51-3.51c.35-.931.54-1.915.56-2.91.06-1.28.07-1.69.07-4.95s-.01-3.67-.07-4.95m-2.16 9.8a6.7 6.7 0 0 1-.42 2.23 3.9 3.9 0 0 1-2.27 2.27 6.7 6.7 0 0 1-2.23.42c-1.27.06-1.65.07-4.85.07s-3.58-.01-4.85-.07a6.7 6.7 0 0 1-2.23-.42 3.9 3.9 0 0 1-2.27-2.27 6.7 6.7 0 0 1-.42-2.23c-.06-1.27-.07-1.65-.07-4.85s.01-3.58.07-4.85a6.7 6.7 0 0 1 .42-2.23 3.9 3.9 0 0 1 2.27-2.27 6.7 6.7 0 0 1 2.23-.42c1.27-.06 1.65-.07 4.85-.07s3.58.01 4.85.07a6.7 6.7 0 0 1 2.23.42 3.9 3.9 0 0 1 2.27 2.27c.266.714.408 1.468.42 2.23.06 1.27.07 1.65.07 4.85s-.01 3.58-.07 4.85M16 9.838a6.162 6.162 0 1 0 0 12.324 6.162 6.162 0 0 0 0-12.324M16 20a4 4 0 1 1 0-8 4 4 0 0 1 0 8m7.85-10.41a1.44 1.44 0 1 1-2.88 0 1.44 1.44 0 0 1 2.88 0" clip-rule="evenodd"></path></svg></a><a href="https://www.facebook.com/official.arduino" aria-label="Facebook" rel="noopener noreferrer" class="_Footer__social-link_1kn9u_178"><svg xmlns="http://www.w3.org/2000/svg" width="1em" height="1em" fill="none" viewBox="0 0 32 32"><path fill="currentColor" d="M18.19 11.37V14h3.88l-.62 4.05h-3.26V28h-4.38v-9.95h-3.55V14h3.55v-3.08c0-3.51 2.09-5.45 5.29-5.45 1.048.014 2.095.104 3.13.27v3.45h-1.76a2.02 2.02 0 0 0-2.28 2.18"></path></svg></a><a href="https://github.com/arduino/" aria-label="GitHub" rel="noopener noreferrer" class="_Footer__social-link_1kn9u_178"><svg xmlns="http://www.w3.org/2000/svg" width="1em" height="1em" fill="none" viewBox="0 0 32 32"><path fill="currentColor" d="M18.54 20.403a3.33 3.33 0 0 1 .95 2.59c0 1.262-.01 2.778-.015 3.777a.985.985 0 0 1-.778.968c-1.78.35-3.612.35-5.393 0a.985.985 0 0 1-.778-.969c-.004-.735-.01-1.6-.016-2.316-3.89.84-4.71-1.88-4.71-1.88a3.7 3.7 0 0 0-1.56-2.05c-1.27-.86.1-.85.1-.85a2.94 2.94 0 0 1 2.14 1.45 2.984 2.984 0 0 0 4.08 1.16c.057-.71.37-1.374.88-1.87-3.1-.36-6.37-1.56-6.37-6.92a5.4 5.4 0 0 1 1.44-3.76 4.95 4.95 0 0 1 .14-3.7s1.17-.38 3.85 1.43a13.3 13.3 0 0 1 7.01 0c2.67-1.81 3.84-1.43 3.84-1.43a4.95 4.95 0 0 1 .14 3.7 5.4 5.4 0 0 1 1.44 3.76c0 5.38-3.27 6.56-6.39 6.91"></path></svg></a><a href="https://www.linkedin.com/company/arduino" aria-label="LinkedIn" rel="noopener noreferrer" class="_Footer__social-link_1kn9u_178"><svg xmlns="http://www.w3.org/2000/svg" width="1em" height="1em" fill="none" viewBox="0 0 32 32"><path fill="currentColor" fill-rule="evenodd" d="M6.206 7.071a2.41 2.41 0 1 0 4.008 2.678A2.41 2.41 0 0 0 6.206 7.07M12.925 26h4.046v-7.482c-.016-.348.03-.697.138-1.028a2.305 2.305 0 0 1 2.162-1.54c1.819 0 2.455 1.161 2.455 2.865V26h4.08v-7.67c0-3.893-1.186-5.983-4.85-5.983A4.11 4.11 0 0 0 16.97 14.7v-2.074h-4.046c.055 1.19 0 13.375 0 13.375m4.046-11.302v.061h-.028zm-6.71-2.079H6.11V26h4.15z" clip-rule="evenodd"></path></svg></a><a href="https://x.com/arduino" aria-label="X" rel="noopener noreferrer" class="_Footer__social-link_1kn9u_178"><svg xmlns="http://www.w3.org/2000/svg" width="1em" height="1em" fill="currentColor" viewBox="0 0 32 32"><path d="M18.568 14.223 27.362 4h-2.749l-7.267 8.447L11.543 4h-7.5l9.134 13.294L3.967 28h2.75l7.681-8.93L20.534 28h7.499zm-8.283-8.148 13.927 19.92h-2.438L7.847 6.074z"></path></svg></a></div></div><div class="_Footer__column_1kn9u_69 _Footer__column--special-layout_1kn9u_75"><div data-font="" data-font-size="small" data-font-weight="bold" class="_Footer__column--title_1kn9u_94">Newsletter</div><div class="_Footer__newsletter_1kn9u_206"><input class="_input_tr6dw_1" type="email" placeholder="Enter your e-mail to sign up" data-font="" data-font-size="x-small" value=""/><button class="_btn_w5llj_1 _btn--secondary_w5llj_70 _btn--secondary--inverted_w5llj_101" type="button" data-font="" data-font-size="small" data-font-weight="bold">Subscribe</button></div></div></div><div class="_Footer__separator_1kn9u_11"></div><div class="_Footer__row_1kn9u_14"><div class="_Footer__column_1kn9u_69"><div data-font="" data-font-size="small" data-font-weight="bold" class="_Footer__column--title_1kn9u_94">company</div><div class="_Footer__column--link-list_1kn9u_108"><a href="https://arduino.cc/en/about" rel="noopener noreferrer" class="_btn_w5llj_1 _btn--tertiary_w5llj_114 _btn--small_w5llj_150 _btn--tertiary--default_w5llj_122 _Footer__column--accent-link_1kn9u_132" type="button" data-font="" data-font-size="x-small" data-font-weight="bold">About Arduino</a><a href="https://careers.arduino.cc/" rel="noopener noreferrer" class="_btn_w5llj_1 _btn--tertiary_w5llj_114 _btn--small_w5llj_150 _btn--tertiary--default_w5llj_122 _Footer__column--accent-link_1kn9u_132" type="button" data-font="" data-font-size="x-small" data-font-weight="bold">Careers</a><a href="https://www.arduino.cc/en/contact-us/" rel="noopener noreferrer" class="_btn_w5llj_1 _btn--small_w5llj_150 _btn--default_w5llj_32" type="button" data-font="" data-font-size="x-small" data-font-weight="bold">Contact us</a></div></div><div class="_Footer__column_1kn9u_69"><div data-font="" data-font-size="small" data-font-weight="bold" class="_Footer__column--title_1kn9u_94">solutions</div><div class="_Footer__column--link-list_1kn9u_108"><div data-font="" data-font-size="x-small"><a href="https://arduino.cc/pro/" class="_Footer__column--simple-link_1kn9u_122" rel="noopener noreferrer">Professional</a></div><div data-font="" data-font-size="x-small"><a href="https://arduino.cc/education" class="_Footer__column--simple-link_1kn9u_122" rel="noopener noreferrer">Education</a></div><div data-font="" data-font-size="x-small"><a href="https://arduino.cc/makers" class="_Footer__column--simple-link_1kn9u_122" rel="noopener noreferrer">Makers</a></div></div></div><div class="_Footer__column_1kn9u_69"><div data-font="" data-font-size="small" data-font-weight="bold" class="_Footer__column--title_1kn9u_94">products</div><div class="_Footer__column--link-list_1kn9u_108"><div data-font="" data-font-size="x-small"><a href="https://arduino.cc/en/hardware" class="_Footer__column--simple-link_1kn9u_122" rel="noopener noreferrer">Hardware</a></div><div data-font="" data-font-size="x-small"><a href="https://arduino.cc/en/software" class="_Footer__column--simple-link_1kn9u_122" rel="noopener noreferrer">Software</a></div><div data-font="" data-font-size="x-small"><a href="https://cloud.arduino.cc/" class="_Footer__column--simple-link_1kn9u_122" rel="noopener noreferrer">Arduino Cloud</a></div><div data-font="" data-font-size="x-small"><a href="https://cloud.arduino.cc/iot-remote-app/" class="_Footer__column--simple-link_1kn9u_122" rel="noopener noreferrer">IoT Remote App</a></div><a href="https://store.arduino.cc/" rel="noopener noreferrer" class="_btn_w5llj_1 _btn--secondary_w5llj_70 _btn--small_w5llj_150 _btn--secondary--inverted_w5llj_101" type="button" data-font="" data-font-size="x-small" data-font-weight="bold">Shop</a></div></div><div class="_Footer__column_1kn9u_69"><div data-font="" data-font-size="small" data-font-weight="bold" class="_Footer__column--title_1kn9u_94">community</div><div class="_Footer__column--link-list_1kn9u_108"><div data-font="" data-font-size="x-small"><a href="https://projecthub.arduino.cc/" class="_Footer__column--simple-link_1kn9u_122" rel="noopener noreferrer">Project Hub</a></div><div data-font="" data-font-size="x-small"><a href="https://labs.arduino.cc/en" class="_Footer__column--simple-link_1kn9u_122" rel="noopener noreferrer">Arduino Labs</a></div><div data-font="" data-font-size="x-small"><a href="https://discord.com/invite/jQJFwW7" class="_Footer__column--simple-link_1kn9u_122" rel="noopener noreferrer">Discord</a></div><div data-font="" data-font-size="x-small"><a href="https://forum.arduino.cc/" class="_Footer__column--simple-link_1kn9u_122" rel="noopener noreferrer">Forum</a></div><div data-font="" data-font-size="x-small"><a href="https://www.youtube.com/user/arduinoteam" class="_Footer__column--simple-link_1kn9u_122" rel="noopener noreferrer">YouTube</a></div><div data-font="" data-font-size="x-small"><a href="https://github.com/arduino/" class="_Footer__column--simple-link_1kn9u_122" rel="noopener noreferrer">GitHub</a></div></div></div><div class="_Footer__column_1kn9u_69"><div data-font="" data-font-size="small" data-font-weight="bold" class="_Footer__column--title_1kn9u_94">news</div><div class="_Footer__column--link-list_1kn9u_108"><div data-font="" data-font-size="x-small"><a href="https://days.arduino.cc/about" class="_Footer__column--simple-link_1kn9u_122" rel="noopener noreferrer">Arduino Days</a></div><div data-font="" data-font-size="x-small"><a href="https://blog.arduino.cc/" class="_Footer__column--simple-link_1kn9u_122" rel="noopener noreferrer">Blog</a></div></div></div><div class="_Footer__column_1kn9u_69"><div data-font="" data-font-size="small" data-font-weight="bold" class="_Footer__column--title_1kn9u_94">support</div><div class="_Footer__column--link-list_1kn9u_108"><div data-font="" data-font-size="x-small"><a href="https://docs.arduino.cc/" class="_Footer__column--simple-link_1kn9u_122" rel="noopener noreferrer">Documentation</a></div><div data-font="" data-font-size="x-small"><a href="https://support.arduino.cc/hc/en-us" class="_Footer__column--simple-link_1kn9u_122" rel="noopener noreferrer">Help Center</a></div><a href="https://www.arduino.cc/en/contact-us/" rel="noopener noreferrer" class="_btn_w5llj_1 _btn--secondary_w5llj_70 _btn--small_w5llj_150 _btn--secondary--inverted_w5llj_101" type="button" data-font="" data-font-size="x-small" data-font-weight="bold">Ask for Support</a></div></div></div><div class="_Footer__separator_1kn9u_11"></div><div class="_Footer__row_1kn9u_14"><div data-font="" data-font-size="xx-small">© 2026 Arduino</div><div class="_Footer__column--privacy-links_1kn9u_135"><div class="_Footer__column--privacy-links_group_1kn9u_149"><div data-font="" data-font-size="xx-small" data-font-weight="bold"><a href="https://arduino.cc/en/trademark" class="_Footer__column--simple-link_1kn9u_122" rel="noopener noreferrer">Trademarks &amp; Copyrights</a></div><div data-font="" data-font-size="xx-small" data-font-weight="bold"><a href="https://secure.ethicspoint.com/domain/media/en/gui/33575/" class="_Footer__column--simple-link_1kn9u_122" rel="noopener noreferrer">Whistleblowing</a></div><div data-font="" data-font-size="xx-small" data-font-weight="bold"><a href="https://arduino.cc/en/digital-services-act" class="_Footer__column--simple-link_1kn9u_122" rel="noopener noreferrer">Digital Services Act</a></div><div data-font="" data-font-size="xx-small" data-font-weight="bold"><a href="https://arduino.cc/en/terms-conditions" class="_Footer__column--simple-link_1kn9u_122" rel="noopener noreferrer">Terms of Service</a></div><div data-font="" data-font-size="xx-small" data-font-weight="bold"><a href="https://arduino.cc/en/privacy-policy" class="_Footer__column--simple-link_1kn9u_122" rel="noopener noreferrer">Privacy Policy</a></div><div data-font="" data-font-size="xx-small" data-font-weight="bold"><a href="https://arduino.cc/en/security" class="_Footer__column--simple-link_1kn9u_122" rel="noopener noreferrer">Security</a></div><button class="_Footer__column--simple-link_1kn9u_122 unstyled" style="background:none;border:none;cursor:pointer;padding:0" data-font="" data-font-size="xx-small" data-font-weight="bold">Cookie Settings</button></div></div></div></div><style>
    #nprogress {
      pointer-events: none;
    }
    #nprogress .bar {
      background: #008184;
      position: fixed;
      z-index: 9999;
      top: 0;
      left: 0;
      width: 100%;
      height: 3px;
    }
    #nprogress .peg {
      display: block;
      position: absolute;
      right: 0px;
      width: 100px;
      height: 100%;
      box-shadow: 0 0 10px #008184, 0 0 5px #008184;
      opacity: 1;
      -webkit-transform: rotate(3deg) translate(0px, -4px);
      -ms-transform: rotate(3deg) translate(0px, -4px);
      transform: rotate(3deg) translate(0px, -4px);
    }
    #nprogress .spinner {
      display: block;
      position: fixed;
      z-index: 1031;
      top: 15px;
      right: 15px;
    }
    #nprogress .spinner-icon {
      width: 18px;
      height: 18px;
      box-sizing: border-box;
      border: solid 2px transparent;
      border-top-color: #008184;
      border-left-color: #008184;
      border-radius: 50%;
      -webkit-animation: nprogresss-spinner 400ms linear infinite;
      animation: nprogress-spinner 400ms linear infinite;
    }
    .nprogress-custom-parent {
      overflow: hidden;
      position: relative;
    }
    .nprogress-custom-parent #nprogress .spinner,
    .nprogress-custom-parent #nprogress .bar {
      position: absolute;
    }
    @-webkit-keyframes nprogress-spinner {
      0% {
        -webkit-transform: rotate(0deg);
      }
      100% {
        -webkit-transform: rotate(360deg);
      }
    }
    @keyframes nprogress-spinner {
      0% {
        transform: rotate(0deg);
      }
      100% {
        transform: rotate(360deg);
      }
    }
  </style></div></div></div><script id="__NEXT_DATA__" type="application/json">{"props":{"pageProps":{"data":{"page":{"metatags":{"title":"Arduino - Home","description":"Open-source electronic prototyping platform enabling users to create interactive electronic objects.","twitterCard":null,"image":{"url":"https://www.datocms-assets.com/150482/1742470244-logo.png"}},"id":"eclJadTDR4mrbAApqCURlA","name":"Arduino Homepage","content":[{"__typename":"HomepageRecord","id":"VqdCWUL_RHuRCeAqHIHxjA","homepage":{"id":"FcHfRE1KSJ-fRD1iA1MYAw","title":"Homepage","content":[{"__typename":"PrimaryHeroProductVisionRecord","id":"PI7Eupk8QjesDO0ze8Hzjg","primaryHeroContent":{"id":"LB4loM5pSMyerAIB7mHFfA","title":"Arduino UNO Q: From blink to think","titleColor":"white","backgroundImage":null,"externalVideo":"https://content.arduino.cc/assets/homepage-16-9.webm","mobileVideo":"https://content.arduino.cc/assets/homepage-9-16.webm","buttons":[{"__typename":"LinkRecord","id":"R6PnjH-YTKu7IBKas1L2Ig","action":"discover more","url":"","pageLink":{"slug":"product-uno-q"},"description":"","blank":false,"linkStyle":"secondary-white-btn","icon":null,"dataLayer":[],"attr":""},{"__typename":"LinkRecord","id":"IHF5Urv_RiCb-ibo99tcZQ","action":"Buy now","url":"https://store-usa.arduino.cc/pages/uno-q","pageLink":null,"description":"","blank":false,"linkStyle":"primary-teal-btn","icon":null,"dataLayer":[],"attr":""}]}},{"__typename":"ProductHighlightRecord","id":"cRxHrrg9SD2c58bY5VmNug","productList":[{"id":"UWn-iYboQzCPs3e3YKY2tw","__typename":"ProductHighlightsItemRecord","title":"Arduino Starter Kit R4","description":"Whatever your path to innovation, start here","theme":"light-teal","image":{"url":"https://www.datocms-assets.com/150482/1764063710-img.png","responsiveImage":{"srcSet":"https://www.datocms-assets.com/150482/1764063710-img.png?auto=format\u0026dpr=0.25\u0026w=600 150w,https://www.datocms-assets.com/150482/1764063710-img.png?auto=format\u0026dpr=0.5\u0026w=600 300w,https://www.datocms-assets.com/150482/1764063710-img.png?auto=format\u0026dpr=0.75\u0026w=600 450w,https://www.datocms-assets.com/150482/1764063710-img.png?auto=format\u0026w=600 600w,https://www.datocms-assets.com/150482/1764063710-img.png?auto=format\u0026dpr=1.5\u0026w=600 900w","webpSrcSet":"","sizes":"(max-width: 600px) 100vw, 600px","src":"https://www.datocms-assets.com/150482/1764063710-img.png?auto=format\u0026w=600","width":600,"height":352,"aspectRatio":1.7044673539518902,"alt":null,"title":null,"base64":"data:image/png;base64,iVBORw0KGgoAAAANSUhEUgAAABgAAAAPCAMAAADJev/pAAABIFBMVEXj5+nj5+nj5+nj5+nj5+nj5+nj5+nj5+nj5+nj5+nj5+nj5+nj5+nj5+nj5+nj5+nj5+nj5+nj5+nj5+nj5+nj5+nj5+nj5+nj5+nj5+nj5+nj5+nj5+nj5+nj5+nj5+nj5+nj5+nj5+nj5+nj5+nj5+nj5+nj5+nj5+nj5+nj5+nj5+nj5+nj5+nj5+nj5+nj5+nj5+nj5+nj5+nj5+nj5+nj5+nj5+nj5+nj5+nj5+nj5+nj5+nj5+nj5+nj5+nj5+nj5+nj5+nj5+nj5+nj5+nj5+nj5+nj5+nj5+nj5+nj5+nj5+nj5+nj5+nj5+nj5+nj5+nj5+nj5+nj5+nj5+nj5+nj5+nj5+nj5+nj5+nj5+nj5+nj5+nj5+nj5+lNJFWbAAAAYHRSTlMAAQIDBAUGBwgJCgsNDg8QExUWFxgZGhscHiEiIyUmKCotMTIzNDc4PT4/QUNGR0lKS0xNUldYXF5gYWJlaWtsbXB0dXt8gIKHjY6Qk5SXmpudnp+pq660uLq8vr/ByMuUk9AlAAAAq0lEQVR42nXQ2w6CMAwGYNg5QIaH938/oySAOMe2rpMLRQTsVZMv6d+WZX+KLfo8S7tQixT6LRSHgmVQds8VnI+15CmMqm2XoE4HXU3gPeeiiTNUtda6FBylTQjQxTdIKaSgTBCCnBLK6AechBARPUMYg3PGz6PuiZA8CYbeDn1jFuEDxOgUi870V/ezrr2AUxTd4warO6AJBUXbweZyMMin7J1feZ6S/37uBdG2WJfiwe4mAAAAAElFTkSuQmCC","bgColor":"#e5be17"}},"buttons":[{"__typename":"LinkRecord","id":"RAcqTGxmRU-1VKYzeY8bAw","action":"Discover Starter Kit R4","url":"","pageLink":{"slug":"starterkit"},"description":"","blank":false,"linkStyle":"secondary-charcoal-btn","icon":null,"dataLayer":[],"attr":""}]},{"id":"HeJCvk9BTGmm63MNDzBgbw","__typename":"ProductHighlightsItemRecord","title":"Arduino UNO Q","description":"High-performance computing with real-time control.","theme":"dark","image":{"url":"https://www.datocms-assets.com/150482/1769011155-img.png","responsiveImage":{"srcSet":"https://www.datocms-assets.com/150482/1769011155-img.png?auto=format\u0026dpr=0.25\u0026w=600 150w,https://www.datocms-assets.com/150482/1769011155-img.png?auto=format\u0026dpr=0.5\u0026w=600 300w,https://www.datocms-assets.com/150482/1769011155-img.png?auto=format\u0026dpr=0.75\u0026w=600 450w,https://www.datocms-assets.com/150482/1769011155-img.png?auto=format\u0026w=600 600w,https://www.datocms-assets.com/150482/1769011155-img.png?auto=format\u0026dpr=1.5\u0026w=600 900w","webpSrcSet":"","sizes":"(max-width: 600px) 100vw, 600px","src":"https://www.datocms-assets.com/150482/1769011155-img.png?auto=format\u0026w=600","width":600,"height":352,"aspectRatio":1.7044673539518902,"alt":null,"title":null,"base64":"data:image/png;base64,iVBORw0KGgoAAAANSUhEUgAAABgAAAAPCAMAAADJev/pAAABHVBMVEVhdqBhdqBhdqBhdqBhdqBhdqBhdqBhdqBhdqBhdqBhdqBhdqBhdqBhdqBhdqBhdqBhdqBhdqBhdqBhdqBhdqBhdqBhdqBhdqBhdqBhdqBhdqBhdqBhdqBhdqBhdqBhdqBhdqBhdqBhdqBhdqBhdqBhdqBhdqBhdqBhdqBhdqBhdqBhdqBhdqBhdqBhdqBhdqBhdqBhdqBhdqBhdqBhdqBhdqBhdqBhdqBhdqBhdqBhdqBhdqBhdqBhdqBhdqBhdqBhdqBhdqBhdqBhdqBhdqBhdqBhdqBhdqBhdqBhdqBhdqBhdqBhdqBhdqBhdqBhdqBhdqBhdqBhdqBhdqBhdqBhdqBhdqBhdqBhdqBhdqBhdqBhdqBhdqBhdqBhdqDTTJnOAAAAX3RSTlMAAQIDBgcICgsNDhASFBUWGBkbHB0fIiMkJSkqKywtLi8yMzQ3ODo7P0FCREVGSUpMT1BSVFVXWVpbX2JjZ2lrbG5zdnl8f4CDhIaHio+SlJudoaKkqaqvsbO4ur2/wj7wU+0AAAClSURBVHjadZDdDoMwCIUFrdXqEp3v/4RL3FbX2hXQeeVfHNxAPsKBkyV/IttKlScUL0BVaSA3zGfQtHUO7M0rHEHXNVUGUhe6H/agubc3kyHrFAE/soLSGFMWCgSEQkF+BalaBpecEAFgt4piJCYA5hhjCBv4WqVQGGR09j1MO3E3C98Usrf9cz6c6yn6HMVZe36QHl6nPIYLr9yIMl+ZmEzTrvkB9sRMuanfl3cAAAAASUVORK5CYII=","bgColor":"#116eed"}},"buttons":[{"__typename":"LinkRecord","id":"Ml_sXov4Rq-7GzgCdDt1jg","action":"Buy Now","url":"https://store.arduino.cc/pages/uno-q","pageLink":null,"description":"","blank":true,"linkStyle":"secondary-white-btn","icon":null,"dataLayer":[],"attr":""}]},{"id":"G8b20P8-Q4OiL0ivN3pqWg","__typename":"ProductHighlightsItemRecord","title":"Arduino Cloud","description":"Bring your IoT projects to life quickly","theme":"teal","image":{"url":"https://www.datocms-assets.com/150482/1738746652-opta.png","responsiveImage":{"srcSet":"https://www.datocms-assets.com/150482/1738746652-opta.png?auto=format\u0026dpr=0.25\u0026w=600 100w,https://www.datocms-assets.com/150482/1738746652-opta.png?auto=format\u0026dpr=0.5\u0026w=600 201w,https://www.datocms-assets.com/150482/1738746652-opta.png?auto=format\u0026dpr=0.75\u0026w=600 301w,https://www.datocms-assets.com/150482/1738746652-opta.png?auto=format\u0026w=600 402w","webpSrcSet":"","sizes":"(max-width: 402px) 100vw, 402px","src":"https://www.datocms-assets.com/150482/1738746652-opta.png?auto=format\u0026w=600","width":402,"height":216,"aspectRatio":1.8611111111111112,"alt":null,"title":null,"base64":"data:image/png;base64,iVBORw0KGgoAAAANSUhEUgAAABgAAAANCAMAAACEsl7iAAABI1BMVEXFwb/Fwb/Fwb/Fwb/Fwb/Fwb/Fwb/Fwb/Fwb/Fwb/Fwb/Fwb/Fwb/Fwb/Fwb/Fwb/Fwb/Fwb/Fwb/Fwb/Fwb/Fwb/Fwb/Fwb/Fwb/Fwb/Fwb/Fwb/Fwb/Fwb/Fwb/Fwb/Fwb/Fwb/Fwb/Fwb/Fwb/Fwb/Fwb/Fwb/Fwb/Fwb/Fwb/Fwb/Fwb/Fwb/Fwb/Fwb/Fwb/Fwb/Fwb/Fwb/Fwb/Fwb/Fwb/Fwb/Fwb/Fwb/Fwb/Fwb/Fwb/Fwb/Fwb/Fwb/Fwb/Fwb/Fwb/Fwb/Fwb/Fwb/Fwb/Fwb/Fwb/Fwb/Fwb/Fwb/Fwb/Fwb/Fwb/Fwb/Fwb/Fwb/Fwb/Fwb/Fwb/Fwb/Fwb/Fwb/Fwb/Fwb/Fwb/Fwb/Fwb/Fwb/Fwb/Fwb/Fwb9qttysAAAAYXRSTlMAAgMEBQYHCAoLDA0ODxETFBUYGRscHR4hJScoKissLS4vMDIzNjc5PD1AQUtPUVJTVFVXXF1iY2dpamtub3BxcnN6e31/goSFiImLjI2QkZKTlJaYmZucnZ6goqOlpqut/uA84AAAAKFJREFUeNpd0NkOgyAQBVDBYavaJfb/f68PTdriVmFgKC8a6p0XJieXEKDaAxxTsW2Hq1Hc47gcoL9pDYxwtXYq4d63rVE1ficObCwbjNfyxIGCA1Y25k6aEIAoBnQlONdEopSLeUowuhYgBSTU8bIW0CiZhTOlQzjjaweeIrqFieSdjwwEbkBP3+Gcb4roh+ldPtfaR6d5RW6Ixy+Jn+ovP47cSgK9JRQjAAAAAElFTkSuQmCC","bgColor":"#18a4a8"}},"buttons":[{"__typename":"LinkRecord","id":"JyFPCT-HRYazFyfnb_Fl6w","action":"DISCOVER CLOUD","url":"https://cloud.arduino.cc/","pageLink":null,"description":"","blank":false,"linkStyle":"secondary-teal-btn","icon":null,"dataLayer":[],"attr":""}]}]},{"__typename":"BannerRecord","id":"YAn-Elj-QvivZbSfH5rp0w","bannerModel":{"__typename":"BannerModelRecord","id":"IkTQWMzuRtWFWGgjap5H4g","title":"Save up to 25% on boards, kits and Arduino® UNO™ Q Bundles.","subtitle":"\u003cp\u003ePromo ends September 10th, and while supplies last\u003c/p\u003e\n","textColor":"dark","size":"S","fullscreen":false,"storeButtons":false,"backgroundColor":null,"backgroundImage":{"alt":null,"url":"https://www.datocms-assets.com/150482/1785739461-arduino-cc-homepage-banner-desktop-3000x1758-background.png"},"spotlightImage":{"alt":null,"url":"https://www.datocms-assets.com/150482/1785739466-arduino-cc-homepage-banner-elements.png"},"tags":[{"title":"Back to school promo","backgroundColor":"orange","mono":true,"icon":null}],"buttons":[{"__typename":"LinkRecord","id":"fw4KAndcS9-3APu57CpSjw","action":"SHOP THE SALE NOW","url":"https://store-usa.arduino.cc/pages/back-to-school","pageLink":null,"description":"","blank":false,"linkStyle":"primary-teal-btn","icon":null,"dataLayer":[],"attr":""}]}},{"__typename":"BannerRecord","id":"XkQt3Q4hSci8pSA-quAllw","bannerModel":{"__typename":"BannerModelRecord","id":"SUTIe3wGQxayKz47tX80Aw","title":"Arduino is now a Qualcomm company","subtitle":"","textColor":"light","size":"S","fullscreen":true,"storeButtons":false,"backgroundColor":null,"backgroundImage":{"alt":null,"url":"https://www.datocms-assets.com/150482/1772726112-qualcomm-banner.png"},"spotlightImage":{"alt":null,"url":"https://www.datocms-assets.com/150482/1777475656-banner-qualcomm.png"},"tags":[],"buttons":[{"__typename":"LinkRecord","id":"foDYoVGKRbuYANs5nK2Nyg","action":"Learn More","url":"https://www.arduino.cc/qualcomm","pageLink":null,"description":"","blank":false,"linkStyle":"secondary-white","icon":null,"dataLayer":[],"attr":""}]}},{"__typename":"SolutionsSectionRecord","id":"UlOKmv0kTESDNSd684yLSg","solutionsSectionModel":{"id":"aRhTEnfATE259Zx3vdGM9w","title":"Our Solutions","items":[{"__typename":"SolutionCardModelRecord","id":"fjWwsfN7SyuniEoCWnLXmQ","title":"Innovate your industry","description":"Cutting-edge, out-of-the-box solutions for professionals in any field","tag":{"title":"Professional","backgroundColor":"lime","mono":true,"icon":null},"cardType":"pro","buttons":[{"__typename":"LinkRecord","id":"V4U2otjQQASw7iI914iIGw","action":"discover","url":"https://www.arduino.cc/pro/","pageLink":null,"description":"","blank":true,"linkStyle":"secondary-white-btn","icon":null,"dataLayer":[],"attr":""},{"__typename":"LinkRecord","id":"VIBKONnNTai8Sv_xGq1CiQ","action":"Contact sales","url":"https://www.arduino.cc/pro/contact-us/","pageLink":null,"description":"","blank":true,"linkStyle":"tertiary-white","icon":null,"dataLayer":[],"attr":""}],"img":{"alt":null,"url":"https://www.datocms-assets.com/150482/1738941205-pro-solution-card.svg"}},{"__typename":"SolutionCardModelRecord","id":"av9U6WIuRmGIVyjVr0dCFA","title":"Together, we build","description":"A community of millions, united by creativity and passion for innovation","tag":{"title":"Maker","backgroundColor":"teal","mono":true,"icon":null},"cardType":"maker","buttons":[{"__typename":"LinkRecord","id":"IBGZ7Y3xSram1t1qp8Dfmw","action":"discover","url":"https://arduino.cc/maker","pageLink":null,"description":"","blank":true,"linkStyle":"secondary-white-btn","icon":null,"dataLayer":[],"attr":""}],"img":{"alt":null,"url":"https://www.datocms-assets.com/150482/1738946024-maker-solution-card.svg"}},{"__typename":"SolutionCardModelRecord","id":"ZCwzlICwQcutX8jnvYM0tA","title":"Inspire the future","description":"Shaping minds, sparking curiosity, and building skills for tomorrow","tag":{"title":"Education","backgroundColor":"tangerine","mono":true,"icon":null},"cardType":"edu","buttons":[{"__typename":"LinkRecord","id":"C809RlDBQ8CZWBWZkUxj2g","action":"discover","url":"https://www.arduino.cc/education","pageLink":null,"description":"","blank":true,"linkStyle":"secondary-white-btn","icon":null,"dataLayer":[],"attr":""}],"img":{"alt":null,"url":"https://www.datocms-assets.com/150482/1739176609-edu-solution-card.svg"}}]}},{"__typename":"SuccessStoriesCarouselRecord","id":"Y4gVr9hmSriOUIhfGslcbA","carousel":{"__typename":"SuccessStoriesCarouselModelRecord","id":"YUQ4xUkXTKOWd34Rd2TPZw","title":"Success Stories","list":[{"__typename":"SuccessStoriesCardRecord","title":"Two NEW Arduino Plug and Make Kit projects recreate iconic vintage games","tag":{"title":"Maker","backgroundColor":"teal","mono":true,"icon":null},"url":"https://blog.arduino.cc/2024/09/10/two-new-arduino-plug-and-make-kit-projects-recreate-iconic-vintage-games/","image":{"url":"https://www.datocms-assets.com/150482/1741354670-c6ff7a171422510116cada7b312db11b.jpeg","responsiveImage":{"srcSet":"https://www.datocms-assets.com/150482/1741354670-c6ff7a171422510116cada7b312db11b.jpeg?auto=format\u0026dpr=0.25\u0026w=600 150w,https://www.datocms-assets.com/150482/1741354670-c6ff7a171422510116cada7b312db11b.jpeg?auto=format\u0026dpr=0.5\u0026w=600 300w,https://www.datocms-assets.com/150482/1741354670-c6ff7a171422510116cada7b312db11b.jpeg?auto=format\u0026dpr=0.75\u0026w=600 450w,https://www.datocms-assets.com/150482/1741354670-c6ff7a171422510116cada7b312db11b.jpeg?auto=format\u0026w=600 600w,https://www.datocms-assets.com/150482/1741354670-c6ff7a171422510116cada7b312db11b.jpeg?auto=format\u0026dpr=1.5\u0026w=600 900w,https://www.datocms-assets.com/150482/1741354670-c6ff7a171422510116cada7b312db11b.jpeg?auto=format\u0026dpr=2\u0026w=600 1200w,https://www.datocms-assets.com/150482/1741354670-c6ff7a171422510116cada7b312db11b.jpeg?auto=format\u0026dpr=3\u0026w=600 1800w,https://www.datocms-assets.com/150482/1741354670-c6ff7a171422510116cada7b312db11b.jpeg?auto=format\u0026dpr=4\u0026w=600 2400w","webpSrcSet":"","sizes":"(max-width: 600px) 100vw, 600px","src":"https://www.datocms-assets.com/150482/1741354670-c6ff7a171422510116cada7b312db11b.jpeg?auto=format\u0026w=600","width":600,"height":450,"aspectRatio":1.3333333333333333,"alt":null,"title":null,"base64":"data:image/jpeg;base64,/9j/4AAQSkZJRgABAQAAAQABAAD/2wCEAAoHBwgHBgoICAgLERQQDhUODQ4VGhgNDQ0NFx8aGBYTFiEmJysjGh0oHRUiJDUlKC0vMjIyGSI4PTcwPCsxMi8BCgsLDg0OHA4NHS8dFhwvLy8vLy8vLy8vLy8vNS8vLy8vLy8vLy8vLy8vLy8vLy8vLy8vLy8vLy8vLy8vLy8vL//AABEIABIAGAMBIgACEQEDEQH/xAAYAAEBAQEBAAAAAAAAAAAAAAAFAAYHAf/EACAQAAEDBAIDAAAAAAAAAAAAAAEAAgQDBRExEyESFSL/xAAVAQEBAAAAAAAAAAAAAAAAAAAEA//EABkRAAMBAQEAAAAAAAAAAAAAAAABMUEhAv/aAAwDAQACEQMRAD8A2VG4Gjayco+neHV6ZaCiqtWWbO7DTpBQJExnl8nag+srh0q3SHihnKllolxmcGA0qV154HdFS0end0NIGK0eLuhtSlDRDg3AaOHQXilJagZ0/9k=","bgColor":"#f4b202"}}},{"__typename":"SuccessStoriesCardRecord","title":"To “fix the biggest machines in the world, anytime and anywhere,” requires remote... ","tag":{"title":"Professional","backgroundColor":"charcoal","mono":true,"icon":null},"url":"https://www.arduino.cc/pro/success-story-atlas-machine-and-supply/","image":{"url":"https://www.datocms-assets.com/150482/1741354706-23c6592450ef71869726c2743d757f4f.png","responsiveImage":{"srcSet":"https://www.datocms-assets.com/150482/1741354706-23c6592450ef71869726c2743d757f4f.png?auto=format\u0026dpr=0.25\u0026w=600 150w,https://www.datocms-assets.com/150482/1741354706-23c6592450ef71869726c2743d757f4f.png?auto=format\u0026dpr=0.5\u0026w=600 300w,https://www.datocms-assets.com/150482/1741354706-23c6592450ef71869726c2743d757f4f.png?auto=format\u0026dpr=0.75\u0026w=600 450w,https://www.datocms-assets.com/150482/1741354706-23c6592450ef71869726c2743d757f4f.png?auto=format\u0026w=600 600w,https://www.datocms-assets.com/150482/1741354706-23c6592450ef71869726c2743d757f4f.png?auto=format\u0026dpr=1.5\u0026w=600 900w,https://www.datocms-assets.com/150482/1741354706-23c6592450ef71869726c2743d757f4f.png?auto=format\u0026dpr=2\u0026w=600 1200w,https://www.datocms-assets.com/150482/1741354706-23c6592450ef71869726c2743d757f4f.png?auto=format\u0026dpr=3\u0026w=600 1800w","webpSrcSet":"","sizes":"(max-width: 600px) 100vw, 600px","src":"https://www.datocms-assets.com/150482/1741354706-23c6592450ef71869726c2743d757f4f.png?auto=format\u0026w=600","width":600,"height":400,"aspectRatio":1.5,"alt":null,"title":null,"base64":"data:image/jpeg;base64,/9j/4AAQSkZJRgABAQAAAQABAAD/2wCEAAoHBwgHBgoICAgLDxALDhgODQwNDhINFg0PFx8ZGBYTFhUaHysjGh0oHSEWJDUlKC0vMjIyGSI4PTcwPCsxMi8BCgsLDg0OHA8QEC8cFh0vLy8vLy8vLy8vLy8vLy8vLy8vLy8vLy8vLy8vLy8vLy8vLy8vLy8vLy8vLy8vLy8vL//AABEIABAAGAMBIgACEQEDEQH/xAAZAAABBQAAAAAAAAAAAAAAAAAFAAEEBgf/xAAfEAABBAEFAQAAAAAAAAAAAAABAAIDBAUTFCFRYRH/xAAXAQADAQAAAAAAAAAAAAAAAAABAwQA/8QAFhEBAQEAAAAAAAAAAAAAAAAAAQAC/9oADAMBAAIRAxEAPwCFbz0L2kAoXRtB+RDh2qybBDuSUSw9lu5CyBL22jSzatZo8ToS278jASU6kC//2Q==","bgColor":"#05966a"}}},{"__typename":"SuccessStoriesCardRecord","title":"Exploring the Moon and cultivating Earth - STEM projects that inspire, featuring Roland Schulz","tag":{"title":"Education","backgroundColor":"tangerine","mono":true,"icon":null},"url":"https://www.arduino.cc/education/exploring-the-moon-and-cultivating-earth-stem-projects-that-inspire-featuring-rol/","image":{"url":"https://www.datocms-assets.com/150482/1741354743-d482bd26c8bb05e9582a1b4927fd956c.jpeg","responsiveImage":{"srcSet":"https://www.datocms-assets.com/150482/1741354743-d482bd26c8bb05e9582a1b4927fd956c.jpeg?auto=format\u0026dpr=0.25\u0026w=600 150w,https://www.datocms-assets.com/150482/1741354743-d482bd26c8bb05e9582a1b4927fd956c.jpeg?auto=format\u0026dpr=0.5\u0026w=600 300w,https://www.datocms-assets.com/150482/1741354743-d482bd26c8bb05e9582a1b4927fd956c.jpeg?auto=format\u0026dpr=0.75\u0026w=600 450w,https://www.datocms-assets.com/150482/1741354743-d482bd26c8bb05e9582a1b4927fd956c.jpeg?auto=format\u0026w=600 600w,https://www.datocms-assets.com/150482/1741354743-d482bd26c8bb05e9582a1b4927fd956c.jpeg?auto=format\u0026dpr=1.5\u0026w=600 900w,https://www.datocms-assets.com/150482/1741354743-d482bd26c8bb05e9582a1b4927fd956c.jpeg?auto=format\u0026dpr=2\u0026w=600 1200w,https://www.datocms-assets.com/150482/1741354743-d482bd26c8bb05e9582a1b4927fd956c.jpeg?auto=format\u0026dpr=3\u0026w=600 1800w,https://www.datocms-assets.com/150482/1741354743-d482bd26c8bb05e9582a1b4927fd956c.jpeg?auto=format\u0026dpr=4\u0026w=600 2400w","webpSrcSet":"","sizes":"(max-width: 600px) 100vw, 600px","src":"https://www.datocms-assets.com/150482/1741354743-d482bd26c8bb05e9582a1b4927fd956c.jpeg?auto=format\u0026w=600","width":600,"height":390,"aspectRatio":1.5364086923370188,"alt":null,"title":null,"base64":"data:image/jpeg;base64,/9j/4AAQSkZJRgABAQAAAQABAAD/2wCEAAoHBwgHBgoICAgLDRULDhgQFQ0VDhsOFhUNFx0dGBYTFhUdHysjHR0oKRUWJDUlKC0vMjIyGSI4PTcwPCsxMi8BCgsLDg0OHRANHS8cFhwvLy8vLy8vLy8vLy8vLy8vLy8vLy8vLy8vLy8vLy8vLy8vLy8vLy8vLy8vLy8vLy8vL//AABEIABAAGAMBIgACEQEDEQH/xAAYAAACAwAAAAAAAAAAAAAAAAAEBgABBf/EABwQAAIDAAMBAAAAAAAAAAAAAAEDAAIEBRIxIf/EABcBAAMBAAAAAAAAAAAAAAAAAAEDBAD/xAAaEQABBQEAAAAAAAAAAAAAAAAAAhESEzEB/9oADAMBAAIRAxEAPwBwVfEUkCwmW2metr2FhAk5mqSbGx+Rb5Lmr523X2MQnrlOBT+SUndYdh7LiPq3sbqNuxkhiaw//9k=","bgColor":"#eab33f"}}},{"__typename":"SuccessStoriesCardRecord","title":"Innovating the future of automotive with rapid prototyping","tag":{"title":"Professional","backgroundColor":"charcoal","mono":true,"icon":null},"url":"https://www.arduino.cc/pro/case-studies-steelcase/","image":{"url":"https://www.datocms-assets.com/150482/1742303880-47ea25f46c304e5862ca44ae830438e0.png","responsiveImage":{"srcSet":"https://www.datocms-assets.com/150482/1742303880-47ea25f46c304e5862ca44ae830438e0.png?auto=format\u0026dpr=0.25\u0026w=600 150w,https://www.datocms-assets.com/150482/1742303880-47ea25f46c304e5862ca44ae830438e0.png?auto=format\u0026dpr=0.5\u0026w=600 300w,https://www.datocms-assets.com/150482/1742303880-47ea25f46c304e5862ca44ae830438e0.png?auto=format\u0026dpr=0.75\u0026w=600 450w,https://www.datocms-assets.com/150482/1742303880-47ea25f46c304e5862ca44ae830438e0.png?auto=format\u0026w=600 600w,https://www.datocms-assets.com/150482/1742303880-47ea25f46c304e5862ca44ae830438e0.png?auto=format\u0026dpr=1.5\u0026w=600 900w,https://www.datocms-assets.com/150482/1742303880-47ea25f46c304e5862ca44ae830438e0.png?auto=format\u0026dpr=2\u0026w=600 1200w,https://www.datocms-assets.com/150482/1742303880-47ea25f46c304e5862ca44ae830438e0.png?auto=format\u0026dpr=3\u0026w=600 1800w,https://www.datocms-assets.com/150482/1742303880-47ea25f46c304e5862ca44ae830438e0.png?auto=format\u0026dpr=4\u0026w=600 2400w","webpSrcSet":"","sizes":"(max-width: 600px) 100vw, 600px","src":"https://www.datocms-assets.com/150482/1742303880-47ea25f46c304e5862ca44ae830438e0.png?auto=format\u0026w=600","width":600,"height":337,"aspectRatio":1.7757009345794392,"alt":null,"title":null,"base64":"data:image/jpeg;base64,/9j/4AAQSkZJRgABAQAAAQABAAD/2wCEAAoHBwgHBgoICAgLCgoUDhgbFRUNDhUVHhUVHR8dHRYTFhUdHysjGh0oHSEWJDUlKC0vMjIyGSI4PTcwPCsxMi8BCgsLDg0OHA0KHDscFhwvLy8vLy8vLy8vLy8vLy8vLy8vLy8vLy8vLy8vLy8vLy8vLy8vLy8vLy8vLy8vLy8vL//AABEIAA4AGAMBIgACEQEDEQH/xAAYAAEAAwEAAAAAAAAAAAAAAAAGAQIFAP/EAB4QAAEEAgMBAAAAAAAAAAAAAAIAAQMEBUESEyIR/8QAFgEBAQEAAAAAAAAAAAAAAAAAAwIB/8QAGBEAAwEBAAAAAAAAAAAAAAAAAAECEgP/2gAMAwEAAhEDEQA/AEN2pDDi3+OjdrHxzUXJMJqQzY70SzL9AIMORC+kagVdJA1ypGNLizqVcg7IyZ32uW5ZDuT/2Q==","bgColor":"#358892"}}},{"__typename":"SuccessStoriesCardRecord","title":"It’s silver, it’s green, it’s the Batteryrunner! An Arduino-powered, fully custom electric car","tag":{"title":"Maker","backgroundColor":"teal","mono":true,"icon":null},"url":"https://blog.arduino.cc/2024/11/27/its-silver-its-green-its-the-batteryrunner-an-arduino-powered-fully-custom-electric-car/?_gl=1*1a2tfsf*_up*MQ..*_ga*OTI1ODUyNzgwLjE3NDI0MDQ0MTA.*_ga_NEXN8H46L5*MTc0MjQwNDQwOS4xLjEuMTc0MjQwNDQ3MS4wLjAuNzg2MDY0MTQ5","image":{"url":"https://www.datocms-assets.com/150482/1742547498-548aa5d5935bd5928845e1c3bd13f46a.jpeg","responsiveImage":{"srcSet":"https://www.datocms-assets.com/150482/1742547498-548aa5d5935bd5928845e1c3bd13f46a.jpeg?auto=format\u0026dpr=0.25\u0026w=600 150w,https://www.datocms-assets.com/150482/1742547498-548aa5d5935bd5928845e1c3bd13f46a.jpeg?auto=format\u0026dpr=0.5\u0026w=600 300w,https://www.datocms-assets.com/150482/1742547498-548aa5d5935bd5928845e1c3bd13f46a.jpeg?auto=format\u0026dpr=0.75\u0026w=600 450w,https://www.datocms-assets.com/150482/1742547498-548aa5d5935bd5928845e1c3bd13f46a.jpeg?auto=format\u0026w=600 600w,https://www.datocms-assets.com/150482/1742547498-548aa5d5935bd5928845e1c3bd13f46a.jpeg?auto=format\u0026dpr=1.5\u0026w=600 900w,https://www.datocms-assets.com/150482/1742547498-548aa5d5935bd5928845e1c3bd13f46a.jpeg?auto=format\u0026dpr=2\u0026w=600 1200w","webpSrcSet":"","sizes":"(max-width: 600px) 100vw, 600px","src":"https://www.datocms-assets.com/150482/1742547498-548aa5d5935bd5928845e1c3bd13f46a.jpeg?auto=format\u0026w=600","width":600,"height":450,"aspectRatio":1.3333333333333333,"alt":null,"title":null,"base64":"data:image/jpeg;base64,/9j/4AAQSkZJRgABAQAAAQABAAD/2wCEAAoHBwgHBgoICAgLFhMLDhgSGhUNDhYQFhENIxMbGCIVIhUdHysjGikoHSEiJDUlKC0vMjIyGSI4PTcwPCsxMi8BCgsLDg0OFQ4NEy8cFhwvLy8vLy8vLy8vLy8vLy8vLy8vLy8vLy8vLy8vLy8vLy8vLy8vLy8vLy8vLy8vLy8vL//AABEIABIAGAMBIgACEQEDEQH/xAAaAAACAgMAAAAAAAAAAAAAAAAABgQFAQID/8QAJRAAAQMCBQQDAAAAAAAAAAAAAQACAwQFFSFBUZEGIzFhEhMi/8QAFgEBAQEAAAAAAAAAAAAAAAAAAgEA/8QAFxEBAQEBAAAAAAAAAAAAAAAAAAECEv/aAAwDAQACEQMRAD8A7vu90MJ7ZUCLGKsuc2M8Joqpmx0LniEZDZVto6lMQkH0DL0jnMa7VtudfYqstEZ4QplD1hM+7OaKbXZClxE7MNWBhT8h4SvbGj5S5DVCEshWtna3GX/kedlhCFqj/9k=","bgColor":"#0d41af"}}},{"__typename":"SuccessStoriesCardRecord","title":"AMB Vapor Monitoring leverages the Arduino Cloud for faster, more connected reporting","tag":{"title":"Professional","backgroundColor":"charcoal","mono":true,"icon":null},"url":"https://www.arduino.cc/pro/case-studies-amb-vapor-monitoring/","image":{"url":"https://www.datocms-assets.com/150482/1742551590-image.png","responsiveImage":{"srcSet":"https://www.datocms-assets.com/150482/1742551590-image.png?auto=format\u0026dpr=0.25\u0026w=600 84w,https://www.datocms-assets.com/150482/1742551590-image.png?auto=format\u0026dpr=0.5\u0026w=600 168w,https://www.datocms-assets.com/150482/1742551590-image.png?auto=format\u0026dpr=0.75\u0026w=600 252w,https://www.datocms-assets.com/150482/1742551590-image.png?auto=format\u0026w=600 337w","webpSrcSet":"","sizes":"(max-width: 337px) 100vw, 337px","src":"https://www.datocms-assets.com/150482/1742551590-image.png?auto=format\u0026w=600","width":337,"height":246,"aspectRatio":1.3699186991869918,"alt":null,"title":null,"base64":"data:image/png;base64,iVBORw0KGgoAAAANSUhEUgAAABgAAAASCAIAAADOjonJAAADHUlEQVR42j2U647bNhCFeRneJNnYTRMgSIsg7/8afYv+K4p2s0HXlkRSEu8dytsIHwYELZ05PBwY2h+/E2vn1+9//v3PXz9e36xLnJmn54+//frl27fPX78+ffrIhdpz+Pf29vLy8uP1+3y/5Ri1FE/X66dfPnx4fh7HAUgpJJecay6l5FpKLQ33Sl+806houIu02mrt9Z3zIa2vgRyxHTF0UggRyZzzkBMSc0o5p0wYz+cip3JSC7ZlrKZasXfuFYjbve9snWPfAh6NqLDv4dhj2CNWaDTE3ikeEUnYLCZWadIJ+2WEZ/Crt7az9rpZ79FRBT24zXd2YXaRK2pu7uzU6W5JrodQhwmHipwCzLNdMezZLrNbFrucQplJfXXT4sfFMWlESGjFLu7EYy0pFSUlE4MyGjSpBO7zuliL9cTOp1CkIC52mFdzXQkooRU6mu/rAzuvmFNSEgjT0OUwLLijiy5kcdG1fgpN6/C06MvSQAqlMLHbfb69zfc37DxXvAylMCbJBVDAmGCx7sQ/6uxdZjxxIRY7LFbNKwqBknsIt9vcud/tvKBQ1IoTqrANgxwzuCP4I7jjcDuyu+1IjBWplPeTdcY6KlUXOo77st6XZZ5Xu6ytpBy14GCUxqxqqRBKeSeXI+cjpcQojXELwYfD7zsgJaOQ8975zW2b37ZWMq1t03rfDwQnDxpnFUeL0YJQminJhKTWUquxIOg6FUr6DOHQPMiJloKDmcs5jDjztQLXkkfJ8cBaMiVYEJQQKngD1jitvQ0ljFT6TmOEsP4K5YwB5wLNACYOahxVLdIZOXZEQTcEjw4awZgFR3V8tWQugSvgUmBkrFZpNIJjpEetBwPmOkZSzTaZdTR+NLWw1tQ4qMFIxGhhFPYspKrHZ4PB0/BWzTgMl3G8TJ1pguEyodCwjeYyGTfqM0W0pjtand3QUaVN7bpvbqa1wkkb8UGh6zQhKKTwt5Kwvxp0rzGSVuXQbUv9QKEQ/ot0R7qbwisD0lC0m+qMCAghcKYeD2BmEvoV4OJ/MEg8GuQzUdHfzxgTabiQ+OEDJf8DAEC83NLJsT8AAAAASUVORK5CYII=","bgColor":"#d82826"}}},{"__typename":"SuccessStoriesCardRecord","title":"By Educators, For Educators: Meet The Teacher Behind The Arduino Science Kit R3","tag":{"title":"Education","backgroundColor":"tangerine","mono":true,"icon":null},"url":"https://www.arduino.cc/education/meet-the-teacher-science-kit/","image":{"url":"https://www.datocms-assets.com/150482/1742547772-43588221d8e652f925e71b5b347790ab.jpeg","responsiveImage":{"srcSet":"https://www.datocms-assets.com/150482/1742547772-43588221d8e652f925e71b5b347790ab.jpeg?auto=format\u0026dpr=0.25\u0026w=600 150w,https://www.datocms-assets.com/150482/1742547772-43588221d8e652f925e71b5b347790ab.jpeg?auto=format\u0026dpr=0.5\u0026w=600 300w,https://www.datocms-assets.com/150482/1742547772-43588221d8e652f925e71b5b347790ab.jpeg?auto=format\u0026dpr=0.75\u0026w=600 450w,https://www.datocms-assets.com/150482/1742547772-43588221d8e652f925e71b5b347790ab.jpeg?auto=format\u0026w=600 600w,https://www.datocms-assets.com/150482/1742547772-43588221d8e652f925e71b5b347790ab.jpeg?auto=format\u0026dpr=1.5\u0026w=600 900w,https://www.datocms-assets.com/150482/1742547772-43588221d8e652f925e71b5b347790ab.jpeg?auto=format\u0026dpr=2\u0026w=600 1200w,https://www.datocms-assets.com/150482/1742547772-43588221d8e652f925e71b5b347790ab.jpeg?auto=format\u0026dpr=3\u0026w=600 1800w,https://www.datocms-assets.com/150482/1742547772-43588221d8e652f925e71b5b347790ab.jpeg?auto=format\u0026dpr=4\u0026w=600 2400w","webpSrcSet":"","sizes":"(max-width: 600px) 100vw, 600px","src":"https://www.datocms-assets.com/150482/1742547772-43588221d8e652f925e71b5b347790ab.jpeg?auto=format\u0026w=600","width":600,"height":450,"aspectRatio":1.3333333333333333,"alt":null,"title":null,"base64":"data:image/jpeg;base64,/9j/4AAQSkZJRgABAQAAAQABAAD/2wCEAAoHBwgHBgoICAgLFQoXDhcaFhUZDhIVDQ0PFxoaGBYVFhUdISsjGh0oHRUiJDUlKC0vMjIyHSI4PTcwPCsxMi8BCgsLBQ0OHBENHC8dFhwvNS8vLy8vLy8vLy8vLy8vLy8vLy8vLy8vLy8vLy8vLy8vLy8vLy8vLy8vLy8vLy8vL//AABEIABIAGAMBIgACEQEDEQH/xAAZAAACAwEAAAAAAAAAAAAAAAAABAMFBgH/xAAfEAACAgEEAwAAAAAAAAAAAAABBAACAxESEzEhQZH/xAAWAQEBAQAAAAAAAAAAAAAAAAADBAL/xAAcEQABAwUAAAAAAAAAAAAAAAAAAgMRAQQUMTL/2gAMAwEAAhEDEQA/ALN5sWZFdZZq4AF9+vqYzNR2ztbbTNAuwzwDGQeoTWNSht7JknWsLvEawiya7FGjcgwhKVbSOilzA3krXn6HyT4gOUeJyEJGjbvQ7UDf1OQhJlbKkcn/2Q==","bgColor":"#c5493f"}}},{"__typename":"SuccessStoriesCardRecord","title":"A riddle wrapped in an enigma… made easy, with Arduino Plug and Make Kit","tag":{"title":"Maker","backgroundColor":"teal","mono":true,"icon":null},"url":"https://blog.arduino.cc/2024/11/15/a-riddle-wrapped-in-an-enigma-made-easy-with-arduino-plug-and-make-kit/?_gl=1*1vmef3y*_up*MQ..*_ga*MTg2MDYzNTIxNi4xNzQyNTQ4MjM4*_ga_NEXN8H46L5*MTc0MjU0ODIzNy4xLjEuMTc0MjU0ODI3MC4wLjAuMjMwNjc3OTk.","image":{"url":"https://www.datocms-assets.com/150482/1742547971-cd7a4c4170727bda365ee13b563802f8.jpeg","responsiveImage":{"srcSet":"https://www.datocms-assets.com/150482/1742547971-cd7a4c4170727bda365ee13b563802f8.jpeg?auto=format\u0026dpr=0.25\u0026w=600 150w,https://www.datocms-assets.com/150482/1742547971-cd7a4c4170727bda365ee13b563802f8.jpeg?auto=format\u0026dpr=0.5\u0026w=600 300w,https://www.datocms-assets.com/150482/1742547971-cd7a4c4170727bda365ee13b563802f8.jpeg?auto=format\u0026dpr=0.75\u0026w=600 450w,https://www.datocms-assets.com/150482/1742547971-cd7a4c4170727bda365ee13b563802f8.jpeg?auto=format\u0026w=600 600w,https://www.datocms-assets.com/150482/1742547971-cd7a4c4170727bda365ee13b563802f8.jpeg?auto=format\u0026dpr=1.5\u0026w=600 900w,https://www.datocms-assets.com/150482/1742547971-cd7a4c4170727bda365ee13b563802f8.jpeg?auto=format\u0026dpr=2\u0026w=600 1200w,https://www.datocms-assets.com/150482/1742547971-cd7a4c4170727bda365ee13b563802f8.jpeg?auto=format\u0026dpr=3\u0026w=600 1800w","webpSrcSet":"","sizes":"(max-width: 600px) 100vw, 600px","src":"https://www.datocms-assets.com/150482/1742547971-cd7a4c4170727bda365ee13b563802f8.jpeg?auto=format\u0026w=600","width":600,"height":450,"aspectRatio":1.3333333333333333,"alt":null,"title":null,"base64":"data:image/jpeg;base64,/9j/4AAQSkZJRgABAQAAAQABAAD/2wCEAAoHBwgHBgoICAgLFgoVDiQODg0WFh0VFQ0iFysZHhYfFiEeHysjGh0oHRUiJDUlKC0vMjIyGSI4PTcwPCsxMi8BCgsLDg4OHA0NHC8cFhw7Ly8vLy8vLy8vLy8vLy8vLy8vLy8vLy8vLy8vLy8vLy8vLy8vLy8vLy8vLy8vLy8vL//AABEIABIAGAMBIgACEQEDEQH/xAAYAAEAAwEAAAAAAAAAAAAAAAAABQYHA//EACIQAAICAgEDBQAAAAAAAAAAAAECAAMEBREGFDESFTVBUf/EABYBAQEBAAAAAAAAAAAAAAAAAAMEAv/EABwRAAIBBQEAAAAAAAAAAAAAAAACAwQRIjEyAf/aAAwDAQACEQMRAD8A0WtxYrhvyVSu+jG3b+ph5klm7VaLWRT9TN9rm3e9llY8cwqmTI1H41jTtW1ORtuVMSv9GZwOcDY8RUlxDZWucdmT3xlR2XyMRJanosj0TfSxPf8AmIiInJhtn//Z","bgColor":"#ba9b26"}}},{"__typename":"SuccessStoriesCardRecord","title":"Abinsula innovates e-mobility with a powerful, compact, and customizable smart EV charger","tag":{"title":"Professional","backgroundColor":"charcoal","mono":true,"icon":null},"url":"https://www.arduino.cc/pro/case-studies-abinsula/","image":{"url":"https://www.datocms-assets.com/150482/1742548029-feb56abe7e18e49ad192b6468f5c0ded.png","responsiveImage":{"srcSet":"https://www.datocms-assets.com/150482/1742548029-feb56abe7e18e49ad192b6468f5c0ded.png?auto=format\u0026dpr=0.25\u0026w=600 150w,https://www.datocms-assets.com/150482/1742548029-feb56abe7e18e49ad192b6468f5c0ded.png?auto=format\u0026dpr=0.5\u0026w=600 300w,https://www.datocms-assets.com/150482/1742548029-feb56abe7e18e49ad192b6468f5c0ded.png?auto=format\u0026dpr=0.75\u0026w=600 450w,https://www.datocms-assets.com/150482/1742548029-feb56abe7e18e49ad192b6468f5c0ded.png?auto=format\u0026w=600 600w,https://www.datocms-assets.com/150482/1742548029-feb56abe7e18e49ad192b6468f5c0ded.png?auto=format\u0026dpr=1.5\u0026w=600 900w,https://www.datocms-assets.com/150482/1742548029-feb56abe7e18e49ad192b6468f5c0ded.png?auto=format\u0026dpr=2\u0026w=600 1200w,https://www.datocms-assets.com/150482/1742548029-feb56abe7e18e49ad192b6468f5c0ded.png?auto=format\u0026dpr=3\u0026w=600 1800w","webpSrcSet":"","sizes":"(max-width: 600px) 100vw, 600px","src":"https://www.datocms-assets.com/150482/1742548029-feb56abe7e18e49ad192b6468f5c0ded.png?auto=format\u0026w=600","width":600,"height":388,"aspectRatio":1.5456603773584905,"alt":null,"title":null,"base64":"data:image/jpeg;base64,/9j/4AAQSkZJRgABAQAAAQABAAD/2wCEAAoHBwgHBgoICAgLFhULFRgZDRUVDhcODRYNGhUdHSIfFiEaHysjHR0oHRUWJDUlKC0vMjIyHSI4PTcwPCsxMi8BCgsLDg0OHA0KHS8cFhw7Ly8vLy8vLy8vLy8vLy8vLy8vLy8vLy8vLy8vLy8vLy8vLy8vLy8vLy8vLy8vLy8vL//AABEIABAAGAMBIgACEQEDEQH/xAAYAAACAwAAAAAAAAAAAAAAAAAABQMEBv/EABwQAAEFAQEBAAAAAAAAAAAAAAQAAQIDBREhFP/EABUBAQEAAAAAAAAAAAAAAAAAAAQD/8QAGBEAAwEBAAAAAAAAAAAAAAAAAAExIQL/2gAMAwEAAhEDEQA/AH2kWNA3rTZSAa9P1caTLF2QJIL9m6v5wF0S+vJ1HRCg/wBk+uZHjoSPRrsiTx3QrJMN1T//2Q==","bgColor":"#375e9f"}}},{"__typename":"SuccessStoriesCardRecord","title":"“I want to try that!”: How Arduino is inspiring active learning at Acera School","tag":{"title":"Education","backgroundColor":"tangerine","mono":true,"icon":null},"url":"https://www.arduino.cc/education/case-study-how-arduino-is-inspiring-active-learning-at-acera-school/","image":{"url":"https://www.datocms-assets.com/150482/1742551693-image-2.png","responsiveImage":{"srcSet":"https://www.datocms-assets.com/150482/1742551693-image-2.png?auto=format\u0026dpr=0.25\u0026w=600 84w,https://www.datocms-assets.com/150482/1742551693-image-2.png?auto=format\u0026dpr=0.5\u0026w=600 168w,https://www.datocms-assets.com/150482/1742551693-image-2.png?auto=format\u0026dpr=0.75\u0026w=600 252w,https://www.datocms-assets.com/150482/1742551693-image-2.png?auto=format\u0026w=600 337w","webpSrcSet":"","sizes":"(max-width: 337px) 100vw, 337px","src":"https://www.datocms-assets.com/150482/1742551693-image-2.png?auto=format\u0026w=600","width":337,"height":246,"aspectRatio":1.3699186991869918,"alt":null,"title":null,"base64":"data:image/png;base64,iVBORw0KGgoAAAANSUhEUgAAABgAAAASCAIAAADOjonJAAACqklEQVR42i1UC3bcMAjkK3uTY/VEPVRv2Ca2JaCDNi9ET/bKw8AMsj+/f4mqjcPGy8bJfiT7Kr5mfN3z67q/7/t57ohJlKY1XF5DX6diPQ8dJqYiQpbFVJLJ2GQJlxT97It21PuRiTiSEAsRHRMJuZBAkm0G4LhUKARvOKVYcSAQGZGySqN0ZVZVIgmzCI4jZxIwspayMNm9REuTNUUCJFlLGmgGwmbGivWErohKUQEcgQNVJnitciOVDfT9sCobsYsYTpKQNtC9+I68lyKepXMpvhWipRlZ0XXFUDIFEGiSfV0sxl7s1HDgQ8qr5An0O+/ZQFjnQh+RuGwxiEzLR8txdpeJ/tnfi9TIk7zIiRS8lYP4Cboe/p5yTUH5c0oGgFKZphR0NUlrFMC3XvbvSrXyLKcOTRCrIJrZQNeka/I9eU2GspCo2yGQDEBlvNXprhd6BFVyVg2uBSBqIwTVzLonghDParETPFE7AxHyIiqg9qbTjJ4Jw0CQqlmp2QXjkRJAz+qY0YHu4i33H/T/cVY/Uv93j2IjwmZtPnCEVSA02MEgsQXKtk+zp5a5a4NJkA8rts2ImxHmg0W5zbBl3GmqP6v3urM2D8D00S15h7BxV4paG2gcLmrmbo4VjpLOSS0ckN+Bjzc+0okrDeOh2GzVdrO7tI/XAUeaDR2u7mzWBkajuGIPynvKqraJgKI8nA6roXhsEwj1xNnH5yk9/kAZ4oMUlpKJkqBLTxIgmj1WtMRVhtHhO2CaLnD7CJ74/DhRA4DEBpuTWKAajBSjx7LvAPwOUdFbfFmH8zneQKgRQPgBScnOE0OmQBKgGEZF2y7QG75J7uiimlE3CCyc3Wl4F7iBaN8E1V3uiwG3k77fdcmwpeJ60ZYYr/tga997iPyOH+1wdezS/wNRGNGXDZuAKAAAAABJRU5ErkJggg==","bgColor":"#f1d20b"}}},{"__typename":"SuccessStoriesCardRecord","title":"Snaptron accelerates prototyping and innovates tactile dome switch testing","tag":{"title":"Professional","backgroundColor":"charcoal","mono":true,"icon":null},"url":"https://www.arduino.cc/pro/case-studies-snaptron/","image":{"url":"https://www.datocms-assets.com/150482/1742548154-0ab822dbcb1335e692968bd08564a972.jpeg","responsiveImage":{"srcSet":"https://www.datocms-assets.com/150482/1742548154-0ab822dbcb1335e692968bd08564a972.jpeg?auto=format\u0026dpr=0.25\u0026w=600 150w,https://www.datocms-assets.com/150482/1742548154-0ab822dbcb1335e692968bd08564a972.jpeg?auto=format\u0026dpr=0.5\u0026w=600 300w,https://www.datocms-assets.com/150482/1742548154-0ab822dbcb1335e692968bd08564a972.jpeg?auto=format\u0026dpr=0.75\u0026w=600 450w,https://www.datocms-assets.com/150482/1742548154-0ab822dbcb1335e692968bd08564a972.jpeg?auto=format\u0026w=600 600w,https://www.datocms-assets.com/150482/1742548154-0ab822dbcb1335e692968bd08564a972.jpeg?auto=format\u0026dpr=1.5\u0026w=600 900w,https://www.datocms-assets.com/150482/1742548154-0ab822dbcb1335e692968bd08564a972.jpeg?auto=format\u0026dpr=2\u0026w=600 1200w,https://www.datocms-assets.com/150482/1742548154-0ab822dbcb1335e692968bd08564a972.jpeg?auto=format\u0026dpr=3\u0026w=600 1800w","webpSrcSet":"","sizes":"(max-width: 600px) 100vw, 600px","src":"https://www.datocms-assets.com/150482/1742548154-0ab822dbcb1335e692968bd08564a972.jpeg?auto=format\u0026w=600","width":600,"height":349,"aspectRatio":1.7152428810720268,"alt":null,"title":null,"base64":"data:image/jpeg;base64,/9j/4AAQSkZJRgABAQAAAQABAAD/2wCEAAoHBwgHBgoICAgXCgoLDhgNCg0OGhENFg4YFxUZGBYTFhUaHysjHR0oHRUWJDUlKC0vMjIyGSI4PTcwPCsxMi8BCgsLDg0OGA0NHDscFhwvLy8vLy81Ly8vLy8vLy8vLy8vLy8vLy8vLy8vLy8vLy8vLy8vLy8vLy8vLy8vLy8vL//AABEIAA4AGAMBIgACEQEDEQH/xAAXAAADAQAAAAAAAAAAAAAAAAAABQYC/8QAHhAAAgMAAQUAAAAAAAAAAAAAAQIAAwUEBhIhJUH/xAAWAQEBAQAAAAAAAAAAAAAAAAADAgD/xAAYEQADAQEAAAAAAAAAAAAAAAAAAQISA//aAAwDAQACEQMRAD8AaaesUqMmn3XXuImtzksKzJ+uwvSxMOZTFbke43UFj8siERYFnsG8fYTPmidyf//Z","bgColor":"#c98935"}}},{"__typename":"SuccessStoriesCardRecord","title":"How White Mountains Regional High School Used Arduino \u0026 the IoT to Build an Automated Greenhouse","tag":{"title":"Education","backgroundColor":"tangerine","mono":true,"icon":null},"url":"https://cloud.arduino.cc/building-automated-greenhouse/","image":{"url":"https://www.datocms-assets.com/150482/1742551729-image-3.png","responsiveImage":{"srcSet":"https://www.datocms-assets.com/150482/1742551729-image-3.png?auto=format\u0026dpr=0.25\u0026w=600 84w,https://www.datocms-assets.com/150482/1742551729-image-3.png?auto=format\u0026dpr=0.5\u0026w=600 168w,https://www.datocms-assets.com/150482/1742551729-image-3.png?auto=format\u0026dpr=0.75\u0026w=600 252w,https://www.datocms-assets.com/150482/1742551729-image-3.png?auto=format\u0026w=600 337w","webpSrcSet":"","sizes":"(max-width: 337px) 100vw, 337px","src":"https://www.datocms-assets.com/150482/1742551729-image-3.png?auto=format\u0026w=600","width":337,"height":246,"aspectRatio":1.3699186991869918,"alt":null,"title":null,"base64":"data:image/png;base64,iVBORw0KGgoAAAANSUhEUgAAABgAAAASCAIAAADOjonJAAACr0lEQVR42j1UC3LdIAwESeA0TdsT9g49Qy/cSZ4fPD5CXeGXeHYYjPGyklbI399/UuKX1/z97fjx89vbr+P7Wz5eiZNp6K2Xs94+bu//3vF8fJz3e+m9L10UYxY5RF5EMpGIRbMYLIQQL8SAPXgoEF6YaIMFm5lFWJTBAlzvyUefrBBWAJetGACQgigwBTbQsDFja8KpSY4kPSU1o7UWb0VPuCL13+MMCARc2BQc2MaQtimV+UjcUjpyGjNDPJsTURY+JB2biAXxmgUxnbZmWJ+MYVFwXZCXmBIz/vIfEy9jgiYQbakJapMTNZ2gwrF5zbYUvN1UjDxV4RkvEgKNQAAECTL/HqOJr/g6RamjT4QxogzOQ44paTJrNEXaccQcSzeWSwbWGohsIYO68H1NUUJQUnpLJsaBGqUmqTF3im1Ngl5V64/hqKPV3i90sEIkhE5D2YXVk33WR1JZZDETP5hrpANq9QhONK09er1X4IHxrKUWJ1JFdZG5ITxQV8/RvbY0FQ6IEhlcGdXwswbOFNW1iUq9neV2v9/OWktrXVVRB1grQ/+TqNQOItiHEklmOYgSHICkRFcEogaict7LedbzLOUimnETdSYcvokej+GCEGXinHs6WBJMZPOLqLdSOoSAom60NidCMxAhO4t57vI3JD/gpWXFHJsy8i3RAojmXLP32Ruge9x4KoIB4H3ytiOTObzVMCIrYyyfdJt5ERy3DHXFCnL+9CvMup1hu5sieTvuFiVZ6g2IEwBsVQBdg0X30W5oePxypDvd7cj+BUBoibfxPTRvsKd/MaHLyBijt5xtLzPqB+AfoSlkyMpWclUtP6vm/f4JnLJb1qViAjIIoehg8htkj+bGjuREu/2cKILo8x5y2HUhfcFvJlw8X8C9hOQu2p0WnXev+I31H7TOC7fMwhQWAAAAAElFTkSuQmCC","bgColor":"#c88b7a"}}}]}},{"__typename":"AboutSectionRecord","id":"UIRsmJcLS5WJUlGhhoAqDQ","aboutSectionModel":{"__typename":"AboutSectionModelRecord","id":"JWJt6CihSsusDsmfQwsu9w","image":{"url":"https://www.datocms-assets.com/150482/1742310237-brand-dark.jpg","responsiveImage":{"srcSet":"https://www.datocms-assets.com/150482/1742310237-brand-dark.jpg?auto=format\u0026dpr=0.25\u0026w=600 150w,https://www.datocms-assets.com/150482/1742310237-brand-dark.jpg?auto=format\u0026dpr=0.5\u0026w=600 300w,https://www.datocms-assets.com/150482/1742310237-brand-dark.jpg?auto=format\u0026dpr=0.75\u0026w=600 450w,https://www.datocms-assets.com/150482/1742310237-brand-dark.jpg?auto=format\u0026w=600 600w,https://www.datocms-assets.com/150482/1742310237-brand-dark.jpg?auto=format\u0026dpr=1.5\u0026w=600 900w,https://www.datocms-assets.com/150482/1742310237-brand-dark.jpg?auto=format\u0026dpr=2\u0026w=600 1200w,https://www.datocms-assets.com/150482/1742310237-brand-dark.jpg?auto=format\u0026dpr=3\u0026w=600 1800w,https://www.datocms-assets.com/150482/1742310237-brand-dark.jpg?auto=format\u0026dpr=4\u0026w=600 2400w","webpSrcSet":"","sizes":"(max-width: 600px) 100vw, 600px","src":"https://www.datocms-assets.com/150482/1742310237-brand-dark.jpg?auto=format\u0026w=600","width":600,"height":400,"aspectRatio":1.5,"alt":null,"title":null,"base64":"data:image/jpeg;base64,/9j/4AAQSkZJRgABAQAAAQABAAD/2wCEAAoHBwgHBgoICAgLChULDhgWDhUNDhcWFhUMFx8iHSIfIiEdHysjHR0oHRUWJDUlKC0vMjIyGSI4PTcwPCsxMi8BCgsLDg0OHBAQEC8dFhw7Ly8vLy8vLy8vLy8vLy8vLy8vLy8vLy8vLy8vLy8vLy8vLy8vLy8vLy8vLy8vLy8vL//AABEIABAAGAMBIgACEQEDEQH/xAAYAAACAwAAAAAAAAAAAAAAAAAEBgECBf/EAB4QAAEEAgMBAAAAAAAAAAAAAAEAAwQFAhESMUEG/8QAFQEBAQAAAAAAAAAAAAAAAAAABAP/xAAXEQADAQAAAAAAAAAAAAAAAAABAhEA/9oADAMBAAIRAxEAPwBfrad9mKSAh4sCU5aAcT2mmqDuUU8grQcRhYbOI7RiwuQEMwf0Fc63X47Hihb30u3YeIA8UKwYTHKG7//Z","bgColor":"#d29435"}},"buttons":[{"__typename":"LinkRecord","id":"H6pLziR0QeiNeWzf7DpRxg","action":"ABOUT ARDUINO","url":"https://www.arduino.cc/en/about","pageLink":null,"description":"","blank":false,"linkStyle":"primary","icon":null,"dataLayer":[],"attr":""}],"topTitle":"What is Arduino?","title":"The easy-to-use hardware\u2028and software platform","topCardTitle":"Mission \u0026 Vision","topCardDescription":"Our goal is to create a world where there are no barriers to technology and innovation","topCardButtons":[{"__typename":"LinkRecord","id":"T2TccGDnS6O7npGf_ndO6w","action":"LEARN MORE","url":"https://www.arduino.cc/en/about#our-mission--vision","pageLink":null,"description":"","blank":false,"linkStyle":"tertiary-white","icon":{"id":"AkUWRCRPSiuG_NwxQ4Fvkw","url":"https://www.datocms-assets.com/150482/1738840518-iconrow.svg","alt":null},"dataLayer":[],"attr":""}],"bottomCardTitle":"Learn Arduino","bottomCardDescription":"What is a board, how do I write code to it, and what tools do I need to create my own project?","bottomCardButtons":[{"__typename":"LinkRecord","id":"JyIwv5T4Rb2GB3cdiIKE3g","action":"START NOW","url":"https://docs.arduino.cc/learn/ ","pageLink":null,"description":"","blank":false,"linkStyle":"tertiary-white","icon":{"id":"AkUWRCRPSiuG_NwxQ4Fvkw","url":"https://www.datocms-assets.com/150482/1738840518-iconrow.svg","alt":null},"dataLayer":[],"attr":""}]}},{"__typename":"ExternalDataCarouselRecord","id":"OXpxIyk_Soix2aPlLbbTgg","title":"Latest News","fetchType":"blog"},{"__typename":"BannerRecord","id":"FBxPeCA4QIS-SznSRJWKqw","bannerModel":{"__typename":"BannerModelRecord","id":"PJda-iufSc2yW1bcXlQSUA","title":"Open source is love","subtitle":"\u003cp\u003eDiscover our 2025 Open Source Report!\u003c/p\u003e\n","textColor":"dark","size":"S","fullscreen":true,"storeButtons":false,"backgroundColor":{"hex":"#ECF1F1"},"backgroundImage":null,"spotlightImage":{"alt":null,"url":"https://www.datocms-assets.com/150482/1777475666-report-2025.png"},"tags":[],"buttons":[{"__typename":"LinkRecord","id":"INOZlZMlRtWQKy-r81Mu5w","action":"Download PDF","url":"https://content.arduino.cc/assets/ArduinoOpenSourceReport2025.pdf","pageLink":null,"description":"","blank":true,"linkStyle":"secondary-teal-btn","icon":null,"dataLayer":[],"attr":""}]}}]}}]}},"posts":[{"id":42414,"type":"post","slug":"arduino-core-on-zephyr-0-90-0-is-officially-stable-and-leaving-beta","url":"https://blog.arduino.cc/2026/07/29/arduino-core-on-zephyr-0-90-0-is-officially-stable-and-leaving-beta/","status":"publish","title":"Arduino Core on Zephyr 0.90.0 is officially stable and leaving beta","title_plain":"Arduino Core on Zephyr 0.90.0 is officially stable and leaving beta","content":"\n\u003cfigure class=\"wp-block-image size-large\"\u003e\u003cdiv class=\"image-post\"\u003e\u003cimg loading=\"lazy\" decoding=\"async\" width=\"1024\" height=\"559\" src=\"https://blog.arduino.cc/wp-content/uploads/2026/07/Arduino.cc-Blogpost-Cover1100x600-1-1024x559.jpg\" alt=\"\" class=\"wp-image-42416\" srcset=\"https://blog.arduino.cc/wp-content/uploads/2026/07/Arduino.cc-Blogpost-Cover1100x600-1-1024x559.jpg 1024w, https://blog.arduino.cc/wp-content/uploads/2026/07/Arduino.cc-Blogpost-Cover1100x600-1-300x164.jpg 300w, https://blog.arduino.cc/wp-content/uploads/2026/07/Arduino.cc-Blogpost-Cover1100x600-1-768x419.jpg 768w, https://blog.arduino.cc/wp-content/uploads/2026/07/Arduino.cc-Blogpost-Cover1100x600-1.jpg 1100w\" sizes=\"auto, (max-width: 1024px) 100vw, 1024px\" /\u003e\u003c/div\u003e\u003c/figure\u003e\n\n\n\n\u003cp class=\"wp-block-paragraph\"\u003eWe are thrilled to announce the release of version 0.90.0 of the ArduinoCore-zephyr. This is a major milestone: we are officially \u003cstrong\u003eexiting the beta phase\u003c/strong\u003e and marking the core as \u003cstrong\u003estable\u003c/strong\u003e. Achieving this goal is the culmination of months of testing, architectural refinement, and community feedback.\u003cbr\u003e\u003cbr\u003eAs we establish this core as our primary framework for advanced hardware, we are also beginning the deprecation phase for the corresponding legacy cores based on mbedOS, which has just now reached End of Life status.\u003cbr\u003e\u003cbr\u003eJoin us in this next chapter! Compile your existing sketches with version 0.90.0, and let us know how it performs.\u003c/p\u003e\n\n\n\n\u003ch2 class=\"wp-block-heading\"\u003e\u003cstrong\u003eExpanded board and hardware support\u003c/strong\u003e\u003c/h2\u003e\n\n\n\n\u003cp class=\"wp-block-paragraph\"\u003e\u003cstrong\u003eWelcome, Nano RP2040 Connect! \u003c/strong\u003eThe \u003ca href=\"https://store.arduino.cc/collections/interactive-games/products/arduino-nano-rp2040-connect\"\u003eArduino\u003csup\u003e®\u003c/sup\u003e Nano\u003csup\u003e™\u003c/sup\u003e RP2040 Connect\u003c/a\u003e board officially joins our lineup. You can now leverage the full RTOS power of Zephyr on RP2040 hardware with standard Arduino API compatibility.\u003c/p\u003e\n\n\n\n\u003cp class=\"wp-block-paragraph\"\u003e\u003cstrong\u003eSD card support for the Arduino\u003c/strong\u003e\u003cstrong\u003e\u003csup\u003e®\u003c/sup\u003e\u003c/strong\u003e\u003cstrong\u003e Portenta\u003c/strong\u003e\u003cstrong\u003e\u003csup\u003e™\u003c/sup\u003e\u003c/strong\u003e\u003cstrong\u003e H7 and C33 boards. \u003c/strong\u003eNative SD card support is now enabled for both \u003ca href=\"https://store.arduino.cc/products/portenta-h7\"\u003ePortenta H7\u003c/a\u003e and \u003ca href=\"https://store.arduino.cc/products/portenta-c33\"\u003ePortenta C33\u003c/a\u003e, making it simple to log data and host local files on external memory.\u003c/p\u003e\n\n\n\n\u003cp class=\"wp-block-paragraph\"\u003e\u003cstrong\u003ePDM library support. \u003c/strong\u003eOfficial support for the PDM library on the \u003ca href=\"https://store.arduino.cc/products/nano-33-ble-rev2\"\u003eNano 33 BLE\u003c/a\u003e board is here, unlocking digital microphone input for audio sampling, noise detection, and edge AI voice processing.\u003c/p\u003e\n\n\n\n\u003ch2 class=\"wp-block-heading\"\u003e\u003cstrong\u003eUniversal automatic loader sync\u003c/strong\u003e\u003c/h2\u003e\n\n\n\n\u003cp class=\"wp-block-paragraph\"\u003eWith version 0.90.0, automatic loader-and-sketch synchronization is now enabled across all supported boards. The core automatically verifies and handles loader updates behind the scenes during every sketch upload. This means you can simply open the Arduino\u003csup\u003e®\u003c/sup\u003e IDE, connect a board running a sketch based on mbedOS, switch to the new Zephyr-based core, and upload your sketch. The IDE will automatically update the loader as needed to ensure compatibility with Zephyr.\u003c/p\u003e\n\n\n\n\u003cp class=\"wp-block-paragraph\"\u003eIf you are running Zephyr for the first time, \u003ca href=\"https://support.arduino.cc/hc/en-us/articles/29180434600476-Install-the-Zephyr-loader-on-your-board\"\u003echeck out our step-by-step guide here\u003c/a\u003e. \u003c/p\u003e\n\n\n\n\u003ch2 class=\"wp-block-heading\"\u003e\u003cstrong\u003eFull hardware compatibility list\u003c/strong\u003e\u003c/h2\u003e\n\n\n\n\u003cul class=\"wp-block-list\"\u003e\n\u003cli\u003e\u003ca href=\"https://www.arduino.cc/product-uno-q\"\u003eArduino\u003csup\u003e®\u003c/sup\u003e UNO\u003csup\u003e™\u003c/sup\u003e Q board\u003c/a\u003e\u003c/li\u003e\n\n\n\n\u003cli\u003ePortenta H7\u003c/li\u003e\n\n\n\n\u003cli\u003ePortenta C33\u003c/li\u003e\n\n\n\n\u003cli\u003e\u003ca href=\"https://www.arduino.cc/pro/hardware-product-family-opta-family/\"\u003eArduino\u003csup\u003e®\u003c/sup\u003e Opta\u003csup\u003e™\u003c/sup\u003e microPLC\u003c/a\u003e\u003c/li\u003e\n\n\n\n\u003cli\u003e\u003ca href=\"https://store.arduino.cc/products/giga-r1-wifi\"\u003eArduino\u003csup\u003e®\u003c/sup\u003e GIGA R1\u003csup\u003e™\u003c/sup\u003e WiFi board\u003c/a\u003e\u003c/li\u003e\n\n\n\n\u003cli\u003e\u003ca href=\"https://store.arduino.cc/products/nano-matter\"\u003eNano Matter board\u003c/a\u003e\u003c/li\u003e\n\n\n\n\u003cli\u003e\u003cstrong\u003eNano RP2040 Connect (New!)\u003c/strong\u003e\u003c/li\u003e\n\n\n\n\u003cli\u003eNano 33 BLE\u003c/li\u003e\n\n\n\n\u003cli\u003e\u003ca href=\"https://store.arduino.cc/products/nicla-sense-me\"\u003eArduino\u003csup\u003e® \u003c/sup\u003eNicla\u003csup\u003e™\u003c/sup\u003e Sense ME module\u003c/a\u003e\u003c/li\u003e\n\n\n\n\u003cli\u003e\u003ca href=\"https://store.arduino.cc/products/nicla-vision\"\u003eNicla Vision module\u003c/a\u003e\u003c/li\u003e\n\u003c/ul\u003e\n\n\n\n\u003ch2 class=\"wp-block-heading\"\u003e\u003cstrong\u003eHow to get started\u003c/strong\u003e\u003c/h2\u003e\n\n\n\n\u003cp class=\"wp-block-paragraph\"\u003eTo update your environment: open the \u003ca href=\"https://docs.arduino.cc/software/ide/\"\u003e\u003cstrong\u003eArduino IDE\u003c/strong\u003e\u003c/a\u003e, search for “zephyr” in the \u003cstrong\u003eBoard Manager\u003c/strong\u003e, and install version 0.90.0.\u003c/p\u003e\n\n\n\n\u003ch2 class=\"wp-block-heading\"\u003e\u003cstrong\u003eThank you!\u003c/strong\u003e\u003c/h2\u003e\n\n\n\n\u003cp class=\"wp-block-paragraph\"\u003eThis stable milestone wouldn’t be possible without our community. Check out the \u003ca href=\"https://github.com/arduino/ArduinoCore-zephyr/releases/tag/0.90.0\"\u003efull release notes on GitHub\u003c/a\u003e, report issues, and help us build the next era of Arduino on Zephyr!\u003c/p\u003e\n\n\n\n\u003cp class=\"wp-block-paragraph\"\u003e\u003cem\u003eArduino, GIGA R1, Nano, Nicla, Opta, Portenta, and UNO are trademarks or registered trademarks of Arduino S.r.l.\u003c/em\u003e\u003cbr\u003e\u003cbr\u003e\u003c/p\u003e\n","excerpt":"\u003cp\u003eWe are thrilled to announce the release of version 0.90.0 of the ArduinoCore-zephyr. This is a major milestone: we are officially exiting the beta phase and marking the core as stable. Achieving this goal is the culmination of months of testing, architectural refinement, and community feedback. As we establish this core as our primary framework [\u0026hellip;]\u003c/p\u003e\n","date":"2026-07-29 15:18:11","modified":"2026-07-29 15:18:12","categories":[{"id":1597,"slug":"featured","title":"Featured","description":"","parent":0,"post_count":1764}],"tags":[{"id":4720,"slug":"arduino-core","title":"Arduino Core","description":"","post_count":3},{"id":6905,"slug":"arduino-core-on-zephyr-0-90-0","title":"Arduino Core on Zephyr 0.90.0","description":"","post_count":1},{"id":6347,"slug":"zephyr","title":"Zephyr","description":"","post_count":6}],"author":{"id":27876,"slug":"editorarduino","name":"Arduino Team","first_name":"","last_name":"","nickname":"Arduino Team","url":"","description":""},"comments":[],"attachments":[{"id":42415,"url":"https://blog.arduino.cc/wp-content/uploads/2026/07/Arduino.cc-Blogpost-Featured385x289-1.jpg","slug":"arduino-cc-blogpost-featured385x289-17","title":"Arduino.cc-Blogpost-Featured(385x289)","description":"","caption":"","parent":42414,"mime_type":"image/jpeg","images":{"full":{"url":"https://blog.arduino.cc/wp-content/uploads/2026/07/Arduino.cc-Blogpost-Featured385x289-1.jpg","width":385,"height":289},"thumbnail":{"url":"https://blog.arduino.cc/wp-content/uploads/2026/07/Arduino.cc-Blogpost-Featured385x289-1.jpg","width":385,"height":289},"medium":{"url":"https://blog.arduino.cc/wp-content/uploads/2026/07/Arduino.cc-Blogpost-Featured385x289-1-300x225.jpg","width":300,"height":225},"medium_large":{"url":"https://blog.arduino.cc/wp-content/uploads/2026/07/Arduino.cc-Blogpost-Featured385x289-1.jpg","width":385,"height":289},"large":{"url":"https://blog.arduino.cc/wp-content/uploads/2026/07/Arduino.cc-Blogpost-Featured385x289-1.jpg","width":385,"height":289},"1536x1536":{"url":"https://blog.arduino.cc/wp-content/uploads/2026/07/Arduino.cc-Blogpost-Featured385x289-1.jpg","width":385,"height":289},"2048x2048":{"url":"https://blog.arduino.cc/wp-content/uploads/2026/07/Arduino.cc-Blogpost-Featured385x289-1.jpg","width":385,"height":289}}},{"id":42416,"url":"https://blog.arduino.cc/wp-content/uploads/2026/07/Arduino.cc-Blogpost-Cover1100x600-1.jpg","slug":"arduino-cc-blogpost-cover1100x600-18","title":"Arduino.cc-Blogpost-Cover(1100x600)","description":"","caption":"","parent":42414,"mime_type":"image/jpeg","images":{"full":{"url":"https://blog.arduino.cc/wp-content/uploads/2026/07/Arduino.cc-Blogpost-Cover1100x600-1.jpg","width":1100,"height":600},"thumbnail":{"url":"https://blog.arduino.cc/wp-content/uploads/2026/07/Arduino.cc-Blogpost-Cover1100x600-1-385x289.jpg","width":385,"height":289},"medium":{"url":"https://blog.arduino.cc/wp-content/uploads/2026/07/Arduino.cc-Blogpost-Cover1100x600-1-300x164.jpg","width":300,"height":164},"medium_large":{"url":"https://blog.arduino.cc/wp-content/uploads/2026/07/Arduino.cc-Blogpost-Cover1100x600-1-768x419.jpg","width":768,"height":419},"large":{"url":"https://blog.arduino.cc/wp-content/uploads/2026/07/Arduino.cc-Blogpost-Cover1100x600-1-1024x559.jpg","width":1024,"height":559},"1536x1536":{"url":"https://blog.arduino.cc/wp-content/uploads/2026/07/Arduino.cc-Blogpost-Cover1100x600-1.jpg","width":1100,"height":600},"2048x2048":{"url":"https://blog.arduino.cc/wp-content/uploads/2026/07/Arduino.cc-Blogpost-Cover1100x600-1.jpg","width":1100,"height":600}}}],"comment_count":0,"comment_status":"closed","thumbnail":"https://blog.arduino.cc/wp-content/uploads/2026/07/Arduino.cc-Blogpost-Featured385x289-1.jpg","custom_fields":{"algolia_searchable_posts_records_count":["2"]},"thumbnail_size":"thumbnail","thumbnail_images":{"full":{"url":"https://blog.arduino.cc/wp-content/uploads/2026/07/Arduino.cc-Blogpost-Featured385x289-1.jpg","width":385,"height":289},"thumbnail":{"url":"https://blog.arduino.cc/wp-content/uploads/2026/07/Arduino.cc-Blogpost-Featured385x289-1.jpg","width":385,"height":289},"medium":{"url":"https://blog.arduino.cc/wp-content/uploads/2026/07/Arduino.cc-Blogpost-Featured385x289-1-300x225.jpg","width":300,"height":225},"medium_large":{"url":"https://blog.arduino.cc/wp-content/uploads/2026/07/Arduino.cc-Blogpost-Featured385x289-1.jpg","width":385,"height":289},"large":{"url":"https://blog.arduino.cc/wp-content/uploads/2026/07/Arduino.cc-Blogpost-Featured385x289-1.jpg","width":385,"height":289},"1536x1536":{"url":"https://blog.arduino.cc/wp-content/uploads/2026/07/Arduino.cc-Blogpost-Featured385x289-1.jpg","width":385,"height":289},"2048x2048":{"url":"https://blog.arduino.cc/wp-content/uploads/2026/07/Arduino.cc-Blogpost-Featured385x289-1.jpg","width":385,"height":289}}},{"id":42309,"type":"post","slug":"mission-44-students-at-silverstone-go-from-zero-to-ai-powered-racing-telemetry-in-90-minutes","url":"https://blog.arduino.cc/2026/07/28/mission-44-students-at-silverstone-go-from-zero-to-ai-powered-racing-telemetry-in-90-minutes/","status":"publish","title":"Mission 44 students at Silverstone go from zero to AI-powered racing telemetry in 90 minutes!","title_plain":"Mission 44 students at Silverstone go from zero to AI-powered racing telemetry in 90 minutes!","content":"\n\u003cfigure class=\"wp-block-image size-large\"\u003e\u003cdiv class=\"image-post\"\u003e\u003cimg loading=\"lazy\" decoding=\"async\" width=\"1024\" height=\"576\" src=\"https://blog.arduino.cc/wp-content/uploads/2026/07/image-3-1-1024x576.png\" alt=\"\" class=\"wp-image-42389\" srcset=\"https://blog.arduino.cc/wp-content/uploads/2026/07/image-3-1-1024x576.png 1024w, https://blog.arduino.cc/wp-content/uploads/2026/07/image-3-1-300x169.png 300w, https://blog.arduino.cc/wp-content/uploads/2026/07/image-3-1-768x432.png 768w, https://blog.arduino.cc/wp-content/uploads/2026/07/image-3-1-1536x864.png 1536w, https://blog.arduino.cc/wp-content/uploads/2026/07/image-3-1.png 1920w\" sizes=\"auto, (max-width: 1024px) 100vw, 1024px\" /\u003e\u003c/div\u003e\u003c/figure\u003e\n\n\n\n\u003cp class=\"wp-block-paragraph\"\u003eOn July 2nd, three days before the British Grand Prix, Arduino brought a hands-on workshop to Silverstone for 40 students aged 16 to 19, supported by \u003ca href=\"https://mission44.org/\"\u003eMission 44\u003c/a\u003e and Qualcomm Technologies, Inc. in the framework of the \u003ca href=\"https://mission44.org/mission-44-drives-change-and-inspires-the-next-generation-at-the-british-grand-prix/\"\u003eIgniting Inclusion Summit\u003c/a\u003e. The setting couldn’t have been more fitting, and as part of the bigger Qualcomm family, we are proud to have had the chance to empower young and bright minds with an activity that was such a natural fit for our team. \u003c/p\u003e\n\n\n\n\u003cp class=\"wp-block-paragraph\"\u003eQualcomm Technologies, Inc., through its Snapdragon\u003csup\u003e®\u003c/sup\u003e brand, is a Founding Corporate Sponsor of Mission 44 – a global foundation established by Sir Lewis Hamilton with a clear belief: that it’s possible to succeed no matter your background. Through inclusive education and improving access to STEM careers, the foundation works to build a fairer, more inclusive future – and events like this one are a direct expression of that mission. Not to mention, the workshop was an exciting moment for students (and us!) to meet the 7-time F1 world champion himself!\u003c/p\u003e\n\n\n\u003cdiv class=\"wp-block-image\"\u003e\n\u003cfigure class=\"aligncenter size-large is-resized\"\u003e\u003cdiv class=\"image-post\"\u003e\u003cimg loading=\"lazy\" decoding=\"async\" width=\"819\" height=\"1024\" src=\"https://blog.arduino.cc/wp-content/uploads/2026/07/LIDS_0677-Mission-44-Silverstone-June-26-@lids_harper-for-@parcferme.co_-819x1024.jpg\" alt=\"\" class=\"wp-image-42403\" style=\"width:671px;height:auto\" srcset=\"https://blog.arduino.cc/wp-content/uploads/2026/07/LIDS_0677-Mission-44-Silverstone-June-26-@lids_harper-for-@parcferme.co_-819x1024.jpg 819w, https://blog.arduino.cc/wp-content/uploads/2026/07/LIDS_0677-Mission-44-Silverstone-June-26-@lids_harper-for-@parcferme.co_-240x300.jpg 240w, https://blog.arduino.cc/wp-content/uploads/2026/07/LIDS_0677-Mission-44-Silverstone-June-26-@lids_harper-for-@parcferme.co_-768x960.jpg 768w, https://blog.arduino.cc/wp-content/uploads/2026/07/LIDS_0677-Mission-44-Silverstone-June-26-@lids_harper-for-@parcferme.co_-1229x1536.jpg 1229w, https://blog.arduino.cc/wp-content/uploads/2026/07/LIDS_0677-Mission-44-Silverstone-June-26-@lids_harper-for-@parcferme.co_-1638x2048.jpg 1638w, https://blog.arduino.cc/wp-content/uploads/2026/07/LIDS_0677-Mission-44-Silverstone-June-26-@lids_harper-for-@parcferme.co_-scaled.jpg 2048w\" sizes=\"auto, (max-width: 819px) 100vw, 819px\" /\u003e\u003c/div\u003e\u003c/figure\u003e\n\u003c/div\u003e\n\n\n\u003ch2 class=\"wp-block-heading\"\u003eFrom unboxing to AI model in under an hour\u003c/h2\u003e\n\n\n\n\u003cp class=\"wp-block-paragraph\"\u003eMany of the students, who are supported by Mission 44 partners \u003ca href=\"https://afbe.org.uk/\"\u003eAFBE-UK\u003c/a\u003e and \u003ca href=\"https://upreach.org.uk/\"\u003eupReach\u003c/a\u003e, had never worked with sensors, AI, or machine learning before. Yet within the first hour, they were already collecting live data and exploring how AI models are trained.\u003c/p\u003e\n\n\n\n\u003cp class=\"wp-block-paragraph\"\u003eThe goal was simple: to understand how an F1-inspired telemetry system works. Through hands-on experiments with \u003ca href=\"https://www.arduino.cc/product-uno-q\"\u003eArduino\u003csup\u003e®\u003c/sup\u003e UNO\u003csup\u003e™\u003c/sup\u003e Q 4GB\u003c/a\u003e, \u003ca href=\"https://store.arduino.cc/pages/modulino\"\u003eArduino\u003csup\u003e®\u003c/sup\u003e Modulino\u003csup\u003e™\u003c/sup\u003e\u003c/a\u003e and using \u003ca href=\"https://docs.arduino.cc/software/app-lab/\"\u003eArduino\u003csup\u003e®\u003c/sup\u003e App Lab\u003c/a\u003e and \u003ca href=\"https://www.edgeimpulse.com/developers?utm_platform=23675660573-194972799496\u0026amp;utm_source=google\u0026amp;utm_medium=cpc\u0026amp;utm_campaign=\u0026amp;utm_content=801314931074\u0026amp;utm_term=edge%20impulse\u0026amp;hsa_acc=6610359976\u0026amp;hsa_cam=23675660573\u0026amp;hsa_grp=194972799496\u0026amp;hsa_ad=801314931074\u0026amp;hsa_src=g\u0026amp;hsa_tgt=kwd-670726942748\u0026amp;hsa_kw=edge%20impulse\u0026amp;hsa_mt=e\u0026amp;hsa_net=adwords\u0026amp;hsa_ver=3\u0026amp;gad_source=1\u0026amp;gad_campaignid=23675660573\u0026amp;gclid=CjwKCAjwuuPRBhAnEiwA2Ji8enTJ3Rf7a63wEBKI7yHSQ3jqb3StoQQ9ZRvkmobt2plXH7prtuamYBoC5D4QAvD_BwE\"\u003eEdge Impulse\u003c/a\u003e as their development environments, students experienced how information is collected, analyzed, and turned into insights in real-time.\u003c/p\u003e\n\n\n\u003cdiv class=\"wp-block-image\"\u003e\n\u003cfigure class=\"aligncenter size-large is-resized\"\u003e\u003cdiv class=\"image-post\"\u003e\u003cimg loading=\"lazy\" decoding=\"async\" width=\"819\" height=\"1024\" src=\"https://blog.arduino.cc/wp-content/uploads/2026/07/LIDS_2575-Mission-44-Silverstone-June-26-@lids_harper-for-@parcferme.co_-819x1024.jpg\" alt=\"\" class=\"wp-image-42392\" style=\"width:667px;height:auto\" srcset=\"https://blog.arduino.cc/wp-content/uploads/2026/07/LIDS_2575-Mission-44-Silverstone-June-26-@lids_harper-for-@parcferme.co_-819x1024.jpg 819w, https://blog.arduino.cc/wp-content/uploads/2026/07/LIDS_2575-Mission-44-Silverstone-June-26-@lids_harper-for-@parcferme.co_-240x300.jpg 240w, https://blog.arduino.cc/wp-content/uploads/2026/07/LIDS_2575-Mission-44-Silverstone-June-26-@lids_harper-for-@parcferme.co_-768x960.jpg 768w, https://blog.arduino.cc/wp-content/uploads/2026/07/LIDS_2575-Mission-44-Silverstone-June-26-@lids_harper-for-@parcferme.co_-1229x1536.jpg 1229w, https://blog.arduino.cc/wp-content/uploads/2026/07/LIDS_2575-Mission-44-Silverstone-June-26-@lids_harper-for-@parcferme.co_-1638x2048.jpg 1638w, https://blog.arduino.cc/wp-content/uploads/2026/07/LIDS_2575-Mission-44-Silverstone-June-26-@lids_harper-for-@parcferme.co_-scaled.jpg 2048w\" sizes=\"auto, (max-width: 819px) 100vw, 819px\" /\u003e\u003c/div\u003e\u003c/figure\u003e\n\u003c/div\u003e\n\n\n\u003ch2 class=\"wp-block-heading\"\u003eDiscovering the tools that bring a future in racing within reach\u003c/h2\u003e\n\n\n\n\u003cp class=\"wp-block-paragraph\"\u003eFor the final part of the session, some of the students raced miniature cars around a custom-built track while accelerometers streamed motion data over Bluetooth. UNO Q processed telemetry at the edge, computer vision tracked each car, and leaderboards displayed lap times, crashes, and performance metrics in real-time.\u003c/p\u003e\n\n\n\n\u003cp class=\"wp-block-paragraph\"\u003e\u003cstrong\u003eFor many students, seeing their race transformed into live telemetry was the moment it all clicked.\u003c/strong\u003e\u003c/p\u003e\n\n\n\u003cdiv class=\"wp-block-image\"\u003e\n\u003cfigure class=\"aligncenter size-large is-resized\"\u003e\u003cdiv class=\"image-post\"\u003e\u003cimg loading=\"lazy\" decoding=\"async\" width=\"819\" height=\"1024\" src=\"https://blog.arduino.cc/wp-content/uploads/2026/07/LIDS_0819-Mission-44-Silverstone-June-26-@lids_harper-for-@parcferme.co_-819x1024.jpg\" alt=\"\" class=\"wp-image-42401\" style=\"aspect-ratio:0.7998102639884699;width:669px;height:auto\" srcset=\"https://blog.arduino.cc/wp-content/uploads/2026/07/LIDS_0819-Mission-44-Silverstone-June-26-@lids_harper-for-@parcferme.co_-819x1024.jpg 819w, https://blog.arduino.cc/wp-content/uploads/2026/07/LIDS_0819-Mission-44-Silverstone-June-26-@lids_harper-for-@parcferme.co_-240x300.jpg 240w, https://blog.arduino.cc/wp-content/uploads/2026/07/LIDS_0819-Mission-44-Silverstone-June-26-@lids_harper-for-@parcferme.co_-768x960.jpg 768w, https://blog.arduino.cc/wp-content/uploads/2026/07/LIDS_0819-Mission-44-Silverstone-June-26-@lids_harper-for-@parcferme.co_-1229x1536.jpg 1229w, https://blog.arduino.cc/wp-content/uploads/2026/07/LIDS_0819-Mission-44-Silverstone-June-26-@lids_harper-for-@parcferme.co_-1638x2048.jpg 1638w, https://blog.arduino.cc/wp-content/uploads/2026/07/LIDS_0819-Mission-44-Silverstone-June-26-@lids_harper-for-@parcferme.co_-scaled.jpg 2048w\" sizes=\"auto, (max-width: 819px) 100vw, 819px\" /\u003e\u003c/div\u003e\u003c/figure\u003e\n\u003c/div\u003e\n\n\n\u003cp class=\"wp-block-paragraph\"\u003eTelemetry is exactly the kind of real-world application that we are seeing with UNO Q. Not only in our demos and workshops, but also in professional motorsport contexts (have you read about \u003ca href=\"https://blog.arduino.cc/2026/06/08/star-stream-is-bringing-f1-level-telemetry-to-every-race-team-and-every-fleet-with-arduino-uno-q/\"\u003eStar Stream’s success in bringing F1-level telemetry to race teams and fleet operators around the world\u003c/a\u003e?).\u003c/p\u003e\n\n\n\n\u003ch2 class=\"wp-block-heading\"\u003eReady to build your own future?\u003c/h2\u003e\n\n\n\n\u003cp class=\"wp-block-paragraph\"\u003eSTEM skills are increasingly central to careers across every industry – and access to hands-on learning experiences like this one can make a real difference in who gets to build that future. Giving young people from all backgrounds the tools, the context, and the confidence to engage with technology is something we care about deeply at Arduino.\u003c/p\u003e\n\n\n\u003cdiv class=\"wp-block-image\"\u003e\n\u003cfigure class=\"aligncenter size-large is-resized\"\u003e\u003cdiv class=\"image-post\"\u003e\u003cimg loading=\"lazy\" decoding=\"async\" width=\"762\" height=\"1024\" src=\"https://blog.arduino.cc/wp-content/uploads/2026/07/Screenshot-2026-07-20-at-18.17.32-762x1024.png\" alt=\"\" class=\"wp-image-42408\" style=\"aspect-ratio:0.7446086510893503;width:666px;height:auto\" srcset=\"https://blog.arduino.cc/wp-content/uploads/2026/07/Screenshot-2026-07-20-at-18.17.32-762x1024.png 762w, https://blog.arduino.cc/wp-content/uploads/2026/07/Screenshot-2026-07-20-at-18.17.32-223x300.png 223w, https://blog.arduino.cc/wp-content/uploads/2026/07/Screenshot-2026-07-20-at-18.17.32-768x1031.png 768w, https://blog.arduino.cc/wp-content/uploads/2026/07/Screenshot-2026-07-20-at-18.17.32-1144x1536.png 1144w, https://blog.arduino.cc/wp-content/uploads/2026/07/Screenshot-2026-07-20-at-18.17.32.png 1172w\" sizes=\"auto, (max-width: 762px) 100vw, 762px\" /\u003e\u003c/div\u003e\u003c/figure\u003e\n\u003c/div\u003e\n\n\n\u003cp class=\"wp-block-paragraph\"\u003eVisit \u003ca href=\"https://mission44.org/\"\u003eMission 44\u003c/a\u003e to learn more about their work, and if today’s post made you want to start your own journey into AI, sensors, and real-world data\u0026#8230; just \u003ca href=\"https://store.arduino.cc/products/uno-q-4gb\"\u003eget your own hands on an UNO Q\u003c/a\u003e!\u003c/p\u003e\n\n\n\n\u003cp class=\"wp-block-paragraph\"\u003e\u003cem\u003eQualcomm branded products are products of Qualcomm Technologies, Inc. and/or its subsidiaries. Arduino and UNO, and the Arduino logo are trademarks or registered trademarks of Arduino S.r.l.\u003c/em\u003e\u003c/p\u003e\n","excerpt":"\u003cp\u003eOn July 2nd, three days before the British Grand Prix, Arduino brought a hands-on workshop to Silverstone for 40 students aged 16 to 19, supported by Mission 44 and Qualcomm Technologies, Inc. in the framework of the Igniting Inclusion Summit. The setting couldn’t have been more fitting, and as part of the bigger Qualcomm family, [\u0026hellip;]\u003c/p\u003e\n","date":"2026-07-28 13:46:22","modified":"2026-07-28 13:46:24","categories":[{"id":42,"slug":"arduino","title":"Arduino","description":"","parent":0,"post_count":3274},{"id":1597,"slug":"featured","title":"Featured","description":"","parent":0,"post_count":1764},{"id":6609,"slug":"modulino-nodes","title":"Modulino Nodes","description":"","parent":42,"post_count":6},{"id":6698,"slug":"uno-q","title":"UNO Q","description":"","parent":42,"post_count":44}],"tags":[{"id":6902,"slug":"mission-44","title":"Mission 44","description":"","post_count":1},{"id":6904,"slug":"racing-telemetry","title":"Racing Telemetry","description":"","post_count":1},{"id":6903,"slug":"silverstone","title":"Silverstone","description":"","post_count":1}],"author":{"id":27876,"slug":"editorarduino","name":"Arduino Team","first_name":"","last_name":"","nickname":"Arduino Team","url":"","description":""},"comments":[],"attachments":[{"id":42392,"url":"https://blog.arduino.cc/wp-content/uploads/2026/07/LIDS_2575-Mission-44-Silverstone-June-26-@lids_harper-for-@parcferme.co_.jpg","slug":"lids_2575-mission-44-silverstone-june-26-lids_harper-for-parcferme-co","title":"LIDS_2575 - Mission 44 - Silverstone - June 26 - @lids_harper for @parcferme.co","description":"","caption":"","parent":42309,"mime_type":"image/jpeg","images":{"full":{"url":"https://blog.arduino.cc/wp-content/uploads/2026/07/LIDS_2575-Mission-44-Silverstone-June-26-@lids_harper-for-@parcferme.co_-scaled.jpg","width":2048,"height":2560},"thumbnail":{"url":"https://blog.arduino.cc/wp-content/uploads/2026/07/LIDS_2575-Mission-44-Silverstone-June-26-@lids_harper-for-@parcferme.co_-385x289.jpg","width":385,"height":289},"medium":{"url":"https://blog.arduino.cc/wp-content/uploads/2026/07/LIDS_2575-Mission-44-Silverstone-June-26-@lids_harper-for-@parcferme.co_-240x300.jpg","width":240,"height":300},"medium_large":{"url":"https://blog.arduino.cc/wp-content/uploads/2026/07/LIDS_2575-Mission-44-Silverstone-June-26-@lids_harper-for-@parcferme.co_-768x960.jpg","width":768,"height":960},"large":{"url":"https://blog.arduino.cc/wp-content/uploads/2026/07/LIDS_2575-Mission-44-Silverstone-June-26-@lids_harper-for-@parcferme.co_-819x1024.jpg","width":819,"height":1024},"1536x1536":{"url":"https://blog.arduino.cc/wp-content/uploads/2026/07/LIDS_2575-Mission-44-Silverstone-June-26-@lids_harper-for-@parcferme.co_-1229x1536.jpg","width":1229,"height":1536},"2048x2048":{"url":"https://blog.arduino.cc/wp-content/uploads/2026/07/LIDS_2575-Mission-44-Silverstone-June-26-@lids_harper-for-@parcferme.co_-1638x2048.jpg","width":1638,"height":2048}}},{"id":42408,"url":"https://blog.arduino.cc/wp-content/uploads/2026/07/Screenshot-2026-07-20-at-18.17.32.png","slug":"screenshot-2026-07-20-at-18-17-32","title":"Screenshot 2026-07-20 at 18.17.32","description":"","caption":"","parent":42309,"mime_type":"image/png","images":{"full":{"url":"https://blog.arduino.cc/wp-content/uploads/2026/07/Screenshot-2026-07-20-at-18.17.32.png","width":1172,"height":1574},"thumbnail":{"url":"https://blog.arduino.cc/wp-content/uploads/2026/07/Screenshot-2026-07-20-at-18.17.32-385x289.png","width":385,"height":289},"medium":{"url":"https://blog.arduino.cc/wp-content/uploads/2026/07/Screenshot-2026-07-20-at-18.17.32-223x300.png","width":223,"height":300},"medium_large":{"url":"https://blog.arduino.cc/wp-content/uploads/2026/07/Screenshot-2026-07-20-at-18.17.32-768x1031.png","width":768,"height":1031},"large":{"url":"https://blog.arduino.cc/wp-content/uploads/2026/07/Screenshot-2026-07-20-at-18.17.32-762x1024.png","width":762,"height":1024},"1536x1536":{"url":"https://blog.arduino.cc/wp-content/uploads/2026/07/Screenshot-2026-07-20-at-18.17.32-1144x1536.png","width":1144,"height":1536},"2048x2048":{"url":"https://blog.arduino.cc/wp-content/uploads/2026/07/Screenshot-2026-07-20-at-18.17.32.png","width":1172,"height":1574}}},{"id":42407,"url":"https://blog.arduino.cc/wp-content/uploads/2026/07/LIDS_2555-Mission-44-Silverstone-June-26-@lids_harper-for-@parcferme.co_-2.jpg","slug":"lids_2555-mission-44-silverstone-june-26-lids_harper-for-parcferme-co-3","title":"LIDS_2555 - Mission 44 - Silverstone - June 26 - @lids_harper for @parcferme.co","description":"","caption":"","parent":42309,"mime_type":"image/jpeg","images":{"full":{"url":"https://blog.arduino.cc/wp-content/uploads/2026/07/LIDS_2555-Mission-44-Silverstone-June-26-@lids_harper-for-@parcferme.co_-2-scaled.jpg","width":2048,"height":2560},"thumbnail":{"url":"https://blog.arduino.cc/wp-content/uploads/2026/07/LIDS_2555-Mission-44-Silverstone-June-26-@lids_harper-for-@parcferme.co_-2-385x289.jpg","width":385,"height":289},"medium":{"url":"https://blog.arduino.cc/wp-content/uploads/2026/07/LIDS_2555-Mission-44-Silverstone-June-26-@lids_harper-for-@parcferme.co_-2-240x300.jpg","width":240,"height":300},"medium_large":{"url":"https://blog.arduino.cc/wp-content/uploads/2026/07/LIDS_2555-Mission-44-Silverstone-June-26-@lids_harper-for-@parcferme.co_-2-768x960.jpg","width":768,"height":960},"large":{"url":"https://blog.arduino.cc/wp-content/uploads/2026/07/LIDS_2555-Mission-44-Silverstone-June-26-@lids_harper-for-@parcferme.co_-2-819x1024.jpg","width":819,"height":1024},"1536x1536":{"url":"https://blog.arduino.cc/wp-content/uploads/2026/07/LIDS_2555-Mission-44-Silverstone-June-26-@lids_harper-for-@parcferme.co_-2-1229x1536.jpg","width":1229,"height":1536},"2048x2048":{"url":"https://blog.arduino.cc/wp-content/uploads/2026/07/LIDS_2555-Mission-44-Silverstone-June-26-@lids_harper-for-@parcferme.co_-2-1638x2048.jpg","width":1638,"height":2048}}},{"id":42405,"url":"https://blog.arduino.cc/wp-content/uploads/2026/07/LIDS_0819-Mission-44-Silverstone-June-26-@lids_harper-for-@parcferme.co_-1.jpg","slug":"lids_0819-mission-44-silverstone-june-26-lids_harper-for-parcferme-co-2","title":"LIDS_0819 - Mission 44 - Silverstone - June 26 - @lids_harper for @parcferme.co","description":"","caption":"","parent":42309,"mime_type":"image/jpeg","images":{"full":{"url":"https://blog.arduino.cc/wp-content/uploads/2026/07/LIDS_0819-Mission-44-Silverstone-June-26-@lids_harper-for-@parcferme.co_-1-scaled.jpg","width":2048,"height":2560},"thumbnail":{"url":"https://blog.arduino.cc/wp-content/uploads/2026/07/LIDS_0819-Mission-44-Silverstone-June-26-@lids_harper-for-@parcferme.co_-1-385x289.jpg","width":385,"height":289},"medium":{"url":"https://blog.arduino.cc/wp-content/uploads/2026/07/LIDS_0819-Mission-44-Silverstone-June-26-@lids_harper-for-@parcferme.co_-1-240x300.jpg","width":240,"height":300},"medium_large":{"url":"https://blog.arduino.cc/wp-content/uploads/2026/07/LIDS_0819-Mission-44-Silverstone-June-26-@lids_harper-for-@parcferme.co_-1-768x960.jpg","width":768,"height":960},"large":{"url":"https://blog.arduino.cc/wp-content/uploads/2026/07/LIDS_0819-Mission-44-Silverstone-June-26-@lids_harper-for-@parcferme.co_-1-819x1024.jpg","width":819,"height":1024},"1536x1536":{"url":"https://blog.arduino.cc/wp-content/uploads/2026/07/LIDS_0819-Mission-44-Silverstone-June-26-@lids_harper-for-@parcferme.co_-1-1229x1536.jpg","width":1229,"height":1536},"2048x2048":{"url":"https://blog.arduino.cc/wp-content/uploads/2026/07/LIDS_0819-Mission-44-Silverstone-June-26-@lids_harper-for-@parcferme.co_-1-1638x2048.jpg","width":1638,"height":2048}}},{"id":42403,"url":"https://blog.arduino.cc/wp-content/uploads/2026/07/LIDS_0677-Mission-44-Silverstone-June-26-@lids_harper-for-@parcferme.co_.jpg","slug":"lids_0677-mission-44-silverstone-june-26-lids_harper-for-parcferme-co","title":"LIDS_0677 - Mission 44 - Silverstone - June 26 - @lids_harper for @parcferme.co","description":"","caption":"","parent":42309,"mime_type":"image/jpeg","images":{"full":{"url":"https://blog.arduino.cc/wp-content/uploads/2026/07/LIDS_0677-Mission-44-Silverstone-June-26-@lids_harper-for-@parcferme.co_-scaled.jpg","width":2048,"height":2560},"thumbnail":{"url":"https://blog.arduino.cc/wp-content/uploads/2026/07/LIDS_0677-Mission-44-Silverstone-June-26-@lids_harper-for-@parcferme.co_-385x289.jpg","width":385,"height":289},"medium":{"url":"https://blog.arduino.cc/wp-content/uploads/2026/07/LIDS_0677-Mission-44-Silverstone-June-26-@lids_harper-for-@parcferme.co_-240x300.jpg","width":240,"height":300},"medium_large":{"url":"https://blog.arduino.cc/wp-content/uploads/2026/07/LIDS_0677-Mission-44-Silverstone-June-26-@lids_harper-for-@parcferme.co_-768x960.jpg","width":768,"height":960},"large":{"url":"https://blog.arduino.cc/wp-content/uploads/2026/07/LIDS_0677-Mission-44-Silverstone-June-26-@lids_harper-for-@parcferme.co_-819x1024.jpg","width":819,"height":1024},"1536x1536":{"url":"https://blog.arduino.cc/wp-content/uploads/2026/07/LIDS_0677-Mission-44-Silverstone-June-26-@lids_harper-for-@parcferme.co_-1229x1536.jpg","width":1229,"height":1536},"2048x2048":{"url":"https://blog.arduino.cc/wp-content/uploads/2026/07/LIDS_0677-Mission-44-Silverstone-June-26-@lids_harper-for-@parcferme.co_-1638x2048.jpg","width":1638,"height":2048}}},{"id":42401,"url":"https://blog.arduino.cc/wp-content/uploads/2026/07/LIDS_0819-Mission-44-Silverstone-June-26-@lids_harper-for-@parcferme.co_.jpg","slug":"lids_0819-mission-44-silverstone-june-26-lids_harper-for-parcferme-co","title":"LIDS_0819 - Mission 44 - Silverstone - June 26 - @lids_harper for @parcferme.co","description":"","caption":"","parent":42309,"mime_type":"image/jpeg","images":{"full":{"url":"https://blog.arduino.cc/wp-content/uploads/2026/07/LIDS_0819-Mission-44-Silverstone-June-26-@lids_harper-for-@parcferme.co_-scaled.jpg","width":2048,"height":2560},"thumbnail":{"url":"https://blog.arduino.cc/wp-content/uploads/2026/07/LIDS_0819-Mission-44-Silverstone-June-26-@lids_harper-for-@parcferme.co_-385x289.jpg","width":385,"height":289},"medium":{"url":"https://blog.arduino.cc/wp-content/uploads/2026/07/LIDS_0819-Mission-44-Silverstone-June-26-@lids_harper-for-@parcferme.co_-240x300.jpg","width":240,"height":300},"medium_large":{"url":"https://blog.arduino.cc/wp-content/uploads/2026/07/LIDS_0819-Mission-44-Silverstone-June-26-@lids_harper-for-@parcferme.co_-768x960.jpg","width":768,"height":960},"large":{"url":"https://blog.arduino.cc/wp-content/uploads/2026/07/LIDS_0819-Mission-44-Silverstone-June-26-@lids_harper-for-@parcferme.co_-819x1024.jpg","width":819,"height":1024},"1536x1536":{"url":"https://blog.arduino.cc/wp-content/uploads/2026/07/LIDS_0819-Mission-44-Silverstone-June-26-@lids_harper-for-@parcferme.co_-1229x1536.jpg","width":1229,"height":1536},"2048x2048":{"url":"https://blog.arduino.cc/wp-content/uploads/2026/07/LIDS_0819-Mission-44-Silverstone-June-26-@lids_harper-for-@parcferme.co_-1638x2048.jpg","width":1638,"height":2048}}},{"id":42400,"url":"https://blog.arduino.cc/wp-content/uploads/2026/07/LIDS_2555-Mission-44-Silverstone-June-26-@lids_harper-for-@parcferme.co_-1.jpg","slug":"lids_2555-mission-44-silverstone-june-26-lids_harper-for-parcferme-co-2","title":"LIDS_2555 - Mission 44 - Silverstone - June 26 - @lids_harper for @parcferme.co","description":"","caption":"","parent":42309,"mime_type":"image/jpeg","images":{"full":{"url":"https://blog.arduino.cc/wp-content/uploads/2026/07/LIDS_2555-Mission-44-Silverstone-June-26-@lids_harper-for-@parcferme.co_-1-scaled.jpg","width":2048,"height":2560},"thumbnail":{"url":"https://blog.arduino.cc/wp-content/uploads/2026/07/LIDS_2555-Mission-44-Silverstone-June-26-@lids_harper-for-@parcferme.co_-1-385x289.jpg","width":385,"height":289},"medium":{"url":"https://blog.arduino.cc/wp-content/uploads/2026/07/LIDS_2555-Mission-44-Silverstone-June-26-@lids_harper-for-@parcferme.co_-1-240x300.jpg","width":240,"height":300},"medium_large":{"url":"https://blog.arduino.cc/wp-content/uploads/2026/07/LIDS_2555-Mission-44-Silverstone-June-26-@lids_harper-for-@parcferme.co_-1-768x960.jpg","width":768,"height":960},"large":{"url":"https://blog.arduino.cc/wp-content/uploads/2026/07/LIDS_2555-Mission-44-Silverstone-June-26-@lids_harper-for-@parcferme.co_-1-819x1024.jpg","width":819,"height":1024},"1536x1536":{"url":"https://blog.arduino.cc/wp-content/uploads/2026/07/LIDS_2555-Mission-44-Silverstone-June-26-@lids_harper-for-@parcferme.co_-1-1229x1536.jpg","width":1229,"height":1536},"2048x2048":{"url":"https://blog.arduino.cc/wp-content/uploads/2026/07/LIDS_2555-Mission-44-Silverstone-June-26-@lids_harper-for-@parcferme.co_-1-1638x2048.jpg","width":1638,"height":2048}}},{"id":42396,"url":"https://blog.arduino.cc/wp-content/uploads/2026/07/LIDS_2555-Mission-44-Silverstone-June-26-@lids_harper-for-@parcferme.co_.jpg","slug":"lids_2555-mission-44-silverstone-june-26-lids_harper-for-parcferme-co","title":"LIDS_2555 - Mission 44 - Silverstone - June 26 - @lids_harper for @parcferme.co","description":"","caption":"","parent":42309,"mime_type":"image/jpeg","images":{"full":{"url":"https://blog.arduino.cc/wp-content/uploads/2026/07/LIDS_2555-Mission-44-Silverstone-June-26-@lids_harper-for-@parcferme.co_-scaled.jpg","width":2048,"height":2560},"thumbnail":{"url":"https://blog.arduino.cc/wp-content/uploads/2026/07/LIDS_2555-Mission-44-Silverstone-June-26-@lids_harper-for-@parcferme.co_-385x289.jpg","width":385,"height":289},"medium":{"url":"https://blog.arduino.cc/wp-content/uploads/2026/07/LIDS_2555-Mission-44-Silverstone-June-26-@lids_harper-for-@parcferme.co_-240x300.jpg","width":240,"height":300},"medium_large":{"url":"https://blog.arduino.cc/wp-content/uploads/2026/07/LIDS_2555-Mission-44-Silverstone-June-26-@lids_harper-for-@parcferme.co_-768x960.jpg","width":768,"height":960},"large":{"url":"https://blog.arduino.cc/wp-content/uploads/2026/07/LIDS_2555-Mission-44-Silverstone-June-26-@lids_harper-for-@parcferme.co_-819x1024.jpg","width":819,"height":1024},"1536x1536":{"url":"https://blog.arduino.cc/wp-content/uploads/2026/07/LIDS_2555-Mission-44-Silverstone-June-26-@lids_harper-for-@parcferme.co_-1229x1536.jpg","width":1229,"height":1536},"2048x2048":{"url":"https://blog.arduino.cc/wp-content/uploads/2026/07/LIDS_2555-Mission-44-Silverstone-June-26-@lids_harper-for-@parcferme.co_-1638x2048.jpg","width":1638,"height":2048}}},{"id":42395,"url":"https://blog.arduino.cc/wp-content/uploads/2026/07/LIDS_2575-Mission-44-Silverstone-June-26-@lids_harper-for-@parcferme.co_-1.jpg","slug":"lids_2575-mission-44-silverstone-june-26-lids_harper-for-parcferme-co-2","title":"LIDS_2575 - Mission 44 - Silverstone - June 26 - @lids_harper for @parcferme.co","description":"","caption":"","parent":42309,"mime_type":"image/jpeg","images":{"full":{"url":"https://blog.arduino.cc/wp-content/uploads/2026/07/LIDS_2575-Mission-44-Silverstone-June-26-@lids_harper-for-@parcferme.co_-1-scaled.jpg","width":2048,"height":2560},"thumbnail":{"url":"https://blog.arduino.cc/wp-content/uploads/2026/07/LIDS_2575-Mission-44-Silverstone-June-26-@lids_harper-for-@parcferme.co_-1-385x289.jpg","width":385,"height":289},"medium":{"url":"https://blog.arduino.cc/wp-content/uploads/2026/07/LIDS_2575-Mission-44-Silverstone-June-26-@lids_harper-for-@parcferme.co_-1-240x300.jpg","width":240,"height":300},"medium_large":{"url":"https://blog.arduino.cc/wp-content/uploads/2026/07/LIDS_2575-Mission-44-Silverstone-June-26-@lids_harper-for-@parcferme.co_-1-768x960.jpg","width":768,"height":960},"large":{"url":"https://blog.arduino.cc/wp-content/uploads/2026/07/LIDS_2575-Mission-44-Silverstone-June-26-@lids_harper-for-@parcferme.co_-1-819x1024.jpg","width":819,"height":1024},"1536x1536":{"url":"https://blog.arduino.cc/wp-content/uploads/2026/07/LIDS_2575-Mission-44-Silverstone-June-26-@lids_harper-for-@parcferme.co_-1-1229x1536.jpg","width":1229,"height":1536},"2048x2048":{"url":"https://blog.arduino.cc/wp-content/uploads/2026/07/LIDS_2575-Mission-44-Silverstone-June-26-@lids_harper-for-@parcferme.co_-1-1638x2048.jpg","width":1638,"height":2048}}},{"id":42310,"url":"https://blog.arduino.cc/wp-content/uploads/2026/07/image.jpeg","slug":"image-113","title":"image","description":"","caption":"","parent":42309,"mime_type":"image/jpeg","images":{"full":{"url":"https://blog.arduino.cc/wp-content/uploads/2026/07/image.jpeg","width":1638,"height":2048},"thumbnail":{"url":"https://blog.arduino.cc/wp-content/uploads/2026/07/image-385x289.jpeg","width":385,"height":289},"medium":{"url":"https://blog.arduino.cc/wp-content/uploads/2026/07/image-240x300.jpeg","width":240,"height":300},"medium_large":{"url":"https://blog.arduino.cc/wp-content/uploads/2026/07/image-768x960.jpeg","width":768,"height":960},"large":{"url":"https://blog.arduino.cc/wp-content/uploads/2026/07/image-819x1024.jpeg","width":819,"height":1024},"1536x1536":{"url":"https://blog.arduino.cc/wp-content/uploads/2026/07/image-1229x1536.jpeg","width":1229,"height":1536},"2048x2048":{"url":"https://blog.arduino.cc/wp-content/uploads/2026/07/image.jpeg","width":1638,"height":2048}}},{"id":42391,"url":"https://blog.arduino.cc/wp-content/uploads/2026/07/Attendees.jpg","slug":"attendees","title":"Attendees","description":"","caption":"","parent":42309,"mime_type":"image/jpeg","images":{"full":{"url":"https://blog.arduino.cc/wp-content/uploads/2026/07/Attendees-scaled.jpg","width":2560,"height":2088},"thumbnail":{"url":"https://blog.arduino.cc/wp-content/uploads/2026/07/Attendees-385x289.jpg","width":385,"height":289},"medium":{"url":"https://blog.arduino.cc/wp-content/uploads/2026/07/Attendees-300x245.jpg","width":300,"height":245},"medium_large":{"url":"https://blog.arduino.cc/wp-content/uploads/2026/07/Attendees-768x626.jpg","width":768,"height":626},"large":{"url":"https://blog.arduino.cc/wp-content/uploads/2026/07/Attendees-1024x835.jpg","width":1024,"height":835},"1536x1536":{"url":"https://blog.arduino.cc/wp-content/uploads/2026/07/Attendees-1536x1253.jpg","width":1536,"height":1253},"2048x2048":{"url":"https://blog.arduino.cc/wp-content/uploads/2026/07/Attendees-2048x1671.jpg","width":2048,"height":1671}}},{"id":42389,"url":"https://blog.arduino.cc/wp-content/uploads/2026/07/image-3-1.png","slug":"image-3-7","title":"image-3","description":"","caption":"","parent":42309,"mime_type":"image/png","images":{"full":{"url":"https://blog.arduino.cc/wp-content/uploads/2026/07/image-3-1.png","width":1920,"height":1080},"thumbnail":{"url":"https://blog.arduino.cc/wp-content/uploads/2026/07/image-3-1-385x289.png","width":385,"height":289},"medium":{"url":"https://blog.arduino.cc/wp-content/uploads/2026/07/image-3-1-300x169.png","width":300,"height":169},"medium_large":{"url":"https://blog.arduino.cc/wp-content/uploads/2026/07/image-3-1-768x432.png","width":768,"height":432},"large":{"url":"https://blog.arduino.cc/wp-content/uploads/2026/07/image-3-1-1024x576.png","width":1024,"height":576},"1536x1536":{"url":"https://blog.arduino.cc/wp-content/uploads/2026/07/image-3-1-1536x864.png","width":1536,"height":864},"2048x2048":{"url":"https://blog.arduino.cc/wp-content/uploads/2026/07/image-3-1.png","width":1920,"height":1080}}},{"id":42386,"url":"https://blog.arduino.cc/wp-content/uploads/2026/07/image-3.png","slug":"image-118","title":"image","description":"","caption":"","parent":42309,"mime_type":"image/png","images":{"full":{"url":"https://blog.arduino.cc/wp-content/uploads/2026/07/image-3.png","width":1920,"height":1080},"thumbnail":{"url":"https://blog.arduino.cc/wp-content/uploads/2026/07/image-3-385x289.png","width":385,"height":289},"medium":{"url":"https://blog.arduino.cc/wp-content/uploads/2026/07/image-3-300x169.png","width":300,"height":169},"medium_large":{"url":"https://blog.arduino.cc/wp-content/uploads/2026/07/image-3-768x432.png","width":768,"height":432},"large":{"url":"https://blog.arduino.cc/wp-content/uploads/2026/07/image-3-1024x576.png","width":1024,"height":576},"1536x1536":{"url":"https://blog.arduino.cc/wp-content/uploads/2026/07/image-3-1536x864.png","width":1536,"height":864},"2048x2048":{"url":"https://blog.arduino.cc/wp-content/uploads/2026/07/image-3.png","width":1920,"height":1080}}},{"id":42314,"url":"https://blog.arduino.cc/wp-content/uploads/2026/07/image-2.png","slug":"image-117","title":"image","description":"","caption":"","parent":42309,"mime_type":"image/png","images":{"full":{"url":"https://blog.arduino.cc/wp-content/uploads/2026/07/image-2.png","width":1148,"height":1550},"thumbnail":{"url":"https://blog.arduino.cc/wp-content/uploads/2026/07/image-2-385x289.png","width":385,"height":289},"medium":{"url":"https://blog.arduino.cc/wp-content/uploads/2026/07/image-2-222x300.png","width":222,"height":300},"medium_large":{"url":"https://blog.arduino.cc/wp-content/uploads/2026/07/image-2-768x1037.png","width":768,"height":1037},"large":{"url":"https://blog.arduino.cc/wp-content/uploads/2026/07/image-2-758x1024.png","width":758,"height":1024},"1536x1536":{"url":"https://blog.arduino.cc/wp-content/uploads/2026/07/image-2-1138x1536.png","width":1138,"height":1536},"2048x2048":{"url":"https://blog.arduino.cc/wp-content/uploads/2026/07/image-2.png","width":1148,"height":1550}}},{"id":42313,"url":"https://blog.arduino.cc/wp-content/uploads/2026/07/image-3.jpeg","slug":"image-116","title":"image","description":"","caption":"","parent":42309,"mime_type":"image/jpeg","images":{"full":{"url":"https://blog.arduino.cc/wp-content/uploads/2026/07/image-3.jpeg","width":1638,"height":2048},"thumbnail":{"url":"https://blog.arduino.cc/wp-content/uploads/2026/07/image-3-385x289.jpeg","width":385,"height":289},"medium":{"url":"https://blog.arduino.cc/wp-content/uploads/2026/07/image-3-240x300.jpeg","width":240,"height":300},"medium_large":{"url":"https://blog.arduino.cc/wp-content/uploads/2026/07/image-3-768x960.jpeg","width":768,"height":960},"large":{"url":"https://blog.arduino.cc/wp-content/uploads/2026/07/image-3-819x1024.jpeg","width":819,"height":1024},"1536x1536":{"url":"https://blog.arduino.cc/wp-content/uploads/2026/07/image-3-1229x1536.jpeg","width":1229,"height":1536},"2048x2048":{"url":"https://blog.arduino.cc/wp-content/uploads/2026/07/image-3.jpeg","width":1638,"height":2048}}},{"id":42312,"url":"https://blog.arduino.cc/wp-content/uploads/2026/07/image-2.jpeg","slug":"image-115","title":"image","description":"","caption":"","parent":42309,"mime_type":"image/jpeg","images":{"full":{"url":"https://blog.arduino.cc/wp-content/uploads/2026/07/image-2.jpeg","width":1638,"height":2048},"thumbnail":{"url":"https://blog.arduino.cc/wp-content/uploads/2026/07/image-2-385x289.jpeg","width":385,"height":289},"medium":{"url":"https://blog.arduino.cc/wp-content/uploads/2026/07/image-2-240x300.jpeg","width":240,"height":300},"medium_large":{"url":"https://blog.arduino.cc/wp-content/uploads/2026/07/image-2-768x960.jpeg","width":768,"height":960},"large":{"url":"https://blog.arduino.cc/wp-content/uploads/2026/07/image-2-819x1024.jpeg","width":819,"height":1024},"1536x1536":{"url":"https://blog.arduino.cc/wp-content/uploads/2026/07/image-2-1229x1536.jpeg","width":1229,"height":1536},"2048x2048":{"url":"https://blog.arduino.cc/wp-content/uploads/2026/07/image-2.jpeg","width":1638,"height":2048}}},{"id":42311,"url":"https://blog.arduino.cc/wp-content/uploads/2026/07/image-1.jpeg","slug":"image-114","title":"image","description":"","caption":"","parent":42309,"mime_type":"image/jpeg","images":{"full":{"url":"https://blog.arduino.cc/wp-content/uploads/2026/07/image-1.jpeg","width":1638,"height":2048},"thumbnail":{"url":"https://blog.arduino.cc/wp-content/uploads/2026/07/image-1-385x289.jpeg","width":385,"height":289},"medium":{"url":"https://blog.arduino.cc/wp-content/uploads/2026/07/image-1-240x300.jpeg","width":240,"height":300},"medium_large":{"url":"https://blog.arduino.cc/wp-content/uploads/2026/07/image-1-768x960.jpeg","width":768,"height":960},"large":{"url":"https://blog.arduino.cc/wp-content/uploads/2026/07/image-1-819x1024.jpeg","width":819,"height":1024},"1536x1536":{"url":"https://blog.arduino.cc/wp-content/uploads/2026/07/image-1-1229x1536.jpeg","width":1229,"height":1536},"2048x2048":{"url":"https://blog.arduino.cc/wp-content/uploads/2026/07/image-1.jpeg","width":1638,"height":2048}}}],"comment_count":0,"comment_status":"closed","thumbnail":"https://blog.arduino.cc/wp-content/uploads/2026/07/image-3-1-385x289.png","custom_fields":{"algolia_searchable_posts_records_count":["2"]},"thumbnail_size":"thumbnail","thumbnail_images":{"full":{"url":"https://blog.arduino.cc/wp-content/uploads/2026/07/image-3-1.png","width":1920,"height":1080},"thumbnail":{"url":"https://blog.arduino.cc/wp-content/uploads/2026/07/image-3-1-385x289.png","width":385,"height":289},"medium":{"url":"https://blog.arduino.cc/wp-content/uploads/2026/07/image-3-1-300x169.png","width":300,"height":169},"medium_large":{"url":"https://blog.arduino.cc/wp-content/uploads/2026/07/image-3-1-768x432.png","width":768,"height":432},"large":{"url":"https://blog.arduino.cc/wp-content/uploads/2026/07/image-3-1-1024x576.png","width":1024,"height":576},"1536x1536":{"url":"https://blog.arduino.cc/wp-content/uploads/2026/07/image-3-1-1536x864.png","width":1536,"height":864},"2048x2048":{"url":"https://blog.arduino.cc/wp-content/uploads/2026/07/image-3-1.png","width":1920,"height":1080}}},{"id":42339,"type":"post","slug":"build-a-retro-home-arcade-with-an-arduino-uno-q-board","url":"https://blog.arduino.cc/2026/07/20/build-a-retro-home-arcade-with-an-arduino-uno-q-board/","status":"publish","title":"Build a retro home arcade with an Arduino® UNO™ Q board!","title_plain":"Build a retro home arcade with an Arduino® UNO™ Q board!","content":"\n\u003cfigure class=\"wp-block-image size-large\"\u003e\u003cdiv class=\"image-post\"\u003e\u003cimg loading=\"lazy\" decoding=\"async\" width=\"1024\" height=\"559\" src=\"https://blog.arduino.cc/wp-content/uploads/2026/07/Arduino.cc-Blogpost-Cover1100x600-1024x559.jpg\" alt=\"\" class=\"wp-image-42340\" srcset=\"https://blog.arduino.cc/wp-content/uploads/2026/07/Arduino.cc-Blogpost-Cover1100x600-1024x559.jpg 1024w, https://blog.arduino.cc/wp-content/uploads/2026/07/Arduino.cc-Blogpost-Cover1100x600-300x164.jpg 300w, https://blog.arduino.cc/wp-content/uploads/2026/07/Arduino.cc-Blogpost-Cover1100x600-768x419.jpg 768w, https://blog.arduino.cc/wp-content/uploads/2026/07/Arduino.cc-Blogpost-Cover1100x600.jpg 1100w\" sizes=\"auto, (max-width: 1024px) 100vw, 1024px\" /\u003e\u003c/div\u003e\u003c/figure\u003e\n\n\n\n\u003cp class=\"wp-block-paragraph\"\u003eJust a few weeks after launching the \u003ca href=\"https://store.arduino.cc/products/uno-q-diy-synth-bundle?utm_source=content\u0026amp;utm_medium=blogpost\u0026amp;utm_campaign=unoq_is_the_answer\u0026amp;utm_id=mktg-content\"\u003eUNO\u003csup\u003e™\u003c/sup\u003e Q DIY synth bundle\u003c/a\u003e, we’re adding a new classic project you can \u003cstrong\u003epick up in one click, and get done in a weekend\u003c/strong\u003e.\u0026nbsp;\u003c/p\u003e\n\n\n\n\u003cp class=\"wp-block-paragraph\"\u003eMeet the \u003ca href=\"https://store-usa.arduino.cc/products/uno-q-arcade-bundle?utm_source=content\u0026amp;utm_medium=blogpost\u0026amp;utm_campaign=unoq_is_the_answer\u0026amp;utm_id=mktg-content\"\u003e\u003cstrong\u003eUNO\u003csup\u003e™\u003c/sup\u003e Q Arcade bundle\u003c/strong\u003e\u003c/a\u003e: a rewarding new way to start building with UNO Q, following a complete step-by-step tutorial towards a clear objective –\u0026nbsp;and gaining hands-on tech experience as you go!\u003c/p\u003e\n\n\n\n\u003cp class=\"wp-block-paragraph\"\u003eNot only is the bundle designed to make your experience frictionless and rewarding, but it comes out during a special sale with a \u003cstrong\u003e20% discount\u003c/strong\u003e built right in to sweeten the deal. Don’t sleep on it! If the DIY synth bundle taught us anything, it’s these sell out fast.\u003c/p\u003e\n\n\n\n\u003ch2 class=\"wp-block-heading\"\u003eThe UNO Q Arcade bundle: one board, infinite games\u003c/h2\u003e\n\n\n\n\u003cp class=\"wp-block-paragraph\"\u003eNow anyone can build their own arcade cabinet, in just a few hours of fun. Follow the \u003ca href=\"https://projecthub.arduino.cc/Arduino_Genuino/uno-q-arcade-bundle-b272c5\"\u003einstructions available on Arduino\u003csup\u003e®\u003c/sup\u003e Project Hub\u003c/a\u003e, and you’ll quickly have UNO Q run RetroArch – the well-established open-source multi-system emulator – directly on its Debian Linux side, outputting via HDMI and handling audio over USB. No separate single-board computer, no extra compute module, no compromises: the Qualcomm Dragonwing\u003csup\u003e™\u003c/sup\u003e QRB2210 processor manages multiple emulation cores, controller input, video, and audio simultaneously, while the onboard eMMC provides plenty of room for ROMs and configuration files.\u003c/p\u003e\n\n\n\n\u003cp class=\"wp-block-paragraph\"\u003eBut one board does not a bundle make! We’ve included \u003cstrong\u003ethree easy-to-use Arduino\u003c/strong\u003e\u003cstrong\u003e\u003csup\u003e®\u003c/sup\u003e\u003c/strong\u003e\u003cstrong\u003e\u0026nbsp;Modulino\u003c/strong\u003e\u003cstrong\u003e\u003csup\u003e™\u003c/sup\u003e\u003c/strong\u003e\u003cstrong\u003e nodes – Buttons, Joystick, and Movement\u003c/strong\u003e – to make the controller side of UNO 4GB really shine. Modulino eliminate complex wiring: just daisy-chain them together via Qwiic and you’re ready to configure. Use Joystick to simulate D-Pad or mouse movement, Buttons for single or multi-key shortcuts, and Movement for motion-based mouse control. Every input is customizable to your playstyle.\u0026nbsp;\u003c/p\u003e\n\n\n\n\u003cfigure class=\"wp-block-image size-large\"\u003e\u003cdiv class=\"image-post\"\u003e\u003cimg loading=\"lazy\" decoding=\"async\" width=\"1024\" height=\"653\" src=\"https://blog.arduino.cc/wp-content/uploads/2026/07/Arcade-Bundle--1024x653.jpg\" alt=\"\" class=\"wp-image-42353\" srcset=\"https://blog.arduino.cc/wp-content/uploads/2026/07/Arcade-Bundle--1024x653.jpg 1024w, https://blog.arduino.cc/wp-content/uploads/2026/07/Arcade-Bundle--300x191.jpg 300w, https://blog.arduino.cc/wp-content/uploads/2026/07/Arcade-Bundle--768x489.jpg 768w, https://blog.arduino.cc/wp-content/uploads/2026/07/Arcade-Bundle-.jpg 1395w\" sizes=\"auto, (max-width: 1024px) 100vw, 1024px\" /\u003e\u003c/div\u003e\u003c/figure\u003e\n\n\n\n\u003ch2 class=\"wp-block-heading\"\u003eCreate your own games with open-source Godot\u003c/h2\u003e\n\n\n\n\u003cp class=\"wp-block-paragraph\"\u003eSo you can build the cool hardware, and leverage ready-to-use software to play your favorite retro-style games. \u003cstrong\u003eBut how about creating your own?\u003c/strong\u003e\u003c/p\u003e\n\n\n\n\u003cp class=\"wp-block-paragraph\"\u003eThanks to its Debian Linux environment, UNO Q can run projects built with the popular open-source game engine \u003ca href=\"https://godotengine.org/\"\u003eGodot\u003c/a\u003e. This makes the UNO Q the heart of a compact game-development platform and, ultimately, a super-portable DIY video game console.\u003c/p\u003e\n\n\n\n\u003cp class=\"wp-block-paragraph\"\u003eDevelop your game with Godot, connect UNO Q to a display via HDMI, add a USB audio device, and build your own controller using Modulino nodes or other Arduino-compatible hardware. Buttons, joysticks, motion sensors, knobs, LEDs, and even environmental sensors can become part of the gameplay –\u0026nbsp;not just accessories connected to it.\u003c/p\u003e\n\n\n\n\u003cp class=\"wp-block-paragraph\"\u003ePut everything inside a \u003ca href=\"https://www.printables.com/model/1786091-arduino-uno-q-arcade-bundle\"\u003e3D-printed\u003c/a\u003e or custom enclosure, add a small HDMI display and a portable power source, and your project can move from desktop prototype to a self-contained gaming device you can carry, demonstrate, and play almost anywhere.\u003c/p\u003e\n\n\n\n\u003cp class=\"wp-block-paragraph\"\u003eCheck out these inspiring GitHub repos to get a better idea of how you can stretch the UNO Q Arcade bundle:\u0026nbsp;\u003c/p\u003e\n\n\n\n\u003cul class=\"wp-block-list\"\u003e\n\u003cli\u003e\u003ca href=\"https://github.com/KsaweryL/Hackathon-project-spear\"\u003eHackathon Project Spear\u003c/a\u003e\u003c/li\u003e\n\n\n\n\u003cli\u003e\u003ca href=\"https://github.com/marchellodev/arduino_summer_game\"\u003eArduino Summer Game\u003c/a\u003e\u003c/li\u003e\n\n\n\n\u003cli\u003e\u003ca href=\"https://github.com/TimofeySukh/summerengine_hackathon\"\u003eSummerEngine Hackathon\u003c/a\u003e\u003c/li\u003e\n\n\n\n\u003cli\u003e\u003ca href=\"https://github.com/vishalshan23/penguin-modulino-explorer\"\u003ePenguin Modulino Explorer\u003c/a\u003e\u003c/li\u003e\n\u003c/ul\u003e\n\n\n\n\u003ch2 class=\"wp-block-heading\"\u003eReady? Set? Play!\u003c/h2\u003e\n\n\n\n\u003cp class=\"wp-block-paragraph\"\u003eWhile the community has been building these kinds of playful and retro projects for years, UNO Q makes them more capable than ever. With the bundle, we want to make it easier to get started, and more affordable to dive in. Bring your creativity! We’ve taken care of the rest.\u003c/p\u003e\n\n\n\n\u003cp class=\"wp-block-paragraph\"\u003e\u003ca href=\"https://store-usa.arduino.cc/products/uno-q-arcade-bundle?utm_source=content\u0026amp;utm_medium=blogpost\u0026amp;utm_campaign=unoq_is_the_answer\u0026amp;utm_id=mktg-content\"\u003eGet the UNO Q Arcade bundle\u003c/a\u003e (with 20% discount until September 10th!).\u003c/p\u003e\n\n\n\n\u003cp class=\"wp-block-paragraph\"\u003e\u003ca href=\"https://projecthub.arduino.cc/Arduino_Genuino/uno-q-arcade-bundle-b272c5\"\u003eCheck out the full tutorial on Arduino Project Hub\u003c/a\u003e.\u003c/p\u003e\n\n\n\n\u003cp class=\"wp-block-paragraph\"\u003e\u003cem\u003eQualcomm branded products are products of Qualcomm Technologies, Inc. and/or its subsidiaries. Arduino, Modulino, UNO, and the Arduino logo are trademarks or registered trademarks of Arduino S.r.l.\u003c/em\u003e\u003c/p\u003e\n","excerpt":"\u003cp\u003eJust a few weeks after launching the UNO™ Q DIY synth bundle, we’re adding a new classic project you can pick up in one click, and get done in a weekend.\u0026nbsp; Meet the UNO™ Q Arcade bundle: a rewarding new way to start building with UNO Q, following a complete step-by-step tutorial towards a clear [\u0026hellip;]\u003c/p\u003e\n","date":"2026-07-20 15:20:14","modified":"2026-07-29 10:44:24","categories":[{"id":42,"slug":"arduino","title":"Arduino","description":"","parent":0,"post_count":3274},{"id":1597,"slug":"featured","title":"Featured","description":"","parent":0,"post_count":1764},{"id":6698,"slug":"uno-q","title":"UNO Q","description":"","parent":42,"post_count":44}],"tags":[{"id":6896,"slug":"arduino-uno-q-arcade-bundle","title":"Arduino UNO Q Arcade Bundle","description":"","post_count":1},{"id":1451,"slug":"gaming","title":"gaming","description":"","post_count":21},{"id":4170,"slug":"gaming-device","title":"Gaming Device","description":"","post_count":2},{"id":1163,"slug":"retro-gaming","title":"Retro Gaming","description":"","post_count":7},{"id":6895,"slug":"uno-q-arcade-bundle","title":"UNO Q Arcade Bundle","description":"","post_count":1}],"author":{"id":27876,"slug":"editorarduino","name":"Arduino Team","first_name":"","last_name":"","nickname":"Arduino Team","url":"","description":""},"comments":[],"attachments":[{"id":42340,"url":"https://blog.arduino.cc/wp-content/uploads/2026/07/Arduino.cc-Blogpost-Cover1100x600.jpg","slug":"arduino-cc-blogpost-cover1100x600-17","title":"Arduino.cc-Blogpost-Cover(1100x600)","description":"","caption":"","parent":42339,"mime_type":"image/jpeg","images":{"full":{"url":"https://blog.arduino.cc/wp-content/uploads/2026/07/Arduino.cc-Blogpost-Cover1100x600.jpg","width":1100,"height":600},"thumbnail":{"url":"https://blog.arduino.cc/wp-content/uploads/2026/07/Arduino.cc-Blogpost-Cover1100x600-385x289.jpg","width":385,"height":289},"medium":{"url":"https://blog.arduino.cc/wp-content/uploads/2026/07/Arduino.cc-Blogpost-Cover1100x600-300x164.jpg","width":300,"height":164},"medium_large":{"url":"https://blog.arduino.cc/wp-content/uploads/2026/07/Arduino.cc-Blogpost-Cover1100x600-768x419.jpg","width":768,"height":419},"large":{"url":"https://blog.arduino.cc/wp-content/uploads/2026/07/Arduino.cc-Blogpost-Cover1100x600-1024x559.jpg","width":1024,"height":559},"1536x1536":{"url":"https://blog.arduino.cc/wp-content/uploads/2026/07/Arduino.cc-Blogpost-Cover1100x600.jpg","width":1100,"height":600},"2048x2048":{"url":"https://blog.arduino.cc/wp-content/uploads/2026/07/Arduino.cc-Blogpost-Cover1100x600.jpg","width":1100,"height":600}}},{"id":42341,"url":"https://blog.arduino.cc/wp-content/uploads/2026/07/Arduino.cc-Blogpost-Featured385x289.jpg","slug":"arduino-cc-blogpost-featured385x289-16","title":"Arduino.cc-Blogpost-Featured(385x289)","description":"","caption":"","parent":42339,"mime_type":"image/jpeg","images":{"full":{"url":"https://blog.arduino.cc/wp-content/uploads/2026/07/Arduino.cc-Blogpost-Featured385x289.jpg","width":385,"height":289},"thumbnail":{"url":"https://blog.arduino.cc/wp-content/uploads/2026/07/Arduino.cc-Blogpost-Featured385x289.jpg","width":385,"height":289},"medium":{"url":"https://blog.arduino.cc/wp-content/uploads/2026/07/Arduino.cc-Blogpost-Featured385x289-300x225.jpg","width":300,"height":225},"medium_large":{"url":"https://blog.arduino.cc/wp-content/uploads/2026/07/Arduino.cc-Blogpost-Featured385x289.jpg","width":385,"height":289},"large":{"url":"https://blog.arduino.cc/wp-content/uploads/2026/07/Arduino.cc-Blogpost-Featured385x289.jpg","width":385,"height":289},"1536x1536":{"url":"https://blog.arduino.cc/wp-content/uploads/2026/07/Arduino.cc-Blogpost-Featured385x289.jpg","width":385,"height":289},"2048x2048":{"url":"https://blog.arduino.cc/wp-content/uploads/2026/07/Arduino.cc-Blogpost-Featured385x289.jpg","width":385,"height":289}}},{"id":42342,"url":"https://blog.arduino.cc/wp-content/uploads/2026/07/Arcade-Bundle.jpg","slug":"arcade-bundle","title":"Arcade Bundle","description":"","caption":"","parent":42339,"mime_type":"image/jpeg","images":{"full":{"url":"https://blog.arduino.cc/wp-content/uploads/2026/07/Arcade-Bundle-scaled.jpg","width":2560,"height":1917},"thumbnail":{"url":"https://blog.arduino.cc/wp-content/uploads/2026/07/Arcade-Bundle-385x289.jpg","width":385,"height":289},"medium":{"url":"https://blog.arduino.cc/wp-content/uploads/2026/07/Arcade-Bundle-300x225.jpg","width":300,"height":225},"medium_large":{"url":"https://blog.arduino.cc/wp-content/uploads/2026/07/Arcade-Bundle-768x575.jpg","width":768,"height":575},"large":{"url":"https://blog.arduino.cc/wp-content/uploads/2026/07/Arcade-Bundle-1024x767.jpg","width":1024,"height":767},"1536x1536":{"url":"https://blog.arduino.cc/wp-content/uploads/2026/07/Arcade-Bundle-1536x1150.jpg","width":1536,"height":1150},"2048x2048":{"url":"https://blog.arduino.cc/wp-content/uploads/2026/07/Arcade-Bundle-2048x1534.jpg","width":2048,"height":1534}}},{"id":42343,"url":"https://blog.arduino.cc/wp-content/uploads/2026/07/Arcade-Bundle-1.jpg","slug":"arcade-bundle-2","title":"Arcade Bundle","description":"","caption":"","parent":42339,"mime_type":"image/jpeg","images":{"full":{"url":"https://blog.arduino.cc/wp-content/uploads/2026/07/Arcade-Bundle-1-scaled.jpg","width":2560,"height":1961},"thumbnail":{"url":"https://blog.arduino.cc/wp-content/uploads/2026/07/Arcade-Bundle-1-385x289.jpg","width":385,"height":289},"medium":{"url":"https://blog.arduino.cc/wp-content/uploads/2026/07/Arcade-Bundle-1-300x230.jpg","width":300,"height":230},"medium_large":{"url":"https://blog.arduino.cc/wp-content/uploads/2026/07/Arcade-Bundle-1-768x588.jpg","width":768,"height":588},"large":{"url":"https://blog.arduino.cc/wp-content/uploads/2026/07/Arcade-Bundle-1-1024x784.jpg","width":1024,"height":784},"1536x1536":{"url":"https://blog.arduino.cc/wp-content/uploads/2026/07/Arcade-Bundle-1-1536x1176.jpg","width":1536,"height":1176},"2048x2048":{"url":"https://blog.arduino.cc/wp-content/uploads/2026/07/Arcade-Bundle-1-2048x1569.jpg","width":2048,"height":1569}}},{"id":42344,"url":"https://blog.arduino.cc/wp-content/uploads/2026/07/Arcade-Bundle-1-1.jpg","slug":"arcade-bundle-1","title":"Arcade Bundle 1","description":"","caption":"","parent":42339,"mime_type":"image/jpeg","images":{"full":{"url":"https://blog.arduino.cc/wp-content/uploads/2026/07/Arcade-Bundle-1-1-scaled.jpg","width":2446,"height":2560},"thumbnail":{"url":"https://blog.arduino.cc/wp-content/uploads/2026/07/Arcade-Bundle-1-1-385x289.jpg","width":385,"height":289},"medium":{"url":"https://blog.arduino.cc/wp-content/uploads/2026/07/Arcade-Bundle-1-1-287x300.jpg","width":287,"height":300},"medium_large":{"url":"https://blog.arduino.cc/wp-content/uploads/2026/07/Arcade-Bundle-1-1-768x804.jpg","width":768,"height":804},"large":{"url":"https://blog.arduino.cc/wp-content/uploads/2026/07/Arcade-Bundle-1-1-978x1024.jpg","width":978,"height":1024},"1536x1536":{"url":"https://blog.arduino.cc/wp-content/uploads/2026/07/Arcade-Bundle-1-1-1468x1536.jpg","width":1468,"height":1536},"2048x2048":{"url":"https://blog.arduino.cc/wp-content/uploads/2026/07/Arcade-Bundle-1-1-1957x2048.jpg","width":1957,"height":2048}}},{"id":42353,"url":"https://blog.arduino.cc/wp-content/uploads/2026/07/Arcade-Bundle-.jpg","slug":"arcade-bundle-3","title":"Arcade Bundle","description":"","caption":"","parent":42339,"mime_type":"image/jpeg","images":{"full":{"url":"https://blog.arduino.cc/wp-content/uploads/2026/07/Arcade-Bundle-.jpg","width":1395,"height":889},"thumbnail":{"url":"https://blog.arduino.cc/wp-content/uploads/2026/07/Arcade-Bundle--385x289.jpg","width":385,"height":289},"medium":{"url":"https://blog.arduino.cc/wp-content/uploads/2026/07/Arcade-Bundle--300x191.jpg","width":300,"height":191},"medium_large":{"url":"https://blog.arduino.cc/wp-content/uploads/2026/07/Arcade-Bundle--768x489.jpg","width":768,"height":489},"large":{"url":"https://blog.arduino.cc/wp-content/uploads/2026/07/Arcade-Bundle--1024x653.jpg","width":1024,"height":653},"1536x1536":{"url":"https://blog.arduino.cc/wp-content/uploads/2026/07/Arcade-Bundle-.jpg","width":1395,"height":889},"2048x2048":{"url":"https://blog.arduino.cc/wp-content/uploads/2026/07/Arcade-Bundle-.jpg","width":1395,"height":889}}},{"id":42410,"url":"https://blog.arduino.cc/wp-content/uploads/2026/07/arcade_bundle_assembly.gif","slug":"arcade_bundle_assembly","title":"arcade_bundle_assembly","description":"","caption":"","parent":42339,"mime_type":"image/gif","images":{"full":{"url":"https://blog.arduino.cc/wp-content/uploads/2026/07/arcade_bundle_assembly.gif","width":1200,"height":534},"thumbnail":{"url":"https://blog.arduino.cc/wp-content/uploads/2026/07/arcade_bundle_assembly-385x289.gif","width":385,"height":289},"medium":{"url":"https://blog.arduino.cc/wp-content/uploads/2026/07/arcade_bundle_assembly-300x134.gif","width":300,"height":134},"medium_large":{"url":"https://blog.arduino.cc/wp-content/uploads/2026/07/arcade_bundle_assembly-768x342.gif","width":768,"height":342},"large":{"url":"https://blog.arduino.cc/wp-content/uploads/2026/07/arcade_bundle_assembly-1024x456.gif","width":1024,"height":456},"1536x1536":{"url":"https://blog.arduino.cc/wp-content/uploads/2026/07/arcade_bundle_assembly.gif","width":1200,"height":534},"2048x2048":{"url":"https://blog.arduino.cc/wp-content/uploads/2026/07/arcade_bundle_assembly.gif","width":1200,"height":534}}}],"comment_count":0,"comment_status":"closed","thumbnail":"https://blog.arduino.cc/wp-content/uploads/2026/07/Arduino.cc-Blogpost-Featured385x289.jpg","custom_fields":{"algolia_searchable_posts_records_count":["2"]},"thumbnail_size":"thumbnail","thumbnail_images":{"full":{"url":"https://blog.arduino.cc/wp-content/uploads/2026/07/Arduino.cc-Blogpost-Featured385x289.jpg","width":385,"height":289},"thumbnail":{"url":"https://blog.arduino.cc/wp-content/uploads/2026/07/Arduino.cc-Blogpost-Featured385x289.jpg","width":385,"height":289},"medium":{"url":"https://blog.arduino.cc/wp-content/uploads/2026/07/Arduino.cc-Blogpost-Featured385x289-300x225.jpg","width":300,"height":225},"medium_large":{"url":"https://blog.arduino.cc/wp-content/uploads/2026/07/Arduino.cc-Blogpost-Featured385x289.jpg","width":385,"height":289},"large":{"url":"https://blog.arduino.cc/wp-content/uploads/2026/07/Arduino.cc-Blogpost-Featured385x289.jpg","width":385,"height":289},"1536x1536":{"url":"https://blog.arduino.cc/wp-content/uploads/2026/07/Arduino.cc-Blogpost-Featured385x289.jpg","width":385,"height":289},"2048x2048":{"url":"https://blog.arduino.cc/wp-content/uploads/2026/07/Arduino.cc-Blogpost-Featured385x289.jpg","width":385,"height":289}}},{"id":42292,"type":"post","slug":"how-to-achieve-cost-effective-predictive-maintenance-with-the-arduino-uno-q-board","url":"https://blog.arduino.cc/2026/07/02/how-to-achieve-cost-effective-predictive-maintenance-with-the-arduino-uno-q-board/","status":"publish","title":"How to achieve cost-effective predictive maintenance with the Arduino® UNO™ Q board","title_plain":"How to achieve cost-effective predictive maintenance with the Arduino® UNO™ Q board","content":"\n\u003cfigure class=\"wp-block-image size-large\"\u003e\u003cdiv class=\"image-post\"\u003e\u003cimg loading=\"lazy\" decoding=\"async\" width=\"1024\" height=\"559\" src=\"https://blog.arduino.cc/wp-content/uploads/2026/07/Arduino.cc-Blogpost-Cover1100x600-4-1024x559.jpg\" alt=\"\" class=\"wp-image-42300\" srcset=\"https://blog.arduino.cc/wp-content/uploads/2026/07/Arduino.cc-Blogpost-Cover1100x600-4-1024x559.jpg 1024w, https://blog.arduino.cc/wp-content/uploads/2026/07/Arduino.cc-Blogpost-Cover1100x600-4-300x164.jpg 300w, https://blog.arduino.cc/wp-content/uploads/2026/07/Arduino.cc-Blogpost-Cover1100x600-4-768x419.jpg 768w, https://blog.arduino.cc/wp-content/uploads/2026/07/Arduino.cc-Blogpost-Cover1100x600-4.jpg 1100w\" sizes=\"auto, (max-width: 1024px) 100vw, 1024px\" /\u003e\u003c/div\u003e\u003c/figure\u003e\n\n\n\n\u003cp class=\"wp-block-paragraph\"\u003eMost machines warn you before they fail. A motor begins to vibrate differently. A pump slowly drifts out of balance. A bearing develops a new mechanical signature. A cooling fan starts producing frequencies that were not present during normal operation.\u003c/p\u003e\n\n\n\n\u003cp class=\"wp-block-paragraph\"\u003eThese changes can appear well before a complete breakdown. The challenge is detecting them early, reliably, and at a cost that makes monitoring practical across more than just the factory’s most expensive machines.\u003c/p\u003e\n\n\n\n\u003cp class=\"wp-block-paragraph\"\u003eUNO Q provides a flexible platform for building a compact predictive maintenance node that collects vibration data, runs a machine learning model locally, and turns unusual machine behavior into actionable alerts. The result is a practical way to begin monitoring motors, pumps, fans, bearings, compressors, and other rotating equipment without immediately deploying a complex cloud infrastructure.\u003c/p\u003e\n\n\n\n\u003ch2 class=\"wp-block-heading\"\u003ePickin’ up good (and bad!) vibrations\u003c/h2\u003e\n\n\n\n\u003cp class=\"wp-block-paragraph\"\u003eVibration is one of the most useful signals for understanding the condition of rotating machinery. When a machine is operating normally, its motor, bearings, shafts, and mechanical components produce a relatively consistent vibration pattern. Changes in alignment, balance, friction, mounting, or component wear can alter that pattern.\u003c/p\u003e\n\n\n\n\u003cp class=\"wp-block-paragraph\"\u003eA traditional monitoring system might trigger an alert whenever vibration exceeds a predefined value. That approach can be useful, but machines rarely operate under perfectly fixed conditions. Speed, load, product type, temperature, mounting position, and operating mode can all influence the vibration signal. This is where anomaly detection becomes especially valuable.\u003c/p\u003e\n\n\n\n\u003cp class=\"wp-block-paragraph\"\u003eA vibration sensor does not automatically identify every mechanical fault. It provides the raw signal from which meaningful patterns can be extracted. UNO Q – perhaps starting with an \u003ca href=\"https://store.arduino.cc/collections/modulino/products/modulino-movement\"\u003eArduino\u003csup\u003e®\u003c/sup\u003e Modulino\u003csup\u003e™\u003c/sup\u003e Movement sensor\u003c/a\u003e and later adding a more precise vibration sensor – can capture acceleration data across three axes. Mounted securely on a motor or pump housing, it can record how the machine behaves during normal operation and how that behavior changes when a fault begins to develop.\u003c/p\u003e\n\n\n\n\u003cp class=\"wp-block-paragraph\"\u003eThe sensor can capture more than a single vibration value. It can record a time series that describes the direction, amplitude, and frequency of the movement. This gives a machine learning model more information than a simple threshold alarm.\u003c/p\u003e\n\n\n\n\u003cp class=\"wp-block-paragraph\"\u003eA team can collect representative data from a healthy machine, train an anomaly detection model, and deploy it to the edge. When the model sees a vibration pattern that is sufficiently different from what it learned, it produces a higher anomaly score.\u003c/p\u003e\n\n\n\n\u003cp class=\"wp-block-paragraph\"\u003eThe system does not need to know the name of every possible fault before deployment. It can begin by answering a more practical question: “Is this machine still behaving as expected?”\u003c/p\u003e\n\n\n\n\u003cp class=\"wp-block-paragraph\"\u003e\u003cstrong\u003e\u003cem\u003eSee this pattern in action\u003c/em\u003e\u003c/strong\u003e\u003cem\u003e: This sense-infer-respond loop is exactly what’s demonstrated in the \u003c/em\u003e\u003ca href=\"https://projecthub.arduino.cc/shivaylamba/ai-guard-demo-with-arduino-uno-q-modulino-sensors-and-local-npu-face-recognition-dcfcfe\"\u003e\u003cem\u003eAI Guard Demo with Arduino UNO Q, Modulino sensors, and local NPU face recognition\u003c/em\u003e\u003c/a\u003e\u003cem\u003e, published on Arduino Project Hub by user shivaylamba. The project is built around face recognition, but the underlying architecture – a Modulino sensor triggering local inference, which then drives a physical response – is the same blueprint a vibration-based anomaly detector would follow, just with different sensors and a different model.\u003c/em\u003e\u003c/p\u003e\n\n\n\n\u003cp class=\"wp-block-paragraph\"\u003e\u003cem\u003eOr check out how \u003c/em\u003e\u003ca href=\"http://hackster.io/felix-setiono/audiolog-predictive-maintenance-75da5f\"\u003e\u003cem\u003eAudioLog uses Arduino UNO Q Edge AI to \u0026#8220;listen\u0026#8221; to machines, detecting early signs of failure to prevent costly industrial downtime\u003c/em\u003e\u003c/a\u003e\u003cem\u003e.\u003c/em\u003e\u003c/p\u003e\n\n\n\n\u003ch2 class=\"wp-block-heading\"\u003eFrom raw data to business intelligence\u003c/h2\u003e\n\n\n\n\u003cp class=\"wp-block-paragraph\"\u003eA first predictive maintenance project can begin with one machine and a limited number of operating conditions.\u003c/p\u003e\n\n\n\n\u003cp class=\"wp-block-paragraph\"\u003eThe out-of-the-box example shipped with \u003ca href=\"https://docs.arduino.cc/software/app-lab/\"\u003eArduino\u003csup\u003e®\u003c/sup\u003e\u0026nbsp;App Lab\u003c/a\u003e is a great starting point.\u003c/p\u003e\n\n\n\n\u003cp class=\"wp-block-paragraph\"\u003eThe Modulino Movement sensor is mounted firmly on the equipment. UNO Q records acceleration data while the machine is idle, starting, running normally, operating under different loads, and shutting down.\u003c/p\u003e\n\n\n\n\u003cp class=\"wp-block-paragraph\"\u003eThe microcontroller side manages sensor acquisition, sending the data to the Linux side that manages data logging, model execution, dashboards.\u003c/p\u003e\n\n\n\n\u003cfigure class=\"wp-block-image size-large\"\u003e\u003cdiv class=\"image-post\"\u003e\u003cimg loading=\"lazy\" decoding=\"async\" width=\"1024\" height=\"573\" src=\"https://blog.arduino.cc/wp-content/uploads/2026/07/image-1024x573.jpg\" alt=\"\" class=\"wp-image-42297\" srcset=\"https://blog.arduino.cc/wp-content/uploads/2026/07/image-1024x573.jpg 1024w, https://blog.arduino.cc/wp-content/uploads/2026/07/image-300x168.jpg 300w, https://blog.arduino.cc/wp-content/uploads/2026/07/image-768x429.jpg 768w, https://blog.arduino.cc/wp-content/uploads/2026/07/image-1536x859.jpg 1536w, https://blog.arduino.cc/wp-content/uploads/2026/07/image.jpg 2012w\" sizes=\"auto, (max-width: 1024px) 100vw, 1024px\" /\u003e\u003c/div\u003e\u003c/figure\u003e\n\n\n\n\u003cp class=\"wp-block-paragraph\"\u003eCollecting this range of normal behavior is important. A model trained on only one operating condition may incorrectly classify a legitimate speed or load change as a fault.\u003c/p\u003e\n\n\n\n\u003cp class=\"wp-block-paragraph\"\u003eDepending on the application, the project can use classification or anomaly detection.\u003c/p\u003e\n\n\n\n\u003cp class=\"wp-block-paragraph\"\u003eClassification is useful when the team already has examples of known conditions, such as normal operation, imbalance, misalignment, or a loose mounting.\u003c/p\u003e\n\n\n\n\u003cp class=\"wp-block-paragraph\"\u003eAnomaly detection is useful when fault data is limited or when intentionally damaging equipment to create training examples would be unsafe or impractical. In this case, the model learns normal behavior and highlights signals that do not fit that baseline.\u003c/p\u003e\n\n\n\n\u003cp class=\"wp-block-paragraph\"\u003e\u003cstrong\u003e\u003cem\u003eWorth a look:\u003c/em\u003e\u003c/strong\u003e\u003cem\u003e For a hands-on look at what running ML locally on UNO Q actually feels like in practice, check out\u003c/em\u003e\u003ca href=\"https://www.hackster.io/vsupacha/running-ml-ai-on-arduino-uno-q-59ff07\"\u003e\u003cem\u003e Running ML/AI on Arduino UNO Q\u003c/em\u003e\u003c/a\u003e\u003cem\u003e on Hackster. It’s a capability demo rather than a predictive maintenance project specifically, but it walks through the Arduino App Lab sample apps and on-device inference experience that the classification and anomaly detection workflows above are built on top of.\u003c/em\u003e\u003c/p\u003e\n\n\n\n\u003cp class=\"wp-block-paragraph\"\u003e\u003cem\u003eLooking for even more inspiration? Check out \u003c/em\u003e\u003ca href=\"https://www.linkedin.com/posts/glenn-norris-95b1a78a_glennnorriscan-systemsengineering-arduino-activity-7415717319441862656-pjUR/\"\u003e\u003cem\u003ethis predictive maintenance project \u003c/em\u003e\u003c/a\u003e\u003cem\u003ethat reads automotive CAN bus raw data to determine systematic drifts early, and alert you when the line is not in sync with specs.\u003c/em\u003e\u003c/p\u003e\n\n\n\n\u003ch2 class=\"wp-block-heading\"\u003eA large model is not necessarily a better model\u003c/h2\u003e\n\n\n\n\u003cp class=\"wp-block-paragraph\"\u003eThe model for a vibration monitoring application has a narrow job. It does not need to understand images, natural language, or hundreds of unrelated machine types. It only needs to distinguish the relevant operating patterns of the equipment being monitored. This focus on smaller, task-specific models helps make always-on monitoring practical.\u0026nbsp;\u003c/p\u003e\n\n\n\n\u003cp class=\"wp-block-paragraph\"\u003eContinuous vibration monitoring can generate a large amount of data, but sending every raw sample to the cloud is not always necessary – especially considering it can increase bandwidth consumption, introduce recurring infrastructure costs, and make the monitoring system dependent on network availability.\u003c/p\u003e\n\n\n\n\u003cp class=\"wp-block-paragraph\"\u003eUNO Q processes vibration windows locally and stores or transmit only useful information, such as the current health state, anomaly score, operating mode, timestamp, or alert event. A local dashboard can show recent machine behavior and event history. When an anomaly exceeds a validated threshold for a defined period, the system can activate a warning light, sound a buzzer, log the event, or send a message to a maintenance service.\u003c/p\u003e\n\n\n\n\u003cp class=\"wp-block-paragraph\"\u003eCloud connectivity can still be added when it provides value. The difference is that the core detection process does not need to stop when the internet connection is unavailable.\u003c/p\u003e\n\n\n\n\u003cp class=\"wp-block-paragraph\"\u003e\u003cstrong\u003e\u003cem\u003eGoing deeper:\u003c/em\u003e\u003c/strong\u003e\u003cem\u003e Edge Impulse has specific\u003c/em\u003e\u003ca href=\"https://docs.edgeimpulse.com/experts/predictive-maintenance-and-defect-detection-projects/compressor-predictive-maintenance-nordic-thingy53\"\u003e\u003cem\u003e \u003c/em\u003e\u003cem\u003epredictive maintenance guidance\u003c/em\u003e\u003c/a\u003e\u003cem\u003e around monitoring equipment while it runs, so service teams can act before failure occurs. Its optimization tools are designed precisely for constrained edge deployments like this one: quantized int8 models and RAM-optimized compilation matter here because always-on monitoring needs lower compute, lower memory use, and better power behavior over the long run.\u003c/em\u003e\u003c/p\u003e\n\n\n\n\u003ch2 class=\"wp-block-heading\"\u003eThe real value of predictive maintenance\u003c/h2\u003e\n\n\n\n\u003cp class=\"wp-block-paragraph\"\u003ePredictive maintenance works when people are given enough warning to inspect a machine before an unexpected stoppage: there still has to be time to act. The great news is UNO Q now brings the sensing, local intelligence, Linux applications, connectivity, and machine-facing control needed to build that workflow on a single platform. It allows teams to start with a simple question – “Is this machine still behaving normally?” – and to develop the answer into a scalable maintenance system.\u003c/p\u003e\n\n\n\n\u003cp class=\"wp-block-paragraph\"\u003eReady to never be caught off guard by a faulty machine or worn-down part again? Build a custom predictive maintenance system that you can easily train on your specific data, with \u003ca href=\"https://store.arduino.cc/products/uno-q-4gb\"\u003eUNO Q\u003c/a\u003e and \u003ca href=\"https://docs.arduino.cc/software/app-lab/\"\u003eArduino App Lab\u003c/a\u003e.\u003c/p\u003e\n\n\n\n\u003cp class=\"wp-block-paragraph\"\u003eUNO Q is available to order from the\u0026nbsp;\u003ca href=\"https://store-usa.arduino.cc/pages/uno-q\" target=\"_blank\" rel=\"noreferrer noopener\"\u003eArduino Store\u003c/a\u003e as well as\u003ca href=\"http://www.digikey.com/en/product-highlight/a/arduino/uno-q-microcontroller-board\"\u003e DigiKey\u003c/a\u003e,\u003ca href=\"https://referral.element14.com/OrderCodeView?url=%2Fnew-products%2Fembedded-computers-education-maker-boards%2Farduino-uno-q\"\u003e Farnell\u003c/a\u003e,\u003ca href=\"https://www.mouser.de/new/arduino/arduino-uno-q-platform/\"\u003e Mouser\u003c/a\u003e,\u003ca href=\"https://referral.element14.com/OrderCodeView?url=%2Fnew-products%2Fembedded-computers-education-maker-boards%2Farduino-uno-q\"\u003e Newark\u003c/a\u003e,\u003ca href=\"https://uk.rs-online.com/web/content/m/arduino-unoq-uk\"\u003e RS Components\u003c/a\u003e, and\u003ca href=\"http://robu.in/\"\u003e Robu.in\u003c/a\u003e; along with our other\u003ca href=\"https://store.arduino.cc/pages/distributors\"\u003e authorized distributors and resellers\u003c/a\u003e.\u003c/p\u003e\n\n\n\n\u003cp class=\"wp-block-paragraph\"\u003e\u003cem\u003eArduino, UNO, Modulino and the Arduino logo are trademarks or registered trademarks of Arduino S.r.l.\u003c/em\u003e\u003c/p\u003e\n\n\n\n\u003cp class=\"wp-block-paragraph\"\u003e\u003c/p\u003e\n","excerpt":"\u003cp\u003eMost machines warn you before they fail. A motor begins to vibrate differently. A pump slowly drifts out of balance. A bearing develops a new mechanical signature. A cooling fan starts producing frequencies that were not present during normal operation. These changes can appear well before a complete breakdown. The challenge is detecting them early, [\u0026hellip;]\u003c/p\u003e\n","date":"2026-07-02 14:31:35","modified":"2026-07-03 13:52:10","categories":[{"id":42,"slug":"arduino","title":"Arduino","description":"","parent":0,"post_count":3274},{"id":1597,"slug":"featured","title":"Featured","description":"","parent":0,"post_count":1764},{"id":6698,"slug":"uno-q","title":"UNO Q","description":"","parent":42,"post_count":44}],"tags":[{"id":5024,"slug":"anomaly-detection","title":"Anomaly Detection","description":"","post_count":7},{"id":5006,"slug":"predictive-maintenance","title":"predictive maintenance","description":"","post_count":9}],"author":{"id":27876,"slug":"editorarduino","name":"Arduino Team","first_name":"","last_name":"","nickname":"Arduino Team","url":"","description":""},"comments":[],"attachments":[{"id":42293,"url":"https://blog.arduino.cc/wp-content/uploads/2026/07/image.png","slug":"image-110","title":"image","description":"","caption":"","parent":42292,"mime_type":"image/png","images":{"full":{"url":"https://blog.arduino.cc/wp-content/uploads/2026/07/image.png","width":2012,"height":1128},"thumbnail":{"url":"https://blog.arduino.cc/wp-content/uploads/2026/07/image-385x289.png","width":385,"height":289},"medium":{"url":"https://blog.arduino.cc/wp-content/uploads/2026/07/image-300x168.png","width":300,"height":168},"medium_large":{"url":"https://blog.arduino.cc/wp-content/uploads/2026/07/image-768x431.png","width":768,"height":431},"large":{"url":"https://blog.arduino.cc/wp-content/uploads/2026/07/image-1024x574.png","width":1024,"height":574},"1536x1536":{"url":"https://blog.arduino.cc/wp-content/uploads/2026/07/image-1536x861.png","width":1536,"height":861},"2048x2048":{"url":"https://blog.arduino.cc/wp-content/uploads/2026/07/image.png","width":2012,"height":1128}}},{"id":42296,"url":"https://blog.arduino.cc/wp-content/uploads/2026/07/image-1.png","slug":"image-111","title":"image","description":"","caption":"","parent":42292,"mime_type":"image/png","images":{"full":{"url":"https://blog.arduino.cc/wp-content/uploads/2026/07/image-1.png","width":2012,"height":1128},"thumbnail":{"url":"https://blog.arduino.cc/wp-content/uploads/2026/07/image-1-385x289.png","width":385,"height":289},"medium":{"url":"https://blog.arduino.cc/wp-content/uploads/2026/07/image-1-300x168.png","width":300,"height":168},"medium_large":{"url":"https://blog.arduino.cc/wp-content/uploads/2026/07/image-1-768x431.png","width":768,"height":431},"large":{"url":"https://blog.arduino.cc/wp-content/uploads/2026/07/image-1-1024x574.png","width":1024,"height":574},"1536x1536":{"url":"https://blog.arduino.cc/wp-content/uploads/2026/07/image-1-1536x861.png","width":1536,"height":861},"2048x2048":{"url":"https://blog.arduino.cc/wp-content/uploads/2026/07/image-1.png","width":2012,"height":1128}}},{"id":42297,"url":"https://blog.arduino.cc/wp-content/uploads/2026/07/image.jpg","slug":"image-112","title":"image","description":"","caption":"","parent":42292,"mime_type":"image/jpeg","images":{"full":{"url":"https://blog.arduino.cc/wp-content/uploads/2026/07/image.jpg","width":2012,"height":1125},"thumbnail":{"url":"https://blog.arduino.cc/wp-content/uploads/2026/07/image-385x289.jpg","width":385,"height":289},"medium":{"url":"https://blog.arduino.cc/wp-content/uploads/2026/07/image-300x168.jpg","width":300,"height":168},"medium_large":{"url":"https://blog.arduino.cc/wp-content/uploads/2026/07/image-768x429.jpg","width":768,"height":429},"large":{"url":"https://blog.arduino.cc/wp-content/uploads/2026/07/image-1024x573.jpg","width":1024,"height":573},"1536x1536":{"url":"https://blog.arduino.cc/wp-content/uploads/2026/07/image-1536x859.jpg","width":1536,"height":859},"2048x2048":{"url":"https://blog.arduino.cc/wp-content/uploads/2026/07/image.jpg","width":2012,"height":1125}}},{"id":42299,"url":"https://blog.arduino.cc/wp-content/uploads/2026/07/Arduino.cc-Blogpost-Featured385x289-3.jpg","slug":"arduino-cc-blogpost-featured385x289-3-3","title":"Arduino.cc-Blogpost-Featured(385x289)-3","description":"","caption":"","parent":42292,"mime_type":"image/jpeg","images":{"full":{"url":"https://blog.arduino.cc/wp-content/uploads/2026/07/Arduino.cc-Blogpost-Featured385x289-3.jpg","width":385,"height":289},"thumbnail":{"url":"https://blog.arduino.cc/wp-content/uploads/2026/07/Arduino.cc-Blogpost-Featured385x289-3.jpg","width":385,"height":289},"medium":{"url":"https://blog.arduino.cc/wp-content/uploads/2026/07/Arduino.cc-Blogpost-Featured385x289-3-300x225.jpg","width":300,"height":225},"medium_large":{"url":"https://blog.arduino.cc/wp-content/uploads/2026/07/Arduino.cc-Blogpost-Featured385x289-3.jpg","width":385,"height":289},"large":{"url":"https://blog.arduino.cc/wp-content/uploads/2026/07/Arduino.cc-Blogpost-Featured385x289-3.jpg","width":385,"height":289},"1536x1536":{"url":"https://blog.arduino.cc/wp-content/uploads/2026/07/Arduino.cc-Blogpost-Featured385x289-3.jpg","width":385,"height":289},"2048x2048":{"url":"https://blog.arduino.cc/wp-content/uploads/2026/07/Arduino.cc-Blogpost-Featured385x289-3.jpg","width":385,"height":289}}},{"id":42300,"url":"https://blog.arduino.cc/wp-content/uploads/2026/07/Arduino.cc-Blogpost-Cover1100x600-4.jpg","slug":"arduino-cc-blogpost-cover1100x600-4-3","title":"Arduino.cc-Blogpost-Cover(1100x600)-4","description":"","caption":"","parent":42292,"mime_type":"image/jpeg","images":{"full":{"url":"https://blog.arduino.cc/wp-content/uploads/2026/07/Arduino.cc-Blogpost-Cover1100x600-4.jpg","width":1100,"height":600},"thumbnail":{"url":"https://blog.arduino.cc/wp-content/uploads/2026/07/Arduino.cc-Blogpost-Cover1100x600-4-385x289.jpg","width":385,"height":289},"medium":{"url":"https://blog.arduino.cc/wp-content/uploads/2026/07/Arduino.cc-Blogpost-Cover1100x600-4-300x164.jpg","width":300,"height":164},"medium_large":{"url":"https://blog.arduino.cc/wp-content/uploads/2026/07/Arduino.cc-Blogpost-Cover1100x600-4-768x419.jpg","width":768,"height":419},"large":{"url":"https://blog.arduino.cc/wp-content/uploads/2026/07/Arduino.cc-Blogpost-Cover1100x600-4-1024x559.jpg","width":1024,"height":559},"1536x1536":{"url":"https://blog.arduino.cc/wp-content/uploads/2026/07/Arduino.cc-Blogpost-Cover1100x600-4.jpg","width":1100,"height":600},"2048x2048":{"url":"https://blog.arduino.cc/wp-content/uploads/2026/07/Arduino.cc-Blogpost-Cover1100x600-4.jpg","width":1100,"height":600}}}],"comment_count":0,"comment_status":"closed","thumbnail":"https://blog.arduino.cc/wp-content/uploads/2026/07/Arduino.cc-Blogpost-Featured385x289-3.jpg","custom_fields":{"algolia_searchable_posts_records_count":["5"]},"thumbnail_size":"thumbnail","thumbnail_images":{"full":{"url":"https://blog.arduino.cc/wp-content/uploads/2026/07/Arduino.cc-Blogpost-Featured385x289-3.jpg","width":385,"height":289},"thumbnail":{"url":"https://blog.arduino.cc/wp-content/uploads/2026/07/Arduino.cc-Blogpost-Featured385x289-3.jpg","width":385,"height":289},"medium":{"url":"https://blog.arduino.cc/wp-content/uploads/2026/07/Arduino.cc-Blogpost-Featured385x289-3-300x225.jpg","width":300,"height":225},"medium_large":{"url":"https://blog.arduino.cc/wp-content/uploads/2026/07/Arduino.cc-Blogpost-Featured385x289-3.jpg","width":385,"height":289},"large":{"url":"https://blog.arduino.cc/wp-content/uploads/2026/07/Arduino.cc-Blogpost-Featured385x289-3.jpg","width":385,"height":289},"1536x1536":{"url":"https://blog.arduino.cc/wp-content/uploads/2026/07/Arduino.cc-Blogpost-Featured385x289-3.jpg","width":385,"height":289},"2048x2048":{"url":"https://blog.arduino.cc/wp-content/uploads/2026/07/Arduino.cc-Blogpost-Featured385x289-3.jpg","width":385,"height":289}}},{"id":42282,"type":"post","slug":"arduino-core-zephyr-0-56-0-try-it-out-now-and-help-us-get-closer-to-stable","url":"https://blog.arduino.cc/2026/06/30/arduino-core-zephyr-0-56-0-try-it-out-now-and-help-us-get-closer-to-stable/","status":"publish","title":"Arduino Core-zephyr 0.56.0: try it out now, and help us get closer to Stable","title_plain":"Arduino Core-zephyr 0.56.0: try it out now, and help us get closer to Stable","content":"\n\u003cfigure class=\"wp-block-image size-large\"\u003e\u003cdiv class=\"image-post\"\u003e\u003cimg loading=\"lazy\" decoding=\"async\" width=\"1024\" height=\"559\" src=\"https://blog.arduino.cc/wp-content/uploads/2026/06/Arduino.cc-Blogpost-Cover1100x600-1-1024x559.jpg\" alt=\"\" class=\"wp-image-42284\" srcset=\"https://blog.arduino.cc/wp-content/uploads/2026/06/Arduino.cc-Blogpost-Cover1100x600-1-1024x559.jpg 1024w, https://blog.arduino.cc/wp-content/uploads/2026/06/Arduino.cc-Blogpost-Cover1100x600-1-300x164.jpg 300w, https://blog.arduino.cc/wp-content/uploads/2026/06/Arduino.cc-Blogpost-Cover1100x600-1-768x419.jpg 768w, https://blog.arduino.cc/wp-content/uploads/2026/06/Arduino.cc-Blogpost-Cover1100x600-1.jpg 1100w\" sizes=\"auto, (max-width: 1024px) 100vw, 1024px\" /\u003e\u003c/div\u003e\u003c/figure\u003e\n\n\n\n\u003cp class=\"wp-block-paragraph\"\u003eVersion 0.56.0 of the Arduino\u003csup\u003e®\u003c/sup\u003e Core on Zephyr is live – and it’s a sizable update to \u003ca href=\"https://blog.arduino.cc/2026/05/15/arduino-core-on-zephyr-0-55-getting-ready-for-the-final-mile/\"\u003ethe earlier release\u003c/a\u003e. Think optimized performance, expanded hardware capabilities. We’re still smoothing some edges towards the official Stable release, but if you’ve been testing the beta, prepare for a meaningful upgrade.\u003c/p\u003e\n\n\n\n\u003ch2 class=\"wp-block-heading\"\u003eMultimedia expansion: Arduino\u003csup\u003e®\u003c/sup\u003e GIGA\u003csup\u003e™\u003c/sup\u003e Display Shield \u0026amp; Arduino\u003csup\u003e®\u003c/sup\u003e Portenta H7 board video support\u003c/h2\u003e\n\n\n\n\u003cp class=\"wp-block-paragraph\"\u003eMultimedia capabilities take a major step forward in this release, establishing native support for advanced visual outputs.\u003c/p\u003e\n\n\n\n\u003cp class=\"wp-block-paragraph\"\u003eWe have introduced official video support for \u003ca href=\"https://store.arduino.cc/products/portenta-h7\"\u003e\u003cstrong\u003ePortenta H7\u003c/strong\u003e\u003c/a\u003e alongside full compatibility for \u003ca href=\"https://store.arduino.cc/products/giga-display-shield\"\u003e\u003cstrong\u003eGIGA Display Shield\u003c/strong\u003e\u003c/a\u003e when paired with the \u003ca href=\"https://store.arduino.cc/products/giga-r1-wifi\"\u003eArduino\u003csup\u003e®\u003c/sup\u003e\u0026nbsp;GIGA R1\u003csup\u003e™\u003c/sup\u003e WiFi\u003c/a\u003e. Whether you are building industrial interfaces, interactive kiosks, or custom dashboards, these display features are now fully integrated into the core and ready for your application code.\u003c/p\u003e\n\n\n\n\u003ch2 class=\"wp-block-heading\"\u003eCore optimizations and network bug fixes\u003c/h2\u003e\n\n\n\n\u003cp class=\"wp-block-paragraph\"\u003eFor our supported board lineup, this release delivers several updates to performance, pin management, and connectivity:\u003c/p\u003e\n\n\n\n\u003cul class=\"wp-block-list\"\u003e\n\u003cli\u003e\u003cstrong\u003eRAM usage optimization:\u003c/strong\u003e We have optimized internal memory management across the core. This effectively lowers the core’s background footprint, freeing up more RAM for your sketches, complex variables, and larger application buffers.\u003c/li\u003e\n\n\n\n\u003cli\u003e\u003cstrong\u003eDynamic pin-muxing improvements:\u003c/strong\u003e Runtime pin multiplex configurations have been refined. This improvement allows for more flexible and reliable dynamic pin reassignment, ensuring better stability when managing hardware peripherals programmatically.\u003c/li\u003e\n\n\n\n\u003cli\u003e\u003cstrong\u003eNetwork fixes and improvements:\u003c/strong\u003e Rather than adding new features, this time around we focused on essential bug fixing within the network stack. These improvements resolve ongoing connection issues and optimize socket management to make your connected prototypes more dependable.\u003c/li\u003e\n\u003c/ul\u003e\n\n\n\n\u003ch2 class=\"wp-block-heading\"\u003eHow to get started\u003c/h2\u003e\n\n\n\n\u003cp class=\"wp-block-paragraph\"\u003eTo update, open the Arduino\u003csup\u003e®\u003c/sup\u003e IDE, search for “zephyr” in the Board Manager, and install the 0.56.0 release. For a granular breakdown of specific code commits and fixes, you can view the full \u003ca href=\"https://github.com/arduino/ArduinoCore-zephyr/releases/tag/0.56.0\"\u003erelease notes on GitHub\u003c/a\u003e.\u003c/p\u003e\n\n\n\n\u003ch2 class=\"wp-block-heading\"\u003eFirst use: flashing the Zephyr loader\u003c/h2\u003e\n\n\n\n\u003cp class=\"wp-block-paragraph\"\u003eTo prepare a supported board for running Zephyr-based sketches for the first time, you must install the Zephyr loader firmware onto your hardware. Follow these steps within the Arduino IDE 2:\u003c/p\u003e\n\n\n\n\u003cp class=\"wp-block-paragraph\"\u003e1. \u003cstrong\u003eEnter bootloader mode:\u003c/strong\u003e Double-click the physical \u003cstrong\u003eRESET\u003c/strong\u003e button on your board.\u003cbr\u003e2. \u003cstrong\u003eSelect a programmer:\u003c/strong\u003e Go to the Tools -\u003e Programmer menu and select any available programmer.\u003cbr\u003e3. \u003cstrong\u003eBurn the loader:\u003c/strong\u003e Navigate to Tools and click \u003cstrong\u003eBurn Bootloader\u003c/strong\u003e to write the Zephyr loader to the board.\u003cbr\u003e4. \u003cstrong\u003eUpload your first sketch:\u003c/strong\u003e Once the loader is successfully installed, put the board into bootloader mode by double-clicking the \u003cstrong\u003eRESET\u003c/strong\u003e button one more time, and upload your sketch. After this initial setup, subsequent uploads will happen automatically without manual resets.\u003c/p\u003e\n\n\n\n\u003cp class=\"wp-block-paragraph\"\u003e\u003cstrong\u003eImportant reminder\u003c/strong\u003e: It is highly recommended to update the Zephyr loader with each new core release. Keeping the loader aligned with the current core version ensures your board remains fully functional, secure, and compatible with future framework modifications.\u003c/p\u003e\n\n\n\n\u003ch2 class=\"wp-block-heading\"\u003eA streamlined workflow for the Arduino\u003csup\u003e®\u003c/sup\u003e\u0026nbsp;UNO\u003csup\u003e™\u003c/sup\u003e Q board\u003c/h2\u003e\n\n\n\n\u003cp class=\"wp-block-paragraph\"\u003eIf you are using \u003cstrong\u003eUNO Q\u003c/strong\u003e, you can completely skip the manual process above. Starting with version 0.56.0, the core automatically checks the loader version behind the scenes during every single sketch upload and handles any necessary updates natively. You can write your code, click upload, and let Arduino IDE and Arduino\u003csup\u003e®\u003c/sup\u003e\u0026nbsp;App Lab take care of the rest.\u0026nbsp;\u003c/p\u003e\n\n\n\n\u003cp class=\"wp-block-paragraph\"\u003eWe are actively working to bring this automated behavior to all other supported boards in future releases.\u003c/p\u003e\n\n\n\n\u003ch2 class=\"wp-block-heading\"\u003eHelp us shape the final release!\u003c/h2\u003e\n\n\n\n\u003cp class=\"wp-block-paragraph\"\u003eYour real-world testing continues to be invaluable as we head towards the Stable milestone. Please share your feedback, report bugs, or contribute on our \u003ca href=\"https://github.com/arduino/ArduinoCore-zephyr/issues\"\u003eGitHub Issues page\u003c/a\u003e. Thank you for being an active part of the Arduino community!\u003c/p\u003e\n\n\n\n\u003cp class=\"wp-block-paragraph\"\u003e\u003cem\u003eArduino, GIGA, Portenta, GIGA R1, and UNO and the Arduino logo are trademarks or registered trademarks of Arduino S.r.l.\u003c/em\u003e\u003cbr\u003e\u003c/p\u003e\n","excerpt":"\u003cp\u003eVersion 0.56.0 of the Arduino® Core on Zephyr is live – and it’s a sizable update to the earlier release. Think optimized performance, expanded hardware capabilities. We’re still smoothing some edges towards the official Stable release, but if you’ve been testing the beta, prepare for a meaningful upgrade. Multimedia expansion: Arduino® GIGA™ Display Shield \u0026amp; [\u0026hellip;]\u003c/p\u003e\n","date":"2026-06-30 14:35:57","modified":"2026-06-30 14:35:58","categories":[{"id":42,"slug":"arduino","title":"Arduino","description":"","parent":0,"post_count":3274},{"id":1597,"slug":"featured","title":"Featured","description":"","parent":0,"post_count":1764},{"id":6043,"slug":"giga-display-shield","title":"GIGA Display Shield","description":"","parent":5762,"post_count":8},{"id":5762,"slug":"giga-r1-wifi","title":"Giga R1 WiFi","description":"","parent":0,"post_count":3},{"id":5767,"slug":"giga-r1-wifi-arduino","title":"GIGA R1 WiFi","description":"","parent":42,"post_count":18},{"id":6698,"slug":"uno-q","title":"UNO Q","description":"","parent":42,"post_count":44}],"tags":[{"id":6893,"slug":"arduino-core-zephyr","title":"Arduino Core-zephyr","description":"","post_count":1},{"id":6892,"slug":"arduino-core-zephyr-0-56-0","title":"Arduino Core-zephyr 0.56.0","description":"","post_count":1},{"id":6347,"slug":"zephyr","title":"Zephyr","description":"","post_count":6}],"author":{"id":27876,"slug":"editorarduino","name":"Arduino Team","first_name":"","last_name":"","nickname":"Arduino Team","url":"","description":""},"comments":[],"attachments":[{"id":42283,"url":"https://blog.arduino.cc/wp-content/uploads/2026/06/Arduino.cc-Blogpost-Featured385x289-3.jpg","slug":"arduino-cc-blogpost-featured385x289-15","title":"Arduino.cc-Blogpost-Featured(385x289)","description":"","caption":"","parent":42282,"mime_type":"image/jpeg","images":{"full":{"url":"https://blog.arduino.cc/wp-content/uploads/2026/06/Arduino.cc-Blogpost-Featured385x289-3.jpg","width":385,"height":289},"thumbnail":{"url":"https://blog.arduino.cc/wp-content/uploads/2026/06/Arduino.cc-Blogpost-Featured385x289-3.jpg","width":385,"height":289},"medium":{"url":"https://blog.arduino.cc/wp-content/uploads/2026/06/Arduino.cc-Blogpost-Featured385x289-3-300x225.jpg","width":300,"height":225},"medium_large":{"url":"https://blog.arduino.cc/wp-content/uploads/2026/06/Arduino.cc-Blogpost-Featured385x289-3.jpg","width":385,"height":289},"large":{"url":"https://blog.arduino.cc/wp-content/uploads/2026/06/Arduino.cc-Blogpost-Featured385x289-3.jpg","width":385,"height":289},"1536x1536":{"url":"https://blog.arduino.cc/wp-content/uploads/2026/06/Arduino.cc-Blogpost-Featured385x289-3.jpg","width":385,"height":289},"2048x2048":{"url":"https://blog.arduino.cc/wp-content/uploads/2026/06/Arduino.cc-Blogpost-Featured385x289-3.jpg","width":385,"height":289}}},{"id":42284,"url":"https://blog.arduino.cc/wp-content/uploads/2026/06/Arduino.cc-Blogpost-Cover1100x600-1.jpg","slug":"arduino-cc-blogpost-cover1100x600-16","title":"Arduino.cc-Blogpost-Cover(1100x600)","description":"","caption":"","parent":42282,"mime_type":"image/jpeg","images":{"full":{"url":"https://blog.arduino.cc/wp-content/uploads/2026/06/Arduino.cc-Blogpost-Cover1100x600-1.jpg","width":1100,"height":600},"thumbnail":{"url":"https://blog.arduino.cc/wp-content/uploads/2026/06/Arduino.cc-Blogpost-Cover1100x600-1-385x289.jpg","width":385,"height":289},"medium":{"url":"https://blog.arduino.cc/wp-content/uploads/2026/06/Arduino.cc-Blogpost-Cover1100x600-1-300x164.jpg","width":300,"height":164},"medium_large":{"url":"https://blog.arduino.cc/wp-content/uploads/2026/06/Arduino.cc-Blogpost-Cover1100x600-1-768x419.jpg","width":768,"height":419},"large":{"url":"https://blog.arduino.cc/wp-content/uploads/2026/06/Arduino.cc-Blogpost-Cover1100x600-1-1024x559.jpg","width":1024,"height":559},"1536x1536":{"url":"https://blog.arduino.cc/wp-content/uploads/2026/06/Arduino.cc-Blogpost-Cover1100x600-1.jpg","width":1100,"height":600},"2048x2048":{"url":"https://blog.arduino.cc/wp-content/uploads/2026/06/Arduino.cc-Blogpost-Cover1100x600-1.jpg","width":1100,"height":600}}}],"comment_count":0,"comment_status":"closed","thumbnail":"https://blog.arduino.cc/wp-content/uploads/2026/06/Arduino.cc-Blogpost-Featured385x289-3.jpg","custom_fields":{"algolia_searchable_posts_records_count":["3"]},"thumbnail_size":"thumbnail","thumbnail_images":{"full":{"url":"https://blog.arduino.cc/wp-content/uploads/2026/06/Arduino.cc-Blogpost-Featured385x289-3.jpg","width":385,"height":289},"thumbnail":{"url":"https://blog.arduino.cc/wp-content/uploads/2026/06/Arduino.cc-Blogpost-Featured385x289-3.jpg","width":385,"height":289},"medium":{"url":"https://blog.arduino.cc/wp-content/uploads/2026/06/Arduino.cc-Blogpost-Featured385x289-3-300x225.jpg","width":300,"height":225},"medium_large":{"url":"https://blog.arduino.cc/wp-content/uploads/2026/06/Arduino.cc-Blogpost-Featured385x289-3.jpg","width":385,"height":289},"large":{"url":"https://blog.arduino.cc/wp-content/uploads/2026/06/Arduino.cc-Blogpost-Featured385x289-3.jpg","width":385,"height":289},"1536x1536":{"url":"https://blog.arduino.cc/wp-content/uploads/2026/06/Arduino.cc-Blogpost-Featured385x289-3.jpg","width":385,"height":289},"2048x2048":{"url":"https://blog.arduino.cc/wp-content/uploads/2026/06/Arduino.cc-Blogpost-Featured385x289-3.jpg","width":385,"height":289}}},{"id":42244,"type":"post","slug":"a-heads-up-on-the-arduino-uno-q-board-pricing-straight-from-marcello-majonchi","url":"https://blog.arduino.cc/2026/06/26/a-heads-up-on-the-arduino-uno-q-board-pricing-straight-from-marcello-majonchi/","status":"publish","title":"A heads-up on the Arduino® UNO™ Q board pricing – straight from Marcello Majonchi","title_plain":"A heads-up on the Arduino® UNO™ Q board pricing – straight from Marcello Majonchi","content":"\n\u003cp class=\"wp-block-paragraph\"\u003e\u003cstrong\u003eA message from Arduino CPO \u0026#8211; Marcello Majonchi\u003c/strong\u003e\u003c/p\u003e\n\n\n\n\u003cfigure class=\"wp-block-image size-large\"\u003e\u003cdiv class=\"image-post\"\u003e\u003cimg loading=\"lazy\" decoding=\"async\" width=\"1024\" height=\"559\" src=\"https://blog.arduino.cc/wp-content/uploads/2026/06/Arduino.cc-Blogpost-Cover1100x600-6-1024x559.jpg\" alt=\"\" class=\"wp-image-42268\" srcset=\"https://blog.arduino.cc/wp-content/uploads/2026/06/Arduino.cc-Blogpost-Cover1100x600-6-1024x559.jpg 1024w, https://blog.arduino.cc/wp-content/uploads/2026/06/Arduino.cc-Blogpost-Cover1100x600-6-300x164.jpg 300w, https://blog.arduino.cc/wp-content/uploads/2026/06/Arduino.cc-Blogpost-Cover1100x600-6-768x419.jpg 768w, https://blog.arduino.cc/wp-content/uploads/2026/06/Arduino.cc-Blogpost-Cover1100x600-6.jpg 1100w\" sizes=\"auto, (max-width: 1024px) 100vw, 1024px\" /\u003e\u003c/div\u003e\u003c/figure\u003e\n\n\n\n\u003cp class=\"wp-block-paragraph\"\u003eDear Builders, Engineers, and Innovators,\u003c/p\u003e\n\n\n\n\u003cp class=\"wp-block-paragraph\"\u003eArduino is built on one belief: powerful technology should be accessible to everyone who wants to make, learn, or innovate with it. Staying true to that principle in every decision we make sometimes means making tough calls about what we charge for it. So let me get straight to the point and break the news: the time has come where at Arduino we finally have to increase the price for UNO Q.\u0026nbsp;\u003c/p\u003e\n\n\n\n\u003cp class=\"wp-block-paragraph\"\u003eEffective \u003cstrong\u003eJuly 6th\u003c/strong\u003e, \u003cstrong\u003ewe are adjusting the price of UNO Q\u003c/strong\u003e. \u003ca href=\"https://store.arduino.cc/products/uno-q\" target=\"_blank\" rel=\"noreferrer noopener\"\u003eUNO Q 2GB\u003c/a\u003e will increase from $44 to $59, while \u003ca href=\"https://store.arduino.cc/products/uno-q-4gb\" target=\"_blank\" rel=\"noreferrer noopener\"\u003eUNO Q 4GB\u003c/a\u003e from $59 to $79.\u0026nbsp;\u003c/p\u003e\n\n\n\n\u003cfigure class=\"wp-block-image size-large\"\u003e\u003cdiv class=\"image-post\"\u003e\u003cimg loading=\"lazy\" decoding=\"async\" width=\"1024\" height=\"1024\" src=\"https://blog.arduino.cc/wp-content/uploads/2026/06/image-1024x1024.png\" alt=\"\" class=\"wp-image-42246\" srcset=\"https://blog.arduino.cc/wp-content/uploads/2026/06/image-1024x1024.png 1024w, https://blog.arduino.cc/wp-content/uploads/2026/06/image-300x300.png 300w, https://blog.arduino.cc/wp-content/uploads/2026/06/image-768x768.png 768w, https://blog.arduino.cc/wp-content/uploads/2026/06/image-1536x1536.png 1536w, https://blog.arduino.cc/wp-content/uploads/2026/06/image.png 2048w\" sizes=\"auto, (max-width: 1024px) 100vw, 1024px\" /\u003e\u003c/div\u003e\u003c/figure\u003e\n\n\n\n\u003cp class=\"wp-block-paragraph\"\u003eIf you follow the news across the tech sector you’ll surely know that memory prices have been on a rally, fueled by the enduring demand for AI applications. Over the last six months alone, our memory component costs have more than doubled. Arduino is not immune to these effects but, thanks to support from Qualcomm Technologies, Inc., we held off increasing the price for as long as possible, enabling the community to do what it does best: innovating and sharing projects. However, with no near-term signs of relief in memory supply or pricing, continuing to absorb these costs is no longer possible.\u003c/p\u003e\n\n\n\n\u003cp class=\"wp-block-paragraph\"\u003eSince its launch in October 2025, I’ve been amazed at the scale of uptake for UNO Q and by the amazing breadth of projects developed using the board. You’ve exceeded every expectation! Personally, I have loved the ingenious innovation from the community – my personal favorites being the \u003ca href=\"https://projecthub.arduino.cc/marina_fujiwara/invisible-mess-glasses-b3e6f0\" target=\"_blank\" rel=\"noreferrer noopener\"\u003eInvisible Mess Glasses\u003c/a\u003e based on UNO Q 2GB and the \u003ca href=\"https://projecthub.arduino.cc/ingeimaks/ai-plant-guardian-the-smart-plant-that-waters-itself-sees-with-ai-and-talks-to-you-on-telegram-f5f73c\" target=\"_blank\" rel=\"noreferrer noopener\"\u003eAI Plant Guardian\u003c/a\u003e based on UNO Q 4GB.\u0026nbsp;\u003c/p\u003e\n\n\n\n\u003cp class=\"wp-block-paragraph\"\u003eThe price increase takes effect on July 6th,\u003cstrong\u003e\u003cem\u003e \u003c/em\u003e\u003c/strong\u003e\u003cstrong\u003eso you still have the opportunity to take advantage of the current pricing for a few more days\u003c/strong\u003e\u003cstrong\u003e\u003cem\u003e, \u003c/em\u003e\u003c/strong\u003eand for a limited time you can get a hold of a 4GB board for what will be the 2GB board’s new price!\u003c/p\u003e\n\n\n\n\u003cp class=\"wp-block-paragraph\"\u003eThank you for the trust you place in Arduino, and for the energy you bring to every build. What you create with these boards is why we do this work. I look forward to seeing what you all will build, channeling your creativity into your next amazing project on UNO Q.\u003c/p\u003e\n\n\n\n\u003cp class=\"wp-block-paragraph\"\u003e\u0026#8211; Marcello Majonchi, Arduino Maker and Arduino Chief Product Officer\u003c/p\u003e\n\n\n\n\u003cp class=\"wp-block-paragraph\"\u003eUNO Q is available to order from the \u003ca href=\"https://store-usa.arduino.cc/pages/uno-q\" target=\"_blank\" rel=\"noreferrer noopener\"\u003eArduino Store\u003c/a\u003e and\u003ca href=\"http://www.digikey.com/en/product-highlight/a/arduino/uno-q-microcontroller-board\" target=\"_blank\" rel=\"noreferrer noopener\"\u003e DigiKey\u003c/a\u003e,\u003ca href=\"https://referral.element14.com/OrderCodeView?url=%2Fnew-products%2Fembedded-computers-education-maker-boards%2Farduino-uno-q\" target=\"_blank\" rel=\"noreferrer noopener\"\u003e Farnell\u003c/a\u003e,\u003ca href=\"https://www.mouser.de/new/arduino/arduino-uno-q-platform/\" target=\"_blank\" rel=\"noreferrer noopener\"\u003e Mouser\u003c/a\u003e,\u003ca href=\"https://referral.element14.com/OrderCodeView?url=%2Fnew-products%2Fembedded-computers-education-maker-boards%2Farduino-uno-q\" target=\"_blank\" rel=\"noreferrer noopener\"\u003e Newark\u003c/a\u003e,\u003ca href=\"https://uk.rs-online.com/web/content/m/arduino-unoq-uk\" target=\"_blank\" rel=\"noreferrer noopener\"\u003e RS Components\u003c/a\u003e, and\u003ca href=\"http://robu.in\" target=\"_blank\" rel=\"noreferrer noopener\"\u003e Robu.in\u003c/a\u003e, as well as our other\u003ca href=\"https://store.arduino.cc/pages/distributors\" target=\"_blank\" rel=\"noreferrer noopener\"\u003e authorized distributors and resellers\u003c/a\u003e.\u003c/p\u003e\n\n\n\n\u003cp class=\"wp-block-paragraph\"\u003e\u003cem\u003eArduino and UNO are trademarks or registered trademarks of Arduino S.r.l.\u003c/em\u003e\u003c/p\u003e\n","excerpt":"\u003cp\u003eA message from Arduino CPO \u0026#8211; Marcello Majonchi Dear Builders, Engineers, and Innovators, Arduino is built on one belief: powerful technology should be accessible to everyone who wants to make, learn, or innovate with it. Staying true to that principle in every decision we make sometimes means making tough calls about what we charge for [\u0026hellip;]\u003c/p\u003e\n","date":"2026-06-26 15:10:35","modified":"2026-06-26 15:34:32","categories":[{"id":42,"slug":"arduino","title":"Arduino","description":"","parent":0,"post_count":3274},{"id":1597,"slug":"featured","title":"Featured","description":"","parent":0,"post_count":1764},{"id":6698,"slug":"uno-q","title":"UNO Q","description":"","parent":42,"post_count":44}],"tags":[],"author":{"id":27876,"slug":"editorarduino","name":"Arduino Team","first_name":"","last_name":"","nickname":"Arduino Team","url":"","description":""},"comments":[],"attachments":[{"id":42245,"url":"https://blog.arduino.cc/wp-content/uploads/2026/06/unnamed-8.png","slug":"unnamed-8-2","title":"unnamed (8)","description":"","caption":"","parent":42244,"mime_type":"image/png","images":{"full":{"url":"https://blog.arduino.cc/wp-content/uploads/2026/06/unnamed-8.png","width":512,"height":290},"thumbnail":{"url":"https://blog.arduino.cc/wp-content/uploads/2026/06/unnamed-8-385x289.png","width":385,"height":289},"medium":{"url":"https://blog.arduino.cc/wp-content/uploads/2026/06/unnamed-8-300x170.png","width":300,"height":170},"medium_large":{"url":"https://blog.arduino.cc/wp-content/uploads/2026/06/unnamed-8.png","width":512,"height":290},"large":{"url":"https://blog.arduino.cc/wp-content/uploads/2026/06/unnamed-8.png","width":512,"height":290},"1536x1536":{"url":"https://blog.arduino.cc/wp-content/uploads/2026/06/unnamed-8.png","width":512,"height":290},"2048x2048":{"url":"https://blog.arduino.cc/wp-content/uploads/2026/06/unnamed-8.png","width":512,"height":290}}},{"id":42246,"url":"https://blog.arduino.cc/wp-content/uploads/2026/06/image.png","slug":"image-108","title":"image","description":"","caption":"","parent":42244,"mime_type":"image/png","images":{"full":{"url":"https://blog.arduino.cc/wp-content/uploads/2026/06/image.png","width":2048,"height":2048},"thumbnail":{"url":"https://blog.arduino.cc/wp-content/uploads/2026/06/image-385x289.png","width":385,"height":289},"medium":{"url":"https://blog.arduino.cc/wp-content/uploads/2026/06/image-300x300.png","width":300,"height":300},"medium_large":{"url":"https://blog.arduino.cc/wp-content/uploads/2026/06/image-768x768.png","width":768,"height":768},"large":{"url":"https://blog.arduino.cc/wp-content/uploads/2026/06/image-1024x1024.png","width":1024,"height":1024},"1536x1536":{"url":"https://blog.arduino.cc/wp-content/uploads/2026/06/image-1536x1536.png","width":1536,"height":1536},"2048x2048":{"url":"https://blog.arduino.cc/wp-content/uploads/2026/06/image.png","width":2048,"height":2048}}},{"id":42260,"url":"https://blog.arduino.cc/wp-content/uploads/2026/06/image-1.png","slug":"image-109","title":"image","description":"","caption":"","parent":42244,"mime_type":"image/png","images":{"full":{"url":"https://blog.arduino.cc/wp-content/uploads/2026/06/image-1.png","width":2048,"height":1160},"thumbnail":{"url":"https://blog.arduino.cc/wp-content/uploads/2026/06/image-1-385x289.png","width":385,"height":289},"medium":{"url":"https://blog.arduino.cc/wp-content/uploads/2026/06/image-1-300x170.png","width":300,"height":170},"medium_large":{"url":"https://blog.arduino.cc/wp-content/uploads/2026/06/image-1-768x435.png","width":768,"height":435},"large":{"url":"https://blog.arduino.cc/wp-content/uploads/2026/06/image-1-1024x580.png","width":1024,"height":580},"1536x1536":{"url":"https://blog.arduino.cc/wp-content/uploads/2026/06/image-1-1536x870.png","width":1536,"height":870},"2048x2048":{"url":"https://blog.arduino.cc/wp-content/uploads/2026/06/image-1.png","width":2048,"height":1160}}},{"id":42268,"url":"https://blog.arduino.cc/wp-content/uploads/2026/06/Arduino.cc-Blogpost-Cover1100x600-6.jpg","slug":"arduino-cc-blogpost-cover1100x600-6-2","title":"Arduino.cc-Blogpost-Cover(1100x600) (6)","description":"","caption":"","parent":42244,"mime_type":"image/jpeg","images":{"full":{"url":"https://blog.arduino.cc/wp-content/uploads/2026/06/Arduino.cc-Blogpost-Cover1100x600-6.jpg","width":1100,"height":600},"thumbnail":{"url":"https://blog.arduino.cc/wp-content/uploads/2026/06/Arduino.cc-Blogpost-Cover1100x600-6-385x289.jpg","width":385,"height":289},"medium":{"url":"https://blog.arduino.cc/wp-content/uploads/2026/06/Arduino.cc-Blogpost-Cover1100x600-6-300x164.jpg","width":300,"height":164},"medium_large":{"url":"https://blog.arduino.cc/wp-content/uploads/2026/06/Arduino.cc-Blogpost-Cover1100x600-6-768x419.jpg","width":768,"height":419},"large":{"url":"https://blog.arduino.cc/wp-content/uploads/2026/06/Arduino.cc-Blogpost-Cover1100x600-6-1024x559.jpg","width":1024,"height":559},"1536x1536":{"url":"https://blog.arduino.cc/wp-content/uploads/2026/06/Arduino.cc-Blogpost-Cover1100x600-6.jpg","width":1100,"height":600},"2048x2048":{"url":"https://blog.arduino.cc/wp-content/uploads/2026/06/Arduino.cc-Blogpost-Cover1100x600-6.jpg","width":1100,"height":600}}},{"id":42270,"url":"https://blog.arduino.cc/wp-content/uploads/2026/06/Arduino.cc-Blogpost-Featured385x289-11.jpg","slug":"arduino-cc-blogpost-featured385x289-11-2","title":"Arduino.cc-Blogpost-Featured(385x289) (11)","description":"","caption":"","parent":42244,"mime_type":"image/jpeg","images":{"full":{"url":"https://blog.arduino.cc/wp-content/uploads/2026/06/Arduino.cc-Blogpost-Featured385x289-11.jpg","width":385,"height":289},"thumbnail":{"url":"https://blog.arduino.cc/wp-content/uploads/2026/06/Arduino.cc-Blogpost-Featured385x289-11.jpg","width":385,"height":289},"medium":{"url":"https://blog.arduino.cc/wp-content/uploads/2026/06/Arduino.cc-Blogpost-Featured385x289-11-300x225.jpg","width":300,"height":225},"medium_large":{"url":"https://blog.arduino.cc/wp-content/uploads/2026/06/Arduino.cc-Blogpost-Featured385x289-11.jpg","width":385,"height":289},"large":{"url":"https://blog.arduino.cc/wp-content/uploads/2026/06/Arduino.cc-Blogpost-Featured385x289-11.jpg","width":385,"height":289},"1536x1536":{"url":"https://blog.arduino.cc/wp-content/uploads/2026/06/Arduino.cc-Blogpost-Featured385x289-11.jpg","width":385,"height":289},"2048x2048":{"url":"https://blog.arduino.cc/wp-content/uploads/2026/06/Arduino.cc-Blogpost-Featured385x289-11.jpg","width":385,"height":289}}}],"comment_count":0,"comment_status":"closed","thumbnail":"https://blog.arduino.cc/wp-content/uploads/2026/06/Arduino.cc-Blogpost-Featured385x289-11.jpg","custom_fields":{"algolia_searchable_posts_records_count":["2"]},"thumbnail_size":"thumbnail","thumbnail_images":{"full":{"url":"https://blog.arduino.cc/wp-content/uploads/2026/06/Arduino.cc-Blogpost-Featured385x289-11.jpg","width":385,"height":289},"thumbnail":{"url":"https://blog.arduino.cc/wp-content/uploads/2026/06/Arduino.cc-Blogpost-Featured385x289-11.jpg","width":385,"height":289},"medium":{"url":"https://blog.arduino.cc/wp-content/uploads/2026/06/Arduino.cc-Blogpost-Featured385x289-11-300x225.jpg","width":300,"height":225},"medium_large":{"url":"https://blog.arduino.cc/wp-content/uploads/2026/06/Arduino.cc-Blogpost-Featured385x289-11.jpg","width":385,"height":289},"large":{"url":"https://blog.arduino.cc/wp-content/uploads/2026/06/Arduino.cc-Blogpost-Featured385x289-11.jpg","width":385,"height":289},"1536x1536":{"url":"https://blog.arduino.cc/wp-content/uploads/2026/06/Arduino.cc-Blogpost-Featured385x289-11.jpg","width":385,"height":289},"2048x2048":{"url":"https://blog.arduino.cc/wp-content/uploads/2026/06/Arduino.cc-Blogpost-Featured385x289-11.jpg","width":385,"height":289}}},{"id":42233,"type":"post","slug":"three-new-arduino-modulino-modules-are-here-bigger-ideas-now-come-with-zero-added-stress","url":"https://blog.arduino.cc/2026/06/26/three-new-arduino-modulino-modules-are-here-bigger-ideas-now-come-with-zero-added-stress/","status":"publish","title":"Three new Arduino® Modulino™ modules are here! Bigger ideas now come with zero added stress","title_plain":"Three new Arduino® Modulino™ modules are here! Bigger ideas now come with zero added stress","content":"\n\u003cfigure class=\"wp-block-image size-large\"\u003e\u003cdiv class=\"image-post\"\u003e\u003cimg loading=\"lazy\" decoding=\"async\" width=\"1024\" height=\"559\" src=\"https://blog.arduino.cc/wp-content/uploads/2026/06/Arduino.cc-Blogpost-Cover1100x600-5-1024x559.jpg\" alt=\"\" class=\"wp-image-42239\" srcset=\"https://blog.arduino.cc/wp-content/uploads/2026/06/Arduino.cc-Blogpost-Cover1100x600-5-1024x559.jpg 1024w, https://blog.arduino.cc/wp-content/uploads/2026/06/Arduino.cc-Blogpost-Cover1100x600-5-300x164.jpg 300w, https://blog.arduino.cc/wp-content/uploads/2026/06/Arduino.cc-Blogpost-Cover1100x600-5-768x419.jpg 768w, https://blog.arduino.cc/wp-content/uploads/2026/06/Arduino.cc-Blogpost-Cover1100x600-5.jpg 1100w\" sizes=\"auto, (max-width: 1024px) 100vw, 1024px\" /\u003e\u003c/div\u003e\u003c/figure\u003e\n\n\n\n\u003cp class=\"wp-block-paragraph\"\u003eThe \u003ca href=\"https://store-usa.arduino.cc/collections/modulino\" target=\"_blank\" rel=\"noreferrer noopener\"\u003eModulino family\u003c/a\u003e keeps growing, to allow you to easily expand your projects with new tiny modules that bring additional functionalities –\u0026nbsp;in a snap!\u0026nbsp;\u003c/p\u003e\n\n\n\n\u003cp class=\"wp-block-paragraph\"\u003eWith \u003cstrong\u003eModulino Hub, Modulino Extender, and Modulino Motors joining the range\u003c/strong\u003e, you now have no less than 15 easy options to make building your next idea easier and more fun than ever. Think of them as ready-to-deploy functionalities you can add, swap around, and link together to \u003cstrong\u003elearn, create, or prototype interactive and automated devices\u003c/strong\u003e.\u003c/p\u003e\n\n\n\n\u003ch2 class=\"wp-block-heading\"\u003e\u003cstrong\u003eLet’s get to know the three new modules!\u003c/strong\u003e\u003c/h2\u003e\n\n\n\n\u003cp class=\"wp-block-paragraph\"\u003eAfter releasing \u003ca href=\"https://store.arduino.cc/products/modulino-led-matrix\" target=\"_blank\" rel=\"noreferrer noopener\"\u003eModulino LED Matrix\u003c/a\u003e, we tackled three pain points the Arduino community has been voicing.\u0026nbsp;\u003c/p\u003e\n\n\n\n\u003cul class=\"wp-block-list\"\u003e\n\u003cli\u003e\u003cstrong\u003eNot enough I\u003csup\u003e2\u003c/sup\u003eC channels?\u003c/strong\u003e The I\u003csup\u003e2\u003c/sup\u003eC protocol supports up to 127 devices in theory, but in practice address conflicts between components can become a real bottleneck long before you get there – especially in complex builds where multiple sensors or actuators share the same default address. When your project hits that wall, you can now add a \u003ca href=\"https://store.arduino.cc/products/modulino-hub\" target=\"_blank\" rel=\"noreferrer noopener\"\u003eModulino Hub\u003c/a\u003e. By daisy-chaining it to your existing setup, you gain 8 new independent I\u003csup\u003e2\u003c/sup\u003eC channels, each with its own isolated address space, so you can keep adding components without conflicts and without changing a line of code in your existing logic.\u003c/li\u003e\n\n\n\n\u003cli\u003e\u003cstrong\u003eHave a project that’s too large for I\u003csup\u003e2\u003c/sup\u003eC to handle?\u003c/strong\u003e I\u003csup\u003e2\u003c/sup\u003eC is great for short-range communication, but if you have longer distances between devices or larger installations you have two choices: either change protocol and start over, or simply boost the signal. Of course, you had us at \u003cem\u003esimply\u003c/em\u003e. Get a \u003ca href=\"https://store.arduino.cc/products/modulino-extender\" target=\"_blank\" rel=\"noreferrer noopener\"\u003eModulino Extender\u003c/a\u003e, place it on the I\u003csup\u003e2\u003c/sup\u003eC bus, and it will amplify the signal to approximately 30 meters (?100 ft) when operating at 100 kHz. No additional libraries needed, because this is a 100% hardware module.\u003c/li\u003e\n\n\n\n\u003cli\u003e\u003cstrong\u003eHave a robot or automated mechanism to control?\u003c/strong\u003e Try \u003ca href=\"https://store.arduino.cc/products/modulino-motors\" target=\"_blank\" rel=\"noreferrer noopener\"\u003eModulino Motors\u003c/a\u003e to skip the spaghetti wiring between central controller and devices, and control two DC motors or a single stepper motor with precision. Now you can adjust speed, direction, and position right where the action happens.\u003c/li\u003e\n\u003c/ul\u003e\n\n\n\n\u003ch2 class=\"wp-block-heading\"\u003e\u003cstrong\u003eWhat exactly is Modulino?\u0026nbsp;\u003c/strong\u003e\u003c/h2\u003e\n\n\n\n\u003cp class=\"wp-block-paragraph\"\u003eModulino is our range of plug-and-play smart components designed to take the friction out of building with electronics. Each node connects via Qwiic cable and supports daisy-chaining, so you can combine sensors, actuators, and controllers without redesigning your hardware every time you add something new. A dedicated library – supporting both Arduino language (based on C++) and MicroPython – means the learning curve stays gentle, no matter where you are on your path.\u003c/p\u003e\n\n\n\n\u003cp class=\"wp-block-paragraph\"\u003eThe design philosophy is consistency: every Modulino node shares the same (tiny!) form factor and connection standard, so swapping components between projects is straightforward, and breakout pins give advanced users room to push customization further.\u0026nbsp;\u003c/p\u003e\n\n\n\n\u003cp class=\"wp-block-paragraph\"\u003eModulino nodes connect directly to\u0026nbsp; \u003ca href=\"https://www.arduino.cc/product-uno-q\" target=\"_blank\" rel=\"noreferrer noopener\"\u003eArduino UNO Q\u003c/a\u003e, \u003ca href=\"https://store.arduino.cc/products/nesso-n1\" target=\"_blank\" rel=\"noreferrer noopener\"\u003eNesso N1\u003c/a\u003e, \u003ca href=\"https://store.arduino.cc/collections/uno/products/uno-r4-wifi\" target=\"_blank\" rel=\"noreferrer noopener\"\u003eUNO R4 WiFi\u003c/a\u003e, and \u003ca href=\"https://store.arduino.cc/collections/nano-family\" target=\"_blank\" rel=\"noreferrer noopener\"\u003eNano\u003c/a\u003e boards, and integrate naturally with \u003ca href=\"https://cloud.arduino.cc/\" target=\"_blank\" rel=\"noreferrer noopener\"\u003eArduino\u003csup\u003e®\u003c/sup\u003e Cloud\u003c/a\u003e tools and the broader Arduino ecosystem – making them equally valuable in a classroom, a maker workshop, or a professional edge IoT prototyping lab.\u0026nbsp;\u003c/p\u003e\n\n\n\n\u003ch2 class=\"wp-block-heading\"\u003e\u003cstrong\u003eGet your new Modulino today\u003c/strong\u003e\u003c/h2\u003e\n\n\n\n\u003cp class=\"wp-block-paragraph\"\u003eModulino Hub, Modulino Extender, and Modulino Motors are available today from the \u003ca href=\"https://store.arduino.cc/\" target=\"_blank\" rel=\"noreferrer noopener\"\u003eArduino Store\u003c/a\u003e today, as well as through trusted official distributors worldwide.\u0026nbsp;\u003c/p\u003e\n\n\n\n\u003cp class=\"wp-block-paragraph\"\u003e\u003cem\u003eArduino, Modulino, UNO, Nesso, and Nano are trademarks or registered trademarks of Arduino S.r.l.\u003c/em\u003e\u003c/p\u003e\n","excerpt":"\u003cp\u003eThe Modulino family keeps growing, to allow you to easily expand your projects with new tiny modules that bring additional functionalities –\u0026nbsp;in a snap!\u0026nbsp; With Modulino Hub, Modulino Extender, and Modulino Motors joining the range, you now have no less than 15 easy options to make building your next idea easier and more fun than [\u0026hellip;]\u003c/p\u003e\n","date":"2026-06-26 07:45:46","modified":"2026-07-14 16:14:30","categories":[{"id":42,"slug":"arduino","title":"Arduino","description":"","parent":0,"post_count":3274},{"id":1597,"slug":"featured","title":"Featured","description":"","parent":0,"post_count":1764},{"id":6609,"slug":"modulino-nodes","title":"Modulino Nodes","description":"","parent":42,"post_count":6}],"tags":[{"id":6769,"slug":"arduino-modulino","title":"Arduino Modulino","description":"","post_count":1},{"id":6606,"slug":"modulino","title":"Modulino","description":"","post_count":3}],"author":{"id":27876,"slug":"editorarduino","name":"Arduino Team","first_name":"","last_name":"","nickname":"Arduino Team","url":"","description":""},"comments":[],"attachments":[{"id":42236,"url":"https://blog.arduino.cc/wp-content/uploads/2026/06/Arduino.cc-Blogpost-Cover1100x600-4.jpg","slug":"arduino-cc-blogpost-cover1100x600-4-2","title":"Arduino.cc-Blogpost-Cover(1100x600) (4)","description":"","caption":"","parent":42233,"mime_type":"image/jpeg","images":{"full":{"url":"https://blog.arduino.cc/wp-content/uploads/2026/06/Arduino.cc-Blogpost-Cover1100x600-4.jpg","width":1100,"height":600},"thumbnail":{"url":"https://blog.arduino.cc/wp-content/uploads/2026/06/Arduino.cc-Blogpost-Cover1100x600-4-385x289.jpg","width":385,"height":289},"medium":{"url":"https://blog.arduino.cc/wp-content/uploads/2026/06/Arduino.cc-Blogpost-Cover1100x600-4-300x164.jpg","width":300,"height":164},"medium_large":{"url":"https://blog.arduino.cc/wp-content/uploads/2026/06/Arduino.cc-Blogpost-Cover1100x600-4-768x419.jpg","width":768,"height":419},"large":{"url":"https://blog.arduino.cc/wp-content/uploads/2026/06/Arduino.cc-Blogpost-Cover1100x600-4-1024x559.jpg","width":1024,"height":559},"1536x1536":{"url":"https://blog.arduino.cc/wp-content/uploads/2026/06/Arduino.cc-Blogpost-Cover1100x600-4.jpg","width":1100,"height":600},"2048x2048":{"url":"https://blog.arduino.cc/wp-content/uploads/2026/06/Arduino.cc-Blogpost-Cover1100x600-4.jpg","width":1100,"height":600}}},{"id":42237,"url":"https://blog.arduino.cc/wp-content/uploads/2026/06/Arduino.cc-Blogpost-Featured385x289-8.jpg","slug":"arduino-cc-blogpost-featured385x289-8-2","title":"Arduino.cc-Blogpost-Featured(385x289) (8)","description":"","caption":"","parent":42233,"mime_type":"image/jpeg","images":{"full":{"url":"https://blog.arduino.cc/wp-content/uploads/2026/06/Arduino.cc-Blogpost-Featured385x289-8.jpg","width":385,"height":289},"thumbnail":{"url":"https://blog.arduino.cc/wp-content/uploads/2026/06/Arduino.cc-Blogpost-Featured385x289-8.jpg","width":385,"height":289},"medium":{"url":"https://blog.arduino.cc/wp-content/uploads/2026/06/Arduino.cc-Blogpost-Featured385x289-8-300x225.jpg","width":300,"height":225},"medium_large":{"url":"https://blog.arduino.cc/wp-content/uploads/2026/06/Arduino.cc-Blogpost-Featured385x289-8.jpg","width":385,"height":289},"large":{"url":"https://blog.arduino.cc/wp-content/uploads/2026/06/Arduino.cc-Blogpost-Featured385x289-8.jpg","width":385,"height":289},"1536x1536":{"url":"https://blog.arduino.cc/wp-content/uploads/2026/06/Arduino.cc-Blogpost-Featured385x289-8.jpg","width":385,"height":289},"2048x2048":{"url":"https://blog.arduino.cc/wp-content/uploads/2026/06/Arduino.cc-Blogpost-Featured385x289-8.jpg","width":385,"height":289}}},{"id":42239,"url":"https://blog.arduino.cc/wp-content/uploads/2026/06/Arduino.cc-Blogpost-Cover1100x600-5.jpg","slug":"arduino-cc-blogpost-cover1100x600-5-2","title":"Arduino.cc-Blogpost-Cover(1100x600) (5)","description":"","caption":"","parent":42233,"mime_type":"image/jpeg","images":{"full":{"url":"https://blog.arduino.cc/wp-content/uploads/2026/06/Arduino.cc-Blogpost-Cover1100x600-5.jpg","width":1100,"height":600},"thumbnail":{"url":"https://blog.arduino.cc/wp-content/uploads/2026/06/Arduino.cc-Blogpost-Cover1100x600-5-385x289.jpg","width":385,"height":289},"medium":{"url":"https://blog.arduino.cc/wp-content/uploads/2026/06/Arduino.cc-Blogpost-Cover1100x600-5-300x164.jpg","width":300,"height":164},"medium_large":{"url":"https://blog.arduino.cc/wp-content/uploads/2026/06/Arduino.cc-Blogpost-Cover1100x600-5-768x419.jpg","width":768,"height":419},"large":{"url":"https://blog.arduino.cc/wp-content/uploads/2026/06/Arduino.cc-Blogpost-Cover1100x600-5-1024x559.jpg","width":1024,"height":559},"1536x1536":{"url":"https://blog.arduino.cc/wp-content/uploads/2026/06/Arduino.cc-Blogpost-Cover1100x600-5.jpg","width":1100,"height":600},"2048x2048":{"url":"https://blog.arduino.cc/wp-content/uploads/2026/06/Arduino.cc-Blogpost-Cover1100x600-5.jpg","width":1100,"height":600}}},{"id":42241,"url":"https://blog.arduino.cc/wp-content/uploads/2026/06/Arduino.cc-Blogpost-Featured385x289-9.jpg","slug":"arduino-cc-blogpost-featured385x289-9-2","title":"Arduino.cc-Blogpost-Featured(385x289) (9)","description":"","caption":"","parent":42233,"mime_type":"image/jpeg","images":{"full":{"url":"https://blog.arduino.cc/wp-content/uploads/2026/06/Arduino.cc-Blogpost-Featured385x289-9.jpg","width":385,"height":289},"thumbnail":{"url":"https://blog.arduino.cc/wp-content/uploads/2026/06/Arduino.cc-Blogpost-Featured385x289-9.jpg","width":385,"height":289},"medium":{"url":"https://blog.arduino.cc/wp-content/uploads/2026/06/Arduino.cc-Blogpost-Featured385x289-9-300x225.jpg","width":300,"height":225},"medium_large":{"url":"https://blog.arduino.cc/wp-content/uploads/2026/06/Arduino.cc-Blogpost-Featured385x289-9.jpg","width":385,"height":289},"large":{"url":"https://blog.arduino.cc/wp-content/uploads/2026/06/Arduino.cc-Blogpost-Featured385x289-9.jpg","width":385,"height":289},"1536x1536":{"url":"https://blog.arduino.cc/wp-content/uploads/2026/06/Arduino.cc-Blogpost-Featured385x289-9.jpg","width":385,"height":289},"2048x2048":{"url":"https://blog.arduino.cc/wp-content/uploads/2026/06/Arduino.cc-Blogpost-Featured385x289-9.jpg","width":385,"height":289}}}],"comment_count":0,"comment_status":"closed","thumbnail":"https://blog.arduino.cc/wp-content/uploads/2026/06/Arduino.cc-Blogpost-Featured385x289-9.jpg","custom_fields":{"algolia_searchable_posts_records_count":["2"]},"thumbnail_size":"thumbnail","thumbnail_images":{"full":{"url":"https://blog.arduino.cc/wp-content/uploads/2026/06/Arduino.cc-Blogpost-Featured385x289-9.jpg","width":385,"height":289},"thumbnail":{"url":"https://blog.arduino.cc/wp-content/uploads/2026/06/Arduino.cc-Blogpost-Featured385x289-9.jpg","width":385,"height":289},"medium":{"url":"https://blog.arduino.cc/wp-content/uploads/2026/06/Arduino.cc-Blogpost-Featured385x289-9-300x225.jpg","width":300,"height":225},"medium_large":{"url":"https://blog.arduino.cc/wp-content/uploads/2026/06/Arduino.cc-Blogpost-Featured385x289-9.jpg","width":385,"height":289},"large":{"url":"https://blog.arduino.cc/wp-content/uploads/2026/06/Arduino.cc-Blogpost-Featured385x289-9.jpg","width":385,"height":289},"1536x1536":{"url":"https://blog.arduino.cc/wp-content/uploads/2026/06/Arduino.cc-Blogpost-Featured385x289-9.jpg","width":385,"height":289},"2048x2048":{"url":"https://blog.arduino.cc/wp-content/uploads/2026/06/Arduino.cc-Blogpost-Featured385x289-9.jpg","width":385,"height":289}}},{"id":42215,"type":"post","slug":"running-local-llms-on-the-arduino-uno-q-board-a-practical-guide","url":"https://blog.arduino.cc/2026/06/18/running-local-llms-on-the-arduino-uno-q-board-a-practical-guide/","status":"publish","title":"Running local LLMs on the Arduino® UNO™ Q board: a practical guide","title_plain":"Running local LLMs on the Arduino® UNO™ Q board: a practical guide","content":"\n\u003cfigure class=\"wp-block-image size-large\"\u003e\u003cdiv class=\"image-post\"\u003e\u003cimg loading=\"lazy\" decoding=\"async\" width=\"1024\" height=\"559\" src=\"https://blog.arduino.cc/wp-content/uploads/2026/06/Arduino.cc-Blogpost-Cover1100x600-3-1-1024x559.jpg\" alt=\"\" class=\"wp-image-42218\" srcset=\"https://blog.arduino.cc/wp-content/uploads/2026/06/Arduino.cc-Blogpost-Cover1100x600-3-1-1024x559.jpg 1024w, https://blog.arduino.cc/wp-content/uploads/2026/06/Arduino.cc-Blogpost-Cover1100x600-3-1-300x164.jpg 300w, https://blog.arduino.cc/wp-content/uploads/2026/06/Arduino.cc-Blogpost-Cover1100x600-3-1-768x419.jpg 768w, https://blog.arduino.cc/wp-content/uploads/2026/06/Arduino.cc-Blogpost-Cover1100x600-3-1.jpg 1100w\" sizes=\"auto, (max-width: 1024px) 100vw, 1024px\" /\u003e\u003c/div\u003e\u003c/figure\u003e\n\n\n\n\u003cp class=\"wp-block-paragraph\"\u003eWhen talking about large language models (LLMs), people usually imagine a general-purpose assistant: something that can answer questions about weather, politics, software, history, travel, cooking, electronics – and almost any other topic. The model is expected to know a little bit about everything, follow open-ended conversations, and respond to a very broad range of prompts. That’s the experience most of us are used to, since cloud-based AI tools have become so widespread.\u003c/p\u003e\n\n\n\n\u003cp class=\"wp-block-paragraph\"\u003eEmbedded systems work in a much more “narrow” world. A robot does not need to discuss politics, an inspection system does not need to suggest vacation destinations, and a maintenance assistant installed near a machine does not need to explain ancient history. The system needs to understand the device, the task, the possible commands, the local data, and the actions that are safe to suggest or execute. The goal is to \u003cstrong\u003egive an edge device enough language intelligence to become more useful, more understandable, and more independent from the network\u003c/strong\u003e.\u003c/p\u003e\n\n\n\n\u003cp class=\"wp-block-paragraph\"\u003eThis is the framework in which we can think about local LLMs on \u003ca href=\"https://www.arduino.cc/product-uno-q\"\u003eUNO Q\u003c/a\u003e: a practical platform to explore this idea because it brings together a Debian Linux environment and the Arduino\u003csup\u003e®\u003c/sup\u003e hardware ecosystem. The Linux side can run local AI tools, command-line workflows, Python applications, web services, and inference runtimes. The Arduino side connects that intelligence to sensors, actuators, shields, \u003ca href=\"https://store.arduino.cc/pages/modulino\"\u003eArduino\u003csup\u003e®\u003c/sup\u003e\u0026nbsp;Modulino\u003csup\u003e™\u003c/sup\u003e nodes\u003c/a\u003e, and real-world signals. This combination makes it possible to experiment with language models not as isolated chatbots, but as part of real embedded workflows.\u003c/p\u003e\n\n\n\n\u003cp class=\"wp-block-paragraph\"\u003eThe most important question to consider is not how to force a large model to run, but \u003cstrong\u003ewhat kind of useful intelligence can live close to the data, close to the device, and close to the physical action?\u003c/strong\u003e\u003c/p\u003e\n\n\n\n\u003ch2 class=\"wp-block-heading\"\u003eStep 1: choose the right model for your use case\u003c/h2\u003e\n\n\n\n\u003cp class=\"wp-block-paragraph\"\u003e\u003cstrong\u003eThe edge is where smaller, optimized models become interesting.\u003c/strong\u003e On the cloud, a large general-purpose model makes sense because it is expected to answer almost anything. On the edge, a model that has been trained, fine-tuned, distilled, or quantized for a specific domain can be more practical. It carries less unnecessary weight, focuses on the type of language the device actually needs, and can be integrated into a controlled application flow.\u003c/p\u003e\n\n\n\n\u003cfigure class=\"wp-block-image size-large\"\u003e\u003cdiv class=\"image-post\"\u003e\u003cimg loading=\"lazy\" decoding=\"async\" width=\"1024\" height=\"682\" src=\"https://blog.arduino.cc/wp-content/uploads/2026/06/DSCF4915-1024x682.jpg\" alt=\"\" class=\"wp-image-42422\" srcset=\"https://blog.arduino.cc/wp-content/uploads/2026/06/DSCF4915-1024x682.jpg 1024w, https://blog.arduino.cc/wp-content/uploads/2026/06/DSCF4915-300x200.jpg 300w, https://blog.arduino.cc/wp-content/uploads/2026/06/DSCF4915-768x512.jpg 768w, https://blog.arduino.cc/wp-content/uploads/2026/06/DSCF4915-1536x1024.jpg 1536w, https://blog.arduino.cc/wp-content/uploads/2026/06/DSCF4915.jpg 2000w\" sizes=\"auto, (max-width: 1024px) 100vw, 1024px\" /\u003e\u003c/div\u003e\u003c/figure\u003e\n\n\n\n\u003cp class=\"wp-block-paragraph\"\u003eFor example, in \u003cstrong\u003erobotics\u003c/strong\u003e the interaction can often be reduced to a limited set of useful instructions: move forward, stop, inspect this object, return to base, report battery level, explain the last error, switch to manual mode. The model can help interpret natural language, but the system should still map that interpretation to a controlled set of valid commands. This makes the behavior easier to test, easier to validate, and easier to trust.\u003c/p\u003e\n\n\n\n\u003cp class=\"wp-block-paragraph\"\u003eThat narrower scope is one of the reasons local LLMs can make sense on embedded platforms.\u003c/p\u003e\n\n\n\n\u003ch2 class=\"wp-block-heading\"\u003eStep 2: understand your memory and storage constraints\u003c/h2\u003e\n\n\n\n\u003cp class=\"wp-block-paragraph\"\u003eA large language model usually has many parameters, and every parameter represents data that must be stored, loaded, and processed during inference. Model weights are only part of the story. During generation, the runtime also needs working memory for the prompt, the intermediate computation, and the key-value cache used by transformer models to keep track of previous tokens. As the context grows, memory usage grows too.\u003c/p\u003e\n\n\n\n\u003cp class=\"wp-block-paragraph\"\u003eA 1B-parameter model in 4-bit quantization (such as Llama 3.2 1B Q4) occupies roughly 600–700 MB on disk and requires around 1 GB of RAM at runtime, including the KV cache for a short context window. A 3B model at the same precision pushes past 2 GB. These are numbers that matter on a board with fixed memory and storage, where the model must coexist with the OS, the runtime, and the rest of the application.\u003c/p\u003e\n\n\n\n\u003cp class=\"wp-block-paragraph\"\u003e\u003cstrong\u003eQuantization\u003c/strong\u003e is one of the techniques that makes this more realistic. Instead of storing model weights with high-precision numerical values, a quantized model uses lower-precision representations. This reduces memory usage and can make inference possible on hardware that would otherwise be too constrained. In practical terms, quantization helps move a model from “too large to run locally” towards “small enough to experiment with” –\u0026nbsp;while accepting a trade-off in accuracy, fluency, or speed depending on the model and runtime.\u003c/p\u003e\n\n\n\n\u003cp class=\"wp-block-paragraph\"\u003e\u003cstrong\u003eModel distillation\u003c/strong\u003e is another important concept. In simple terms, distillation is a training approach where a smaller model learns from a larger teacher model. The goal is to keep useful behavior while reducing inference cost and memory footprint. A distilled model will not have the full breadth of the teacher, but it can be much more suitable when the application needs a focused capability on-device.\u003c/p\u003e\n\n\n\n\u003cfigure class=\"wp-block-image size-full is-resized\"\u003e\u003cdiv class=\"image-post\"\u003e\u003cimg loading=\"lazy\" decoding=\"async\" width=\"1024\" height=\"768\" src=\"https://blog.arduino.cc/wp-content/uploads/2026/06/781ae253-fc34-4fed-a9b4-7ffbbe5fe9cf.png\" alt=\"\" class=\"wp-image-42423\" style=\"width:813px;height:auto\" srcset=\"https://blog.arduino.cc/wp-content/uploads/2026/06/781ae253-fc34-4fed-a9b4-7ffbbe5fe9cf.png 1024w, https://blog.arduino.cc/wp-content/uploads/2026/06/781ae253-fc34-4fed-a9b4-7ffbbe5fe9cf-300x225.png 300w, https://blog.arduino.cc/wp-content/uploads/2026/06/781ae253-fc34-4fed-a9b4-7ffbbe5fe9cf-385x289.png 385w, https://blog.arduino.cc/wp-content/uploads/2026/06/781ae253-fc34-4fed-a9b4-7ffbbe5fe9cf-768x576.png 768w\" sizes=\"auto, (max-width: 1024px) 100vw, 1024px\" /\u003e\u003c/div\u003e\u003c/figure\u003e\n\n\n\n\u003cp class=\"wp-block-paragraph\"\u003eThis example of \u003ca href=\"https://projecthub.arduino.cc/marc-edgeimpulse/running-local-llms-and-vlms-on-the-arduino-uno-q-with-yzma-74e288\"\u003erunning local LLMs and VLMs on UNO Q with yzma \u003c/a\u003eexpands the conversation beyond text chat and explores local LLM and VLM workflows using yzma and llama, pointing toward a wider class of edge AI experiments where language models can work together with images, local data, and device context.\u003c/p\u003e\n\n\n\n\u003ch2 class=\"wp-block-heading\"\u003eStep 3: identify where a local LLM adds real value\u003c/h2\u003e\n\n\n\n\u003cfigure class=\"wp-block-image size-large\"\u003e\u003cdiv class=\"image-post\"\u003e\u003cimg loading=\"lazy\" decoding=\"async\" width=\"1024\" height=\"682\" src=\"https://blog.arduino.cc/wp-content/uploads/2026/06/DSCF5128-1024x682.jpg\" alt=\"\" class=\"wp-image-42424\" srcset=\"https://blog.arduino.cc/wp-content/uploads/2026/06/DSCF5128-1024x682.jpg 1024w, https://blog.arduino.cc/wp-content/uploads/2026/06/DSCF5128-300x200.jpg 300w, https://blog.arduino.cc/wp-content/uploads/2026/06/DSCF5128-768x512.jpg 768w, https://blog.arduino.cc/wp-content/uploads/2026/06/DSCF5128-1536x1024.jpg 1536w, https://blog.arduino.cc/wp-content/uploads/2026/06/DSCF5128.jpg 2000w\" sizes=\"auto, (max-width: 1024px) 100vw, 1024px\" /\u003e\u003c/div\u003e\u003c/figure\u003e\n\n\n\n\u003cp class=\"wp-block-paragraph\"\u003eLocal LLMs become even more useful when they are combined with other edge workflows. OCR is a good example. A camera connected to an UNO Q may extract text from a label, display, document, or machine interface. A compact language model can then summarize that text, classify it, or turn it into a structured response. The model only needs to process the relevant context, which keeps the workflow lighter and more focused.\u003c/p\u003e\n\n\n\n\u003cp class=\"wp-block-paragraph\"\u003eThe same principle applies to an UNO Q that collects logs, sensor readings, error states, or system events. A local model can turn that information into a short human-readable summary directly on the device. For a technician, this can transform raw data into something immediately useful – a compact explanation of the current status or a short description of the last error condition.\u003c/p\u003e\n\n\n\n\u003ch2 class=\"wp-block-heading\"\u003eStep 4: design the architecture and set your boundaries\u003c/h2\u003e\n\n\n\n\u003cp class=\"wp-block-paragraph\"\u003eOne of the most practical ways to think about local LLMs on UNO Q is to treat the model as an occasional reasoning layer. It can be called when language understanding, summarization, or interpretation adds value. Fast control loops, continuous monitoring, and timing-critical actions remain better suited to deterministic software running on the appropriate side of the system.\u003c/p\u003e\n\n\n\n\u003cp class=\"wp-block-paragraph\"\u003eWhen working with local LLMs on UNO Q, developers should take into consideration a few practical parameters. Memory usage comes first: the model must fit comfortably together with the runtime and the rest of the application. Response latency comes next: a model that runs may still feel too slow if the use case expects instant answers. Storage should also be planned carefully, because model files and dependencies can be large.\u003c/p\u003e\n\n\n\n\u003cp class=\"wp-block-paragraph\"\u003eThe best entry point is the Arduino Project Hub tutorial \u003ca href=\"https://projecthub.arduino.cc/robuinlabs/local-llm-ai-chatbot-on-arduino-uno-q-043aa9\"\u003eLocal LLM AI Chatbot on UNO Q\u003c/a\u003e, which walks through installing a small LLM and running it offline. It is a useful starting point because it demonstrates the basic shape of a local LLM application\u003c/p\u003e\n\n\n\n\u003cp class=\"wp-block-paragraph\"\u003eThere is also a natural bridge toward local agents. Agentic workflows can move beyond a simple chat interface and start coordinating tools, files, scripts, and actions. On UNO Q, this direction is especially interesting when the agent is treated as an orchestrator on the Linux side. It can inspect logs, prepare files, call scripts, interact with local tools, or help drive development workflows, while the hardware-facing layer keeps direct control over physical I/O.\u003c/p\u003e\n\n\n\n\u003cp class=\"wp-block-paragraph\"\u003eThis kind of setup requires clear boundaries. Giving an agent access to tools means giving it the ability to change things, so the environment should be designed carefully. \u003cstrong\u003eA dedicated board can be a useful sandbox for this type of experimentation\u003c/strong\u003e, with limited credentials, limited data access, and a specific set of allowed tools. This makes it possible to explore agentic workflows while keeping the system understandable and controlled.\u003c/p\u003e\n\n\n\n\u003cp class=\"wp-block-paragraph\"\u003eIf you prefer a familiar developer workflow, \u003ca href=\"https://blogm.tinivelli.com/installing-ollama-on-arduino-uno-q-d7b63a12b1e9\"\u003eInstalling Ollama on Arduino UNO Q\u003c/a\u003e covers a practical detail that matters a lot on embedded Linux systems: how to efficiently manage the resources available on the UNO Q to get the most out of it.\u003c/p\u003e\n\n\n\n\u003ch2 class=\"wp-block-heading\"\u003eStep 5: run it, measure it, iterate\u003c/h2\u003e\n\n\n\n\u003cp class=\"wp-block-paragraph\"\u003ePick one model, run it on the board, and pay attention to memory usage and response time for your specific prompt. That real-world data will tell you more than any benchmark – and it will give you a much clearer picture of where a local LLM fits in your next embedded project.\u003c/p\u003e\n\n\n\n\u003cp class=\"wp-block-paragraph\"\u003eLocal LLMs on UNO Q always balance power, cost, size, latency, privacy, reliability, and connectivity. The most interesting question is how much useful intelligence can be placed close to the data, the hardware, and the user. Because \u003cstrong\u003eedge AI is not about more power. It’s about smarter choices\u003cem\u003e. \u003c/em\u003e\u003c/strong\u003eWith the right model, the right architecture, and the flexibility of UNO Q, you can test local AI where it matters most: on real hardware, in real projects.\u003c/p\u003e\n\n\n\n\u003cfigure class=\"wp-block-embed is-type-video is-provider-youtube wp-block-embed-youtube wp-embed-aspect-16-9 wp-has-aspect-ratio\"\u003e\u003cdiv class=\"wp-block-embed__wrapper\"\u003e\n\u003ciframe loading=\"lazy\" title=\"Can You Control Hardware Just By Writing to It?\" width=\"500\" height=\"281\" src=\"https://www.youtube.com/embed/p9Wmqpho0q0?feature=oembed\" frameborder=\"0\" allow=\"accelerometer; autoplay; clipboard-write; encrypted-media; gyroscope; picture-in-picture; web-share\" referrerpolicy=\"strict-origin-when-cross-origin\" allowfullscreen\u003e\u003c/iframe\u003e\n\u003c/div\u003e\u003c/figure\u003e\n\n\n\n\u003cp class=\"has-text-align-center wp-block-paragraph\"\u003eThis video demonstrates how you can deploy lightweight LLMs on the Arduino UNO Q, opening the door to a new generation of intelligent, private, and responsive devices.\u003c/p\u003e\n\n\n\n\u003cp class=\"wp-block-paragraph\"\u003e\u003cstrong\u003e\u003ca href=\"https://store.arduino.cc/products/uno-q-4gb\"\u003eStart building with UNO Q\u003c/a\u003e and bring your AI ideas closer to the real world.\u003c/strong\u003e\u003cbr\u003e\u003cbr\u003eUNO Q is available to order from \u003ca href=\"http://www.digikey.com/en/product-highlight/a/arduino/uno-q-microcontroller-board\"\u003eDigiKey\u003c/a\u003e, \u003ca href=\"https://referral.element14.com/OrderCodeView?url=%2Fnew-products%2Fembedded-computers-education-maker-boards%2Farduino-uno-q\"\u003eFarnell\u003c/a\u003e,\u003ca href=\"https://www.mouser.de/new/arduino/arduino-uno-q-platform/\"\u003eMouser\u003c/a\u003e, \u003ca href=\"https://referral.element14.com/OrderCodeView?url=%2Fnew-products%2Fembedded-computers-education-maker-boards%2Farduino-uno-q\"\u003eNewark\u003c/a\u003e, \u003ca href=\"https://uk.rs-online.com/web/content/m/arduino-unoq-uk\"\u003eRS Components\u003c/a\u003e, and \u003ca href=\"http://robu.in/\"\u003eRobu.in\u003c/a\u003e; along with our other \u003ca href=\"https://store.arduino.cc/pages/distributors\"\u003eauthorized distributors and resellers\u003c/a\u003e.\u003c/p\u003e\n\n\n\n\u003cp class=\"wp-block-paragraph\"\u003e\u003cem\u003eArduino and UNO, and the Arduino logo are trademarks or registered trademarks of Arduino S.r.l.\u003c/em\u003e\u003c/p\u003e\n","excerpt":"\u003cp\u003eWhen talking about large language models (LLMs), people usually imagine a general-purpose assistant: something that can answer questions about weather, politics, software, history, travel, cooking, electronics – and almost any other topic. The model is expected to know a little bit about everything, follow open-ended conversations, and respond to a very broad range of prompts. [\u0026hellip;]\u003c/p\u003e\n","date":"2026-06-18 13:10:22","modified":"2026-07-29 16:39:39","categories":[{"id":42,"slug":"arduino","title":"Arduino","description":"","parent":0,"post_count":3274},{"id":1597,"slug":"featured","title":"Featured","description":"","parent":0,"post_count":1764},{"id":6698,"slug":"uno-q","title":"UNO Q","description":"","parent":42,"post_count":44}],"tags":[{"id":2271,"slug":"ai","title":"AI","description":"","post_count":12},{"id":4325,"slug":"artificial-intelligence","title":"Artificial Intelligence","description":"","post_count":7},{"id":6226,"slug":"edge-ai","title":"Edge AI","description":"","post_count":11},{"id":6887,"slug":"large-language-models","title":"Large Language Models","description":"","post_count":1},{"id":6795,"slug":"llms","title":"LLMs","description":"","post_count":3}],"author":{"id":27876,"slug":"editorarduino","name":"Arduino Team","first_name":"","last_name":"","nickname":"Arduino Team","url":"","description":""},"comments":[],"attachments":[{"id":42216,"url":"https://blog.arduino.cc/wp-content/uploads/2026/06/Arduino.cc-Blogpost2-Cover1100x600-2.jpg","slug":"arduino-cc-blogpost2-cover1100x600-2","title":"Arduino.cc-Blogpost2-Cover(1100x600)-2","description":"","caption":"","parent":42215,"mime_type":"image/jpeg","images":{"full":{"url":"https://blog.arduino.cc/wp-content/uploads/2026/06/Arduino.cc-Blogpost2-Cover1100x600-2.jpg","width":1100,"height":600},"thumbnail":{"url":"https://blog.arduino.cc/wp-content/uploads/2026/06/Arduino.cc-Blogpost2-Cover1100x600-2-385x289.jpg","width":385,"height":289},"medium":{"url":"https://blog.arduino.cc/wp-content/uploads/2026/06/Arduino.cc-Blogpost2-Cover1100x600-2-300x164.jpg","width":300,"height":164},"medium_large":{"url":"https://blog.arduino.cc/wp-content/uploads/2026/06/Arduino.cc-Blogpost2-Cover1100x600-2-768x419.jpg","width":768,"height":419},"large":{"url":"https://blog.arduino.cc/wp-content/uploads/2026/06/Arduino.cc-Blogpost2-Cover1100x600-2-1024x559.jpg","width":1024,"height":559},"1536x1536":{"url":"https://blog.arduino.cc/wp-content/uploads/2026/06/Arduino.cc-Blogpost2-Cover1100x600-2.jpg","width":1100,"height":600},"2048x2048":{"url":"https://blog.arduino.cc/wp-content/uploads/2026/06/Arduino.cc-Blogpost2-Cover1100x600-2.jpg","width":1100,"height":600}}},{"id":42218,"url":"https://blog.arduino.cc/wp-content/uploads/2026/06/Arduino.cc-Blogpost-Cover1100x600-3-1.jpg","slug":"arduino-cc-blogpost-cover1100x600-3-3","title":"Arduino.cc-Blogpost-Cover(1100x600)-3","description":"","caption":"","parent":42215,"mime_type":"image/jpeg","images":{"full":{"url":"https://blog.arduino.cc/wp-content/uploads/2026/06/Arduino.cc-Blogpost-Cover1100x600-3-1.jpg","width":1100,"height":600},"thumbnail":{"url":"https://blog.arduino.cc/wp-content/uploads/2026/06/Arduino.cc-Blogpost-Cover1100x600-3-1-385x289.jpg","width":385,"height":289},"medium":{"url":"https://blog.arduino.cc/wp-content/uploads/2026/06/Arduino.cc-Blogpost-Cover1100x600-3-1-300x164.jpg","width":300,"height":164},"medium_large":{"url":"https://blog.arduino.cc/wp-content/uploads/2026/06/Arduino.cc-Blogpost-Cover1100x600-3-1-768x419.jpg","width":768,"height":419},"large":{"url":"https://blog.arduino.cc/wp-content/uploads/2026/06/Arduino.cc-Blogpost-Cover1100x600-3-1-1024x559.jpg","width":1024,"height":559},"1536x1536":{"url":"https://blog.arduino.cc/wp-content/uploads/2026/06/Arduino.cc-Blogpost-Cover1100x600-3-1.jpg","width":1100,"height":600},"2048x2048":{"url":"https://blog.arduino.cc/wp-content/uploads/2026/06/Arduino.cc-Blogpost-Cover1100x600-3-1.jpg","width":1100,"height":600}}},{"id":42219,"url":"https://blog.arduino.cc/wp-content/uploads/2026/06/Arduino.cc-Blogpost-Featured385x289-1.jpg","slug":"arduino-cc-blogpost-featured385x289-14","title":"Arduino.cc-Blogpost-Featured(385x289)","description":"","caption":"","parent":42215,"mime_type":"image/jpeg","images":{"full":{"url":"https://blog.arduino.cc/wp-content/uploads/2026/06/Arduino.cc-Blogpost-Featured385x289-1.jpg","width":385,"height":289},"thumbnail":{"url":"https://blog.arduino.cc/wp-content/uploads/2026/06/Arduino.cc-Blogpost-Featured385x289-1.jpg","width":385,"height":289},"medium":{"url":"https://blog.arduino.cc/wp-content/uploads/2026/06/Arduino.cc-Blogpost-Featured385x289-1-300x225.jpg","width":300,"height":225},"medium_large":{"url":"https://blog.arduino.cc/wp-content/uploads/2026/06/Arduino.cc-Blogpost-Featured385x289-1.jpg","width":385,"height":289},"large":{"url":"https://blog.arduino.cc/wp-content/uploads/2026/06/Arduino.cc-Blogpost-Featured385x289-1.jpg","width":385,"height":289},"1536x1536":{"url":"https://blog.arduino.cc/wp-content/uploads/2026/06/Arduino.cc-Blogpost-Featured385x289-1.jpg","width":385,"height":289},"2048x2048":{"url":"https://blog.arduino.cc/wp-content/uploads/2026/06/Arduino.cc-Blogpost-Featured385x289-1.jpg","width":385,"height":289}}},{"id":42422,"url":"https://blog.arduino.cc/wp-content/uploads/2026/06/DSCF4915.jpg","slug":"dscf4915","title":"DSCF4915","description":"","caption":"","parent":42215,"mime_type":"image/jpeg","images":{"full":{"url":"https://blog.arduino.cc/wp-content/uploads/2026/06/DSCF4915.jpg","width":2000,"height":1333},"thumbnail":{"url":"https://blog.arduino.cc/wp-content/uploads/2026/06/DSCF4915-385x289.jpg","width":385,"height":289},"medium":{"url":"https://blog.arduino.cc/wp-content/uploads/2026/06/DSCF4915-300x200.jpg","width":300,"height":200},"medium_large":{"url":"https://blog.arduino.cc/wp-content/uploads/2026/06/DSCF4915-768x512.jpg","width":768,"height":512},"large":{"url":"https://blog.arduino.cc/wp-content/uploads/2026/06/DSCF4915-1024x682.jpg","width":1024,"height":682},"1536x1536":{"url":"https://blog.arduino.cc/wp-content/uploads/2026/06/DSCF4915-1536x1024.jpg","width":1536,"height":1024},"2048x2048":{"url":"https://blog.arduino.cc/wp-content/uploads/2026/06/DSCF4915.jpg","width":2000,"height":1333}}},{"id":42423,"url":"https://blog.arduino.cc/wp-content/uploads/2026/06/781ae253-fc34-4fed-a9b4-7ffbbe5fe9cf.png","slug":"781ae253-fc34-4fed-a9b4-7ffbbe5fe9cf","title":"781ae253-fc34-4fed-a9b4-7ffbbe5fe9cf","description":"","caption":"","parent":42215,"mime_type":"image/png","images":{"full":{"url":"https://blog.arduino.cc/wp-content/uploads/2026/06/781ae253-fc34-4fed-a9b4-7ffbbe5fe9cf.png","width":1024,"height":768},"thumbnail":{"url":"https://blog.arduino.cc/wp-content/uploads/2026/06/781ae253-fc34-4fed-a9b4-7ffbbe5fe9cf-385x289.png","width":385,"height":289},"medium":{"url":"https://blog.arduino.cc/wp-content/uploads/2026/06/781ae253-fc34-4fed-a9b4-7ffbbe5fe9cf-300x225.png","width":300,"height":225},"medium_large":{"url":"https://blog.arduino.cc/wp-content/uploads/2026/06/781ae253-fc34-4fed-a9b4-7ffbbe5fe9cf-768x576.png","width":768,"height":576},"large":{"url":"https://blog.arduino.cc/wp-content/uploads/2026/06/781ae253-fc34-4fed-a9b4-7ffbbe5fe9cf.png","width":1024,"height":768},"1536x1536":{"url":"https://blog.arduino.cc/wp-content/uploads/2026/06/781ae253-fc34-4fed-a9b4-7ffbbe5fe9cf.png","width":1024,"height":768},"2048x2048":{"url":"https://blog.arduino.cc/wp-content/uploads/2026/06/781ae253-fc34-4fed-a9b4-7ffbbe5fe9cf.png","width":1024,"height":768}}},{"id":42424,"url":"https://blog.arduino.cc/wp-content/uploads/2026/06/DSCF5128.jpg","slug":"dscf5128","title":"DSCF5128","description":"","caption":"","parent":42215,"mime_type":"image/jpeg","images":{"full":{"url":"https://blog.arduino.cc/wp-content/uploads/2026/06/DSCF5128.jpg","width":2000,"height":1333},"thumbnail":{"url":"https://blog.arduino.cc/wp-content/uploads/2026/06/DSCF5128-385x289.jpg","width":385,"height":289},"medium":{"url":"https://blog.arduino.cc/wp-content/uploads/2026/06/DSCF5128-300x200.jpg","width":300,"height":200},"medium_large":{"url":"https://blog.arduino.cc/wp-content/uploads/2026/06/DSCF5128-768x512.jpg","width":768,"height":512},"large":{"url":"https://blog.arduino.cc/wp-content/uploads/2026/06/DSCF5128-1024x682.jpg","width":1024,"height":682},"1536x1536":{"url":"https://blog.arduino.cc/wp-content/uploads/2026/06/DSCF5128-1536x1024.jpg","width":1536,"height":1024},"2048x2048":{"url":"https://blog.arduino.cc/wp-content/uploads/2026/06/DSCF5128.jpg","width":2000,"height":1333}}}],"comment_count":0,"comment_status":"closed","thumbnail":"https://blog.arduino.cc/wp-content/uploads/2026/06/Arduino.cc-Blogpost-Featured385x289-1.jpg","custom_fields":{"algolia_searchable_posts_records_count":["5"]},"thumbnail_size":"thumbnail","thumbnail_images":{"full":{"url":"https://blog.arduino.cc/wp-content/uploads/2026/06/Arduino.cc-Blogpost-Featured385x289-1.jpg","width":385,"height":289},"thumbnail":{"url":"https://blog.arduino.cc/wp-content/uploads/2026/06/Arduino.cc-Blogpost-Featured385x289-1.jpg","width":385,"height":289},"medium":{"url":"https://blog.arduino.cc/wp-content/uploads/2026/06/Arduino.cc-Blogpost-Featured385x289-1-300x225.jpg","width":300,"height":225},"medium_large":{"url":"https://blog.arduino.cc/wp-content/uploads/2026/06/Arduino.cc-Blogpost-Featured385x289-1.jpg","width":385,"height":289},"large":{"url":"https://blog.arduino.cc/wp-content/uploads/2026/06/Arduino.cc-Blogpost-Featured385x289-1.jpg","width":385,"height":289},"1536x1536":{"url":"https://blog.arduino.cc/wp-content/uploads/2026/06/Arduino.cc-Blogpost-Featured385x289-1.jpg","width":385,"height":289},"2048x2048":{"url":"https://blog.arduino.cc/wp-content/uploads/2026/06/Arduino.cc-Blogpost-Featured385x289-1.jpg","width":385,"height":289}}},{"id":42182,"type":"post","slug":"ditch-overpriced-hardware-4-ways-the-arduino-uno-q-board-helps-you-do-more-for-less","url":"https://blog.arduino.cc/2026/06/11/ditch-overpriced-hardware-4-ways-the-arduino-uno-q-board-helps-you-do-more-for-less/","status":"publish","title":"Ditch overpriced hardware: 4 ways the Arduino® UNO™ Q board helps you do more for less","title_plain":"Ditch overpriced hardware: 4 ways the Arduino® UNO™ Q board helps you do more for less","content":"\n\u003cfigure class=\"wp-block-image size-large\"\u003e\u003cdiv class=\"image-post\"\u003e\u003cimg loading=\"lazy\" decoding=\"async\" width=\"1024\" height=\"559\" src=\"https://blog.arduino.cc/wp-content/uploads/2026/06/Arduino.cc-Blogpost-Cover1100x600-2-1024x559.jpg\" alt=\"\" class=\"wp-image-42204\" srcset=\"https://blog.arduino.cc/wp-content/uploads/2026/06/Arduino.cc-Blogpost-Cover1100x600-2-1024x559.jpg 1024w, https://blog.arduino.cc/wp-content/uploads/2026/06/Arduino.cc-Blogpost-Cover1100x600-2-300x164.jpg 300w, https://blog.arduino.cc/wp-content/uploads/2026/06/Arduino.cc-Blogpost-Cover1100x600-2-768x419.jpg 768w, https://blog.arduino.cc/wp-content/uploads/2026/06/Arduino.cc-Blogpost-Cover1100x600-2.jpg 1100w\" sizes=\"auto, (max-width: 1024px) 100vw, 1024px\" /\u003e\u003c/div\u003e\u003c/figure\u003e\n\n\n\n\u003cp class=\"wp-block-paragraph\"\u003eMost developers reach for a \u003cstrong\u003esingle-board computer\u003c/strong\u003e, only to discover they still need a microcontroller for real-time I/O. Then they need eMMC and extra storage. Then a separate AI accelerator. Then comes the custom wiring nightmare just to make everything talk to each other. As your app grows, you find yourself stacking extra boards, external controllers, and shaky communication links. \u003cstrong\u003eThe bill of materials skyrockets\u003c/strong\u003e, and the integration headaches follow, all just to bridge the gap between Linux computing and real-time control.\u003c/p\u003e\n\n\n\n\u003cp class=\"wp-block-paragraph\"\u003e\u003cstrong\u003e\u003ca href=\"https://www.arduino.cc/product-uno-q\"\u003eUNO Q\u003c/a\u003e starts where that frustration ends. \u003c/strong\u003eOne board. Qualcomm Dragonwing\u003csup\u003e™\u003c/sup\u003e QRB2210 Linux-capable processor. Real-time STM32 MCU. Qualcomm\u003csup\u003e®\u003c/sup\u003e Adreno GPU 3D graphics accelerator. Forget unreliable SD cards with the built-in 32GB eMMC. \u003cstrong\u003eIt’s simple:\u003c/strong\u003e \u003cstrong\u003eone board, double the value\u003c/strong\u003e.\u003c/p\u003e\n\n\n\n\u003cp class=\"wp-block-paragraph\"\u003e\u003cstrong\u003eWhen you can slash system complexity right out of the box, you instantly accelerate your development pipeline and cut down your total deployment costs.\u003c/strong\u003e No extra fluff, just pure efficiency.\u003c/p\u003e\n\n\n\n\u003cp class=\"wp-block-paragraph\"\u003eLet’s look under the hood: here are four reasons why UNO Q completely crushes overpriced, complicated hardware with a single, unified platform.\u003c/p\u003e\n\n\n\n\u003ch2 class=\"wp-block-heading\"\u003e#1 Expect more from the right board\u003c/h2\u003e\n\n\n\n\u003cp class=\"wp-block-paragraph\"\u003eMany modern applications need two very different kinds of computing. On one side, there is the need for AI inference, computer vision, networking, data processing, and cloud connectivity, which all benefit from a Linux environment running on a powerful application processor. On the other side, there are sensors, actuators, motors, industrial signals, and timing-critical tasks that require deterministic real-time control.\u003c/p\u003e\n\n\n\n\u003cp class=\"wp-block-paragraph\"\u003eTraditionally, developers solve this challenge by combining multiple boards and creating custom communication layers between them. UNO Q puts both worlds on the same board. The Linux MPU handles AI, vision, and data. The STM32 MCU handles sensors, actuators, and timing. They work together –\u0026nbsp;and you don’t even need to design and debug the communication layer.\u003c/p\u003e\n\n\n\n\u003cp class=\"wp-block-paragraph\"\u003e\u003cstrong\u003eOf course there is value in having “two boards in one.\u0026#8221; But there is potentially even more value in eliminating external hardware, reducing integration effort, and simplifying system architecture.\u003c/strong\u003e\u003c/p\u003e\n\n\n\n\u003cp class=\"wp-block-paragraph\"\u003eThis approach is already proving valuable in real-world applications. \u003ca href=\"https://blog.arduino.cc/2026/06/08/star-stream-is-bringing-f1-level-telemetry-to-every-race-team-and-every-fleet-with-arduino-uno-q/\"\u003eStar Stream\u003c/a\u003e, for example, uses UNO Q to process and analyze high-speed racing telemetry data at the edge. The platform combines Linux-level processing power for data handling and visualization with the deterministic control needed to interact with physical systems in real-time. The result is a solution capable of delivering professional-grade, real-time insights without requiring a complex multi-board architecture: \u003cstrong\u003eit’s Formula 1 results, without the Formula 1 budget.\u003c/strong\u003e\u003c/p\u003e\n\n\n\n\u003ch2 class=\"wp-block-heading\"\u003e#2 Lessen the cost with fewer components\u0026nbsp;\u003c/h2\u003e\n\n\n\n\u003cp class=\"wp-block-paragraph\"\u003eAs you move on to more complex endeavors, it’s important to keep the bigger picture in mind: the purchase price of a board is only a small part of a project\u0026#8217;s budget! Additional controllers, interface boards, communication modules, power supplies, and custom integration all contribute to the final cost of a solution.\u0026nbsp;\u003c/p\u003e\n\n\n\n\u003cp class=\"wp-block-paragraph\"\u003eUNO Q consolidates that BOM. Linux processing, real-time control, high-speed connectivity, and industrial I/O, all on one board. Fewer components means fewer integration points, fewer failure modes, and a bill of materials that doesn\u0026#8217;t keep growing. \u003cstrong\u003eA lot more applications can be built with fewer components and fewer integration challenges\u003c/strong\u003e. The result is a lower total cost of ownership (TCO)\u003cem\u003e,\u003c/em\u003e even before considering maintenance, deployment, and long-term support.\u003c/p\u003e\n\n\n\n\u003cp class=\"wp-block-paragraph\"\u003eA great, concrete example of this comes from \u003ca href=\"https://blog.arduino.cc/2026/05/26/zencell-replacing-two-boards-with-one-to-build-a-better-quality-inspection-solution/\"\u003eZenCell\u003c/a\u003e from PriscoZen, a company developing automated quality inspection systems. By leveraging the dual-brain architecture of UNO Q, they were able to consolidate functionality that would traditionally require multiple devices into a single platform. Fewer boards meant \u003cstrong\u003elower BOM cost, fewer integration points, simplified maintenance, and a cleaner overall system design\u003c/strong\u003e. What’s not to love?\u003c/p\u003e\n\n\n\n\u003ch2 class=\"wp-block-heading\"\u003e#3 Develop AI-native projects with less second guessing\u0026nbsp;\u003c/h2\u003e\n\n\n\n\u003cp class=\"wp-block-paragraph\"\u003eIf you are running an AI model, the real complexity often begins after inference is complete. You need to collect sensor data, make a decision, and trigger a physical response. This needs to be done reliably, in real-time. That requires deterministic control, not a Linux process that can be preempted by the OS. Again, the dual-brain architecture of UNO Q can become particularly valuable from this perspective.\u003c/p\u003e\n\n\n\n\u003cp class=\"wp-block-paragraph\"\u003eThe Linux processor can handle AI models, vision pipelines, orchestration, and high-level decision making. Meanwhile, the microcontroller continues to manage sensors, actuators, and real-time interactions independently. \u003cstrong\u003eThe two processors complement each other naturally, allowing you to build systems that can both understand and react to their environment\u003c/strong\u003e.\u003c/p\u003e\n\n\n\n\u003cp class=\"wp-block-paragraph\"\u003eThis architecture is especially relevant for applications such as \u003ca href=\"https://blog.arduino.cc/2026/05/28/industrial-grade-vision-inspection-made-accessible-by-the-arduino-uno-q-board/\"\u003evisual inspection\u003c/a\u003e, predictive maintenance, robotics, smart gateways, and intelligent human-machine interfaces.\u003c/p\u003e\n\n\n\n\u003cp class=\"wp-block-paragraph\"\u003eThe RS DesignSpark team built a PCB inspection 4-part series (you can start with Part 1, \u003ca href=\"https://www.rs-online.com/designspark/automating-pcb-inspection-with-arduino-uno-q-part-1-introduction\"\u003ehere\u003c/a\u003e) that demonstrates this approach in practice. In the project, UNO Q handles image acquisition, machine learning workflows, and application logic while maintaining reliable interaction with the physical inspection environment. Rather than focusing solely on AI performance, the project showcases what is often more important in industrial deployments: \u003cstrong\u003econnecting intelligence to action\u003c/strong\u003e. The real kicker? Andrew told us he built the whole system for about $1,700 – with significant savings compared to similar systems starting at $3,000 and going all the way up to $20,000!\u003c/p\u003e\n\n\n\n\u003ch2 class=\"wp-block-heading\"\u003e#4 Build it now, faster, and without friction\u003c/h2\u003e\n\n\n\n\u003cp class=\"wp-block-paragraph\"\u003eIn many professional projects, \u003cstrong\u003eengineering time can quickly exceed the cost of the hardware itself\u003c/strong\u003e. Think about it: you need to prepare the environment, install the software stack, connect different tools, move data between systems, and create the infrastructure needed before real application development can even begin.\u003c/p\u003e\n\n\n\n\u003cp class=\"wp-block-paragraph\"\u003eUNO Q helps reduce friction and speed up the process from the very first step. It ships with onboard eMMC and a preinstalled software environment. No SD card to format. No image to flash. No setup ritual before you can write a line of application code. With onboard eMMC storage and a preinstalled software environment, you can start working without first preparing removable media, flashing an operating system image, or assembling the basic development setup from scratch.\u0026nbsp;\u003c/p\u003e\n\n\n\n\u003cp class=\"wp-block-paragraph\"\u003eIt also matters after deployment. In real-world systems, storage is not just a setup detail: it can affect reliability, maintenance, and uptime. Removable storage can be more exposed to corruption, wear, accidental removal, or failure, which may lead to downtime and additional recovery costs when a system needs to be reinstalled or reconfigured. \u003cstrong\u003eBy relying on onboard eMMC storage, UNO Q offers a more robust foundation for applications that are expected to run continuously and reliably\u003c/strong\u003e. It also gives you flexibility in how you work with the board: it can be used connected to a PC during development, or \u003cstrong\u003erun as a full standalone single-board computer (SBC)\u003c/strong\u003e when the application needs to operate independently.\u003c/p\u003e\n\n\n\n\u003cp class=\"wp-block-paragraph\"\u003eThe advantage of adopting UNO Q becomes particularly clear in \u003ca href=\"https://blog.arduino.cc/2026/05/28/industrial-grade-vision-inspection-made-accessible-by-the-arduino-uno-q-board/\"\u003emachine vision and inspection projects\u003c/a\u003e, where developers can focus on building the application itself rather than assembling the underlying infrastructure.\u003c/p\u003e\n\n\n\n\u003cp class=\"wp-block-paragraph\"\u003eAs author Andrew Back noted in his final words on \u003ca href=\"https://www.rs-online.com/designspark/automating-pcb-inspection-with-arduino-uno-q-part-4-creating-the-application\"\u003ePart 4\u003c/a\u003e of the DesignSpark PCB inspection project, “\u003cstrong\u003eUNO Q, Arduino\u003c/strong\u003e\u003csup\u003e®\u003c/sup\u003e\u003cstrong\u003e App Lab and Edge Impulse together provide a powerful combination, with a clear focus on convenience\u003c/strong\u003e and enabling the rapid development of sophisticated applications.”\u003c/p\u003e\n\n\n\n\u003cfigure class=\"wp-block-embed is-type-video is-provider-youtube wp-block-embed-youtube wp-embed-aspect-16-9 wp-has-aspect-ratio\"\u003e\u003cdiv class=\"wp-block-embed__wrapper\"\u003e\n\u003ciframe loading=\"lazy\" title=\"How Arduino® UNO™ Q Board Helps You Do More for Less\" width=\"500\" height=\"281\" src=\"https://www.youtube.com/embed/GFGZb-d5PAg?feature=oembed\" frameborder=\"0\" allow=\"accelerometer; autoplay; clipboard-write; encrypted-media; gyroscope; picture-in-picture; web-share\" referrerpolicy=\"strict-origin-when-cross-origin\" allowfullscreen\u003e\u003c/iframe\u003e\n\u003c/div\u003e\u003c/figure\u003e\n\n\n\n\u003ch2 class=\"wp-block-heading\"\u003eUnderstanding the full value of your hardware\u003c/h2\u003e\n\n\n\n\u003cp class=\"wp-block-paragraph\"\u003eAt the end of the day, the greatest value is found in building a simpler, more efficient, more versatile and scalable system. UNO Q – with its unique combination of Linux computing, real-time control, edge AI readiness, and industrial-grade flexibility – is \u003cstrong\u003edesigned to reduce complexity rather than add it\u003c/strong\u003e. And for developers building the next generation of intelligent devices, that may be the most valuable feature of all.\u003c/p\u003e\n\n\n\n\u003cp class=\"wp-block-paragraph\"\u003eThe real cost of a system is not what you pay for the board.\u003c/p\u003e\n\n\n\n\u003cp class=\"wp-block-paragraph\"\u003eIt’s the external MCU you didn’t have to buy. The AI HAT you didn’t need. The communication layer you didn’t have to build. The hours you didn’t spend on integration. The maintenance call you avoided, because eMMC doesn’t fail the way SD cards do. Every component you skip is money saved. Every integration point you eliminate is a failure mode removed.\u003c/p\u003e\n\n\n\n\u003cp class=\"wp-block-paragraph\"\u003eThe ultimate system cost isn’t the price of the board, it\u0026#8217;s everything you no longer have to buy, wire, and fix. By packing Linux, edge AI, and real-time control onto a single board, UNO Q slashes your component list, cuts power consumption, and eliminates integration headaches. \u003cstrong\u003eZoom in, it does more; zoom out, it saves you more.\u003c/strong\u003e\u003c/p\u003e\n\n\n\n\u003cp class=\"wp-block-paragraph\"\u003eWant to dive deep into real-world applications that are proving the value of UNO Q? Read more about:\u003c/p\u003e\n\n\n\n\u003cul class=\"wp-block-list\"\u003e\n\u003cli\u003e\u003ca href=\"https://blog.arduino.cc/2026/06/08/star-stream-is-bringing-f1-level-telemetry-to-every-race-team-and-every-fleet-with-arduino-uno-q/\"\u003eHow Star Stream created a smart, cost-effective solution to process and analyze high-speed racing telemetry data at the edge\u003c/a\u003e\u003c/li\u003e\n\n\n\n\u003cli\u003e\u003ca href=\"https://blog.arduino.cc/2026/05/26/zencell-replacing-two-boards-with-one-to-build-a-better-quality-inspection-solution/\"\u003eHow ZenCell replaced two boards with one, to build a better quality inspection system\u003c/a\u003e\u003c/li\u003e\n\n\n\n\u003cli\u003e\u003ca href=\"https://www.rs-online.com/designspark/automating-pcb-inspection-with-arduino-uno-q-part-1-introduction\"\u003eHow Andrew Back worked out automated visual inspection of PCBs\u003c/a\u003e, leveraging user-friendly training of AI/ML models made available by Edge Impulse\u003c/li\u003e\n\u003c/ul\u003e\n\n\n\n\u003cp class=\"wp-block-paragraph\"\u003eUNO Q is available to order from\u0026nbsp;\u003ca href=\"http://www.digikey.com/en/product-highlight/a/arduino/uno-q-microcontroller-board\" target=\"_blank\" rel=\"noreferrer noopener\"\u003eDigiKey\u003c/a\u003e,\u0026nbsp;\u003ca href=\"https://referral.element14.com/OrderCodeView?url=%2Fnew-products%2Fembedded-computers-education-maker-boards%2Farduino-uno-q\" target=\"_blank\" rel=\"noreferrer noopener\"\u003eFarnell\u003c/a\u003e,\u0026nbsp;\u003ca href=\"https://www.mouser.de/new/arduino/arduino-uno-q-platform/\" target=\"_blank\" rel=\"noreferrer noopener\"\u003eMouser\u003c/a\u003e,\u0026nbsp;\u003ca href=\"https://referral.element14.com/OrderCodeView?url=%2Fnew-products%2Fembedded-computers-education-maker-boards%2Farduino-uno-q\" target=\"_blank\" rel=\"noreferrer noopener\"\u003eNewark\u003c/a\u003e,\u0026nbsp;\u003ca href=\"https://uk.rs-online.com/web/content/m/arduino-unoq-uk\" target=\"_blank\" rel=\"noreferrer noopener\"\u003eRS Components\u003c/a\u003e, and\u0026nbsp;\u003ca href=\"http://robu.in/\" target=\"_blank\" rel=\"noreferrer noopener\"\u003eRobu.in\u003c/a\u003e; along with our other\u003ca href=\"https://store.arduino.cc/pages/distributors\" target=\"_blank\" rel=\"noreferrer noopener\"\u003eauthorized distributors and resellers\u003c/a\u003e.\u003c/p\u003e\n\n\n\n\u003cp class=\"wp-block-paragraph\"\u003e\u003cem\u003eQualcomm branded products are products of Qualcomm Technologies, Inc. and/or its subsidiaries. Arduino, UNO, and the Arduino logo are trademarks or registered trademarks of Arduino S.r.l.\u003c/em\u003e\u003c/p\u003e\n","excerpt":"\u003cp\u003eMost developers reach for a single-board computer, only to discover they still need a microcontroller for real-time I/O. Then they need eMMC and extra storage. Then a separate AI accelerator. Then comes the custom wiring nightmare just to make everything talk to each other. As your app grows, you find yourself stacking extra boards, external [\u0026hellip;]\u003c/p\u003e\n","date":"2026-06-11 15:01:35","modified":"2026-07-21 20:15:43","categories":[{"id":42,"slug":"arduino","title":"Arduino","description":"","parent":0,"post_count":3274},{"id":1597,"slug":"featured","title":"Featured","description":"","parent":0,"post_count":1764},{"id":6698,"slug":"uno-q","title":"UNO Q","description":"","parent":42,"post_count":44}],"tags":[{"id":6700,"slug":"arduino-uno-q","title":"Arduino UNO Q","description":"","post_count":16}],"author":{"id":27876,"slug":"editorarduino","name":"Arduino Team","first_name":"","last_name":"","nickname":"Arduino Team","url":"","description":""},"comments":[],"attachments":[{"id":42202,"url":"https://blog.arduino.cc/wp-content/uploads/2026/06/Arduino.cc-Blogpost-Cover1100x600.jpg","slug":"arduino-cc-blogpost-cover1100x600-15","title":"Arduino.cc-Blogpost-Cover(1100x600)","description":"","caption":"","parent":42182,"mime_type":"image/jpeg","images":{"full":{"url":"https://blog.arduino.cc/wp-content/uploads/2026/06/Arduino.cc-Blogpost-Cover1100x600.jpg","width":1100,"height":600},"thumbnail":{"url":"https://blog.arduino.cc/wp-content/uploads/2026/06/Arduino.cc-Blogpost-Cover1100x600-385x289.jpg","width":385,"height":289},"medium":{"url":"https://blog.arduino.cc/wp-content/uploads/2026/06/Arduino.cc-Blogpost-Cover1100x600-300x164.jpg","width":300,"height":164},"medium_large":{"url":"https://blog.arduino.cc/wp-content/uploads/2026/06/Arduino.cc-Blogpost-Cover1100x600-768x419.jpg","width":768,"height":419},"large":{"url":"https://blog.arduino.cc/wp-content/uploads/2026/06/Arduino.cc-Blogpost-Cover1100x600-1024x559.jpg","width":1024,"height":559},"1536x1536":{"url":"https://blog.arduino.cc/wp-content/uploads/2026/06/Arduino.cc-Blogpost-Cover1100x600.jpg","width":1100,"height":600},"2048x2048":{"url":"https://blog.arduino.cc/wp-content/uploads/2026/06/Arduino.cc-Blogpost-Cover1100x600.jpg","width":1100,"height":600}}},{"id":42203,"url":"https://blog.arduino.cc/wp-content/uploads/2026/06/Arduino.cc-Blogpost-Featured385x289-2.jpg","slug":"arduino-cc-blogpost-featured385x289-2-3","title":"Arduino.cc-Blogpost-Featured(385x289)-2","description":"","caption":"","parent":42182,"mime_type":"image/jpeg","images":{"full":{"url":"https://blog.arduino.cc/wp-content/uploads/2026/06/Arduino.cc-Blogpost-Featured385x289-2.jpg","width":385,"height":289},"thumbnail":{"url":"https://blog.arduino.cc/wp-content/uploads/2026/06/Arduino.cc-Blogpost-Featured385x289-2.jpg","width":385,"height":289},"medium":{"url":"https://blog.arduino.cc/wp-content/uploads/2026/06/Arduino.cc-Blogpost-Featured385x289-2-300x225.jpg","width":300,"height":225},"medium_large":{"url":"https://blog.arduino.cc/wp-content/uploads/2026/06/Arduino.cc-Blogpost-Featured385x289-2.jpg","width":385,"height":289},"large":{"url":"https://blog.arduino.cc/wp-content/uploads/2026/06/Arduino.cc-Blogpost-Featured385x289-2.jpg","width":385,"height":289},"1536x1536":{"url":"https://blog.arduino.cc/wp-content/uploads/2026/06/Arduino.cc-Blogpost-Featured385x289-2.jpg","width":385,"height":289},"2048x2048":{"url":"https://blog.arduino.cc/wp-content/uploads/2026/06/Arduino.cc-Blogpost-Featured385x289-2.jpg","width":385,"height":289}}},{"id":42204,"url":"https://blog.arduino.cc/wp-content/uploads/2026/06/Arduino.cc-Blogpost-Cover1100x600-2.jpg","slug":"arduino-cc-blogpost-cover1100x600-2-3","title":"Arduino.cc-Blogpost-Cover(1100x600)-2","description":"","caption":"","parent":42182,"mime_type":"image/jpeg","images":{"full":{"url":"https://blog.arduino.cc/wp-content/uploads/2026/06/Arduino.cc-Blogpost-Cover1100x600-2.jpg","width":1100,"height":600},"thumbnail":{"url":"https://blog.arduino.cc/wp-content/uploads/2026/06/Arduino.cc-Blogpost-Cover1100x600-2-385x289.jpg","width":385,"height":289},"medium":{"url":"https://blog.arduino.cc/wp-content/uploads/2026/06/Arduino.cc-Blogpost-Cover1100x600-2-300x164.jpg","width":300,"height":164},"medium_large":{"url":"https://blog.arduino.cc/wp-content/uploads/2026/06/Arduino.cc-Blogpost-Cover1100x600-2-768x419.jpg","width":768,"height":419},"large":{"url":"https://blog.arduino.cc/wp-content/uploads/2026/06/Arduino.cc-Blogpost-Cover1100x600-2-1024x559.jpg","width":1024,"height":559},"1536x1536":{"url":"https://blog.arduino.cc/wp-content/uploads/2026/06/Arduino.cc-Blogpost-Cover1100x600-2.jpg","width":1100,"height":600},"2048x2048":{"url":"https://blog.arduino.cc/wp-content/uploads/2026/06/Arduino.cc-Blogpost-Cover1100x600-2.jpg","width":1100,"height":600}}}],"comment_count":0,"comment_status":"closed","thumbnail":"https://blog.arduino.cc/wp-content/uploads/2026/06/Arduino.cc-Blogpost-Featured385x289-2.jpg","custom_fields":{"algolia_searchable_posts_records_count":["5"]},"thumbnail_size":"thumbnail","thumbnail_images":{"full":{"url":"https://blog.arduino.cc/wp-content/uploads/2026/06/Arduino.cc-Blogpost-Featured385x289-2.jpg","width":385,"height":289},"thumbnail":{"url":"https://blog.arduino.cc/wp-content/uploads/2026/06/Arduino.cc-Blogpost-Featured385x289-2.jpg","width":385,"height":289},"medium":{"url":"https://blog.arduino.cc/wp-content/uploads/2026/06/Arduino.cc-Blogpost-Featured385x289-2-300x225.jpg","width":300,"height":225},"medium_large":{"url":"https://blog.arduino.cc/wp-content/uploads/2026/06/Arduino.cc-Blogpost-Featured385x289-2.jpg","width":385,"height":289},"large":{"url":"https://blog.arduino.cc/wp-content/uploads/2026/06/Arduino.cc-Blogpost-Featured385x289-2.jpg","width":385,"height":289},"1536x1536":{"url":"https://blog.arduino.cc/wp-content/uploads/2026/06/Arduino.cc-Blogpost-Featured385x289-2.jpg","width":385,"height":289},"2048x2048":{"url":"https://blog.arduino.cc/wp-content/uploads/2026/06/Arduino.cc-Blogpost-Featured385x289-2.jpg","width":385,"height":289}}},{"id":42175,"type":"post","slug":"local-ai-agents-on-arduino-uno-q","url":"https://blog.arduino.cc/2026/06/09/local-ai-agents-on-arduino-uno-q/","status":"publish","title":"Local AI agents on Arduino UNO Q","title_plain":"Local AI agents on Arduino UNO Q","content":"\n\u003cfigure class=\"wp-block-image size-large\"\u003e\u003cdiv class=\"image-post\"\u003e\u003cimg loading=\"lazy\" decoding=\"async\" width=\"1024\" height=\"559\" src=\"https://blog.arduino.cc/wp-content/uploads/2026/06/Arduino.cc-Blogpost2-Cover1100x600-1024x559.jpg\" alt=\"\" class=\"wp-image-42186\" srcset=\"https://blog.arduino.cc/wp-content/uploads/2026/06/Arduino.cc-Blogpost2-Cover1100x600-1024x559.jpg 1024w, https://blog.arduino.cc/wp-content/uploads/2026/06/Arduino.cc-Blogpost2-Cover1100x600-300x164.jpg 300w, https://blog.arduino.cc/wp-content/uploads/2026/06/Arduino.cc-Blogpost2-Cover1100x600-768x419.jpg 768w, https://blog.arduino.cc/wp-content/uploads/2026/06/Arduino.cc-Blogpost2-Cover1100x600.jpg 1100w\" sizes=\"auto, (max-width: 1024px) 100vw, 1024px\" /\u003e\u003c/div\u003e\u003c/figure\u003e\n\n\n\n\u003cp class=\"wp-block-paragraph\"\u003eArtificial intelligence has already evolved from simple conversational assistants into autonomous systems capable of interacting with software, hardware, sensors, and even the physical world. The next frontier is not simply “chatting” with AI, but enabling AI agents to observe, reason, decide, and execute actions locally at the edge.\u003c/p\u003e\n\n\n\n\u003cp class=\"wp-block-paragraph\"\u003eThis shift becomes particularly interesting when combined with embedded systems. Why? Because traditionally, embedded development required deterministic programming, fixed automation logic, and carefully predefined behaviors. But now AI systems are capable of dynamically generating code, controlling peripherals, interacting with operating systems, and adapting behavior in real-time. And we see all of this happening in projects built around \u003ca href=\"https://www.arduino.cc/product-uno-q\"\u003ethe Arduino\u003csup\u003e®\u003c/sup\u003e UNO\u003csup\u003e™\u003c/sup\u003e Q board\u003c/a\u003e.\u003c/p\u003e\n\n\n\n\u003ch2 class=\"wp-block-heading\"\u003e“Think local” takes on a whole new meaning\u003c/h2\u003e\n\n\n\n\u003cp class=\"wp-block-paragraph\"\u003eWhat makes this especially compelling is that these agents can run locally.\u003c/p\u003e\n\n\n\n\u003cp class=\"wp-block-paragraph\"\u003eInstead of relying entirely on cloud APIs and remote inference, developers are beginning to deploy \u003cstrong\u003eautonomous AI systems directly on edge devices – reducing latency, improving privacy, lowering operational costs, and enabling offline functionality\u003c/strong\u003e. Projects such as \u003ca href=\"https://www.hackster.io/draider2001/qclaw-a-fully-local-agentic-assistant-on-the-arduino-uno-q-9f4b09\"\u003eQClaw\u003c/a\u003e and the broader \u003ca href=\"https://www.hackster.io/news/openclaw-can-program-your-arduino-c73287a68858\"\u003eOpenClaw ecosystem\u003c/a\u003e are demonstrating how this model can work on UNO Q.\u003c/p\u003e\n\n\n\n\u003cp class=\"wp-block-paragraph\"\u003eOur first \u003ca href=\"https://blog.arduino.cc/2026/05/07/one-board-two-brains-three-ways-a-dual-architecture-board-makes-building-simpler/\"\u003edual-brain board\u003c/a\u003e\u0026nbsp;is particularly well suited for this new generation of AI-native embedded simple systems because it combines two different computing worlds on the same platform. In simple words, this means you have one board where, on one side, there is a Linux-capable Qualcomm Dragonwing™ QRB2210 processor capable of running Python applications, Docker containers, networking stacks. On the other side, an STM32 microcontroller handles deterministic real-time operations such as GPIO access, peripheral control, and low-level hardware timing. This hybrid architecture allows developers to separate high-level reasoning from low-level execution, effectively creating systems where AI can “think” on Linux while the microcontroller interacts directly with the physical environment.\u003c/p\u003e\n\n\n\n\u003ch2 class=\"wp-block-heading\"\u003eYour word is AI’s command\u003c/h2\u003e\n\n\n\n\u003cp class=\"wp-block-paragraph\"\u003eOne of the most interesting frameworks emerging in this space is OpenClaw. Rather than being a language model itself, OpenClaw acts as an orchestration layer that connects large language models with tools, terminals, filesystems, APIs, and hardware interfaces. As described in the \u003ca href=\"https://www.qualcomm.com/developer/blog/2026/04/install-openclaw-hermes-agent-qualcomm-arduino-rubik-pi-snapdragon-pcs\"\u003eOpenClaw installation guide for Qualcomm\u003c/a\u003e\u003ca href=\"https://www.arduino.cc/product-uno-q\"\u003e\u003csup\u003e®\u003c/sup\u003e\u003c/a\u003e\u003ca href=\"https://www.qualcomm.com/developer/blog/2026/04/install-openclaw-hermes-agent-qualcomm-arduino-rubik-pi-snapdragon-pcs\"\u003eand Arduino\u003c/a\u003e\u003ca href=\"https://www.arduino.cc/product-uno-q\"\u003e\u003csup\u003e®\u003c/sup\u003e\u003c/a\u003e\u003ca href=\"https://www.qualcomm.com/developer/blog/2026/04/install-openclaw-hermes-agent-qualcomm-arduino-rubik-pi-snapdragon-pcs\"\u003eplatforms\u003c/a\u003e, the framework enables AI models to move beyond pure text generation and become actionable agents capable of executing commands and interacting with their environment.\u003c/p\u003e\n\n\n\n\u003cp class=\"wp-block-paragraph\"\u003eThis changes the relationship between developers and embedded systems faster than ever. \u003cstrong\u003eInstead of manually writing every line of code, users can increasingly interact with hardware through natural language\u003c/strong\u003e. We’ve already showcased a good example of this approach \u003ca href=\"https://blog.arduino.cc/2026/03/05/radical-accessibility-on-the-arduino-uno-q-board-with-openclaw\"\u003ehere\u003c/a\u003e, demonstrating how OpenClaw can run on UNO Q to use conversational prompts to control hardware directly. Rather than opening an IDE and programming peripherals manually, you can ask the agent to blink LEDs, modify animations on the LED matrix, or generate entirely new interactions dynamically.\u003c/p\u003e\n\n\n\n\u003cp class=\"wp-block-paragraph\"\u003eWhat makes these demonstrations powerful is the iterative workflow they enable. In one example, the AI agent generated code to display graphics on the LED matrix, uploaded the firmware, and then refined the visual output interactively through additional prompts. The interface to embedded systems effectively becomes conversational. Hardware prototyping starts looking less like firmware engineering and more like collaborative interaction with an intelligent assistant.\u003c/p\u003e\n\n\n\n\u003ch2 class=\"wp-block-heading\"\u003eFast, private, cheap AI agents? Cutting edge!\u003c/h2\u003e\n\n\n\n\u003cp class=\"wp-block-paragraph\"\u003e\u003ca href=\"https://www.hackster.io/draider2001/qclaw-a-fully-local-agentic-assistant-on-the-arduino-uno-q-9f4b09\"\u003eThis concept evolves even further in the QClaw project\u003c/a\u003e, where the Arduino UNO Q becomes a fully local agentic assistant. In this architecture, the system is capable not only of generating code, but also of compiling sketches, uploading the compiled code, interacting with local services, and managing workflows autonomously. Within this scenario, \u003cstrong\u003ethe agent orchestrates the full pipeline from \u003c/strong\u003e\u003cstrong\u003e\u003cem\u003eintent\u003c/em\u003e\u003c/strong\u003e\u003cstrong\u003e to \u003c/strong\u003e\u003cstrong\u003e\u003cem\u003eexecution\u003c/em\u003e\u003c/strong\u003e.\u003c/p\u003e\n\n\n\n\u003cp class=\"wp-block-paragraph\"\u003eAn especially interesting direction is the growing trend toward fully local AI deployments. While many AI systems depend heavily on cloud-hosted models, several developers are exploring combinations of OpenClaw with Ollama and lightweight open-source LLMs to build completely offline agents. The article \u003ca href=\"https://amannnamm.medium.com/how-to-turn-openclaw-into-a-real-arduino-agent-using-a-free-local-llm-ae5a464a2deb\"\u003e\u003cem\u003eHow to turn OpenClaw into a real Arduino agent using a free local LLM\u003c/em\u003e\u003c/a\u003e demonstrates how developers can \u003cstrong\u003erun local inference directly on the device without sending prompts or data to external APIs\u003c/strong\u003e. In this model, Ollama hosts the local language model while OpenClaw orchestrates tools and actions, allowing UNO Q to function as an autonomous AI node entirely within the local network.\u003c/p\u003e\n\n\n\n\u003cp class=\"wp-block-paragraph\"\u003eThis approach is particularly attractive for edge AI applications because it addresses many of the practical concerns associated with cloud AI. \u003cstrong\u003eSensitive data remains local, recurring API costs disappear, internet connectivity becomes optional, and response times improve significantly\u003c/strong\u003e. Of course, local models are generally smaller and less capable than frontier cloud models, but for many embedded automation tasks the tradeoff is worthwhile. In fact, for hardware-centric workflows, deterministic execution and local responsiveness often matter more than absolute model intelligence.\u003c/p\u003e\n\n\n\n\u003ch2 class=\"wp-block-heading\"\u003eLocal AI meets the real world\u003c/h2\u003e\n\n\n\n\u003cp class=\"wp-block-paragraph\"\u003eThe implications become even more interesting when AI agents start interacting with sensors and perception systems. A compelling example comes from \u003ca href=\"https://bandini.medium.com/dispositivo-para-verificar-hornallas-a-gas-con-ia-arduino-uno-q-openclaw-3d1876bd366d\"\u003ethis AI-powered gas stove monitoring project\u003c/a\u003e, where computer vision and local AI reasoning were combined to monitor kitchen burners and detect potentially dangerous situations. Instead of relying on rigid rule-based automation, the AI system interpreted contextual visual information and made decisions dynamically.\u0026nbsp;\u003c/p\u003e\n\n\n\n\u003cp class=\"wp-block-paragraph\"\u003eThis is an important shift because it demonstrates how \u003cstrong\u003eedge AI agents can combine perception, reasoning, and physical interaction into unified systems capable of operating in real environments\u003c/strong\u003e.\u003c/p\u003e\n\n\n\n\u003ch2 class=\"wp-block-heading\"\u003eSafety first! Let UNO Q be your “hardware sandbox”\u003c/h2\u003e\n\n\n\n\u003cp class=\"wp-block-paragraph\"\u003eWhat emerges from all these projects is a broader transformation in how embedded systems may be designed in the future and how UNO Q allows this shift, acting as an accelerator.\u0026nbsp;\u003c/p\u003e\n\n\n\n\u003cp class=\"wp-block-paragraph\"\u003eTraditionally, embedded devices were deterministic endpoints executing carefully predefined logic. \u003cstrong\u003eAI agents introduce adaptability.\u003c/strong\u003e Developers no longer need to explicitly define every possible branch of execution. Instead, they can define goals, permissions, tools, and constraints, allowing the agent to determine dynamically how tasks should be completed.\u003c/p\u003e\n\n\n\n\u003cp class=\"wp-block-paragraph\"\u003eThis does not eliminate traditional engineering. Rather, it \u003cstrong\u003eshifts engineering effort toward architecture, orchestration, safety, and supervision\u003c/strong\u003e. The challenge becomes designing systems where AI agents can act autonomously while remaining constrained, secure, and reliable.\u003c/p\u003e\n\n\n\n\u003cp class=\"wp-block-paragraph\"\u003eSecurity is in fact one of the most important considerations in this new paradigm. AI agents often gain access to terminals, filesystems, APIs, and hardware interfaces, which introduces entirely new attack surfaces. \u003cstrong\u003eOne advantage of platforms such as UNO Q is the possibility of creating isolated “\u003c/strong\u003e\u003ca href=\"https://www.youtube.com/watch?v=aA1oWSPh41Q\"\u003e\u003cstrong\u003ehardware sandboxes\u003c/strong\u003e\u003c/a\u003e\u003cstrong\u003e” dedicated to agent execution\u003c/strong\u003e. Instead of granting AI systems unrestricted access to personal laptops or production environments, developers can deploy agents on dedicated edge hardware with limited permissions and compartmentalized resources. This physical separation is one of the most important deployment strategies for safe personal AI agents.\u003c/p\u003e\n\n\n\n\u003ch2 class=\"wp-block-heading\"\u003eThe bigger picture\u003c/h2\u003e\n\n\n\n\u003cp class=\"wp-block-paragraph\"\u003eThe broader trend is clear: AI is moving toward the edge, becoming increasingly autonomous, multimodal, and physically interactive. UNO Q plays a relevant role not because it replaces cloud AI, but because it makes AI tangible –\u0026nbsp;\u003cstrong\u003eempowering developers, makers, researchers, and students to experiment with autonomous embedded intelligence locally, affordably, and safely.\u003c/strong\u003e\u0026nbsp;\u003c/p\u003e\n\n\n\n\u003cp class=\"wp-block-paragraph\"\u003eReady to upgrade from chatbots to autonomous embedded collaborators? \u003cstrong\u003e\u003ca href=\"https://store.arduino.cc/products/uno-q-4gb\"\u003eGet your hands on UNO Q\u003c/a\u003e \u003c/strong\u003eand play an active role in the AI revolution!\u003cbr\u003e\u003cbr\u003eUNO Q is available to order from \u003ca href=\"http://www.digikey.com/en/product-highlight/a/arduino/uno-q-microcontroller-board\" target=\"_blank\" rel=\"noreferrer noopener\"\u003eDigiKey\u003c/a\u003e, \u003ca href=\"https://referral.element14.com/OrderCodeView?url=%2Fnew-products%2Fembedded-computers-education-maker-boards%2Farduino-uno-q\" target=\"_blank\" rel=\"noreferrer noopener\"\u003eFarnell\u003c/a\u003e, \u003ca href=\"https://www.mouser.de/new/arduino/arduino-uno-q-platform/\" target=\"_blank\" rel=\"noreferrer noopener\"\u003eMouser\u003c/a\u003e, \u003ca href=\"https://referral.element14.com/OrderCodeView?url=%2Fnew-products%2Fembedded-computers-education-maker-boards%2Farduino-uno-q\" target=\"_blank\" rel=\"noreferrer noopener\"\u003eNewark\u003c/a\u003e, \u003ca href=\"https://uk.rs-online.com/web/content/m/arduino-unoq-uk\" target=\"_blank\" rel=\"noreferrer noopener\"\u003eRS Components\u003c/a\u003e, and \u003ca href=\"http://robu.in/\" target=\"_blank\" rel=\"noreferrer noopener\"\u003eRobu.in\u003c/a\u003e; along with our other \u003ca href=\"https://store.arduino.cc/pages/distributors\" target=\"_blank\" rel=\"noreferrer noopener\"\u003eauthorized distributors and resellers\u003c/a\u003e.\u003c/p\u003e\n\n\n\n\u003cp class=\"wp-block-paragraph\"\u003e\u003cem\u003eQualcomm branded products are products of Qualcomm Technologies, Inc. and/or its subsidiaries. Arduino, and UNO, and the Arduino logo are trademarks or registered trademarks of Arduino S.r.l.\u003c/em\u003e\u003c/p\u003e\n","excerpt":"\u003cp\u003eArtificial intelligence has already evolved from simple conversational assistants into autonomous systems capable of interacting with software, hardware, sensors, and even the physical world. The next frontier is not simply “chatting” with AI, but enabling AI agents to observe, reason, decide, and execute actions locally at the edge. This shift becomes particularly interesting when combined [\u0026hellip;]\u003c/p\u003e\n","date":"2026-06-09 13:25:45","modified":"2026-06-18 13:26:51","categories":[{"id":42,"slug":"arduino","title":"Arduino","description":"","parent":0,"post_count":3274},{"id":1597,"slug":"featured","title":"Featured","description":"","parent":0,"post_count":1764},{"id":6698,"slug":"uno-q","title":"UNO Q","description":"","parent":42,"post_count":44}],"tags":[{"id":6873,"slug":"agentic-ai","title":"Agentic AI","description":"","post_count":1},{"id":6872,"slug":"ai-agents","title":"AI Agents","description":"","post_count":1},{"id":6863,"slug":"local-ai","title":"Local AI","description":"","post_count":2}],"author":{"id":27876,"slug":"editorarduino","name":"Arduino Team","first_name":"","last_name":"","nickname":"Arduino Team","url":"","description":""},"comments":[],"attachments":[{"id":42186,"url":"https://blog.arduino.cc/wp-content/uploads/2026/06/Arduino.cc-Blogpost2-Cover1100x600.jpg","slug":"arduino-cc-blogpost2-cover1100x600","title":"Arduino.cc-Blogpost2-Cover(1100x600)","description":"","caption":"","parent":42175,"mime_type":"image/jpeg","images":{"full":{"url":"https://blog.arduino.cc/wp-content/uploads/2026/06/Arduino.cc-Blogpost2-Cover1100x600.jpg","width":1100,"height":600},"thumbnail":{"url":"https://blog.arduino.cc/wp-content/uploads/2026/06/Arduino.cc-Blogpost2-Cover1100x600-385x289.jpg","width":385,"height":289},"medium":{"url":"https://blog.arduino.cc/wp-content/uploads/2026/06/Arduino.cc-Blogpost2-Cover1100x600-300x164.jpg","width":300,"height":164},"medium_large":{"url":"https://blog.arduino.cc/wp-content/uploads/2026/06/Arduino.cc-Blogpost2-Cover1100x600-768x419.jpg","width":768,"height":419},"large":{"url":"https://blog.arduino.cc/wp-content/uploads/2026/06/Arduino.cc-Blogpost2-Cover1100x600-1024x559.jpg","width":1024,"height":559},"1536x1536":{"url":"https://blog.arduino.cc/wp-content/uploads/2026/06/Arduino.cc-Blogpost2-Cover1100x600.jpg","width":1100,"height":600},"2048x2048":{"url":"https://blog.arduino.cc/wp-content/uploads/2026/06/Arduino.cc-Blogpost2-Cover1100x600.jpg","width":1100,"height":600}}},{"id":42189,"url":"https://blog.arduino.cc/wp-content/uploads/2026/06/Arduino.cc-Blogpost-Featured385x289.jpg","slug":"arduino-cc-blogpost-featured385x289-13","title":"Arduino.cc-Blogpost-Featured(385x289)","description":"","caption":"","parent":42175,"mime_type":"image/jpeg","images":{"full":{"url":"https://blog.arduino.cc/wp-content/uploads/2026/06/Arduino.cc-Blogpost-Featured385x289.jpg","width":385,"height":289},"thumbnail":{"url":"https://blog.arduino.cc/wp-content/uploads/2026/06/Arduino.cc-Blogpost-Featured385x289.jpg","width":385,"height":289},"medium":{"url":"https://blog.arduino.cc/wp-content/uploads/2026/06/Arduino.cc-Blogpost-Featured385x289-300x225.jpg","width":300,"height":225},"medium_large":{"url":"https://blog.arduino.cc/wp-content/uploads/2026/06/Arduino.cc-Blogpost-Featured385x289.jpg","width":385,"height":289},"large":{"url":"https://blog.arduino.cc/wp-content/uploads/2026/06/Arduino.cc-Blogpost-Featured385x289.jpg","width":385,"height":289},"1536x1536":{"url":"https://blog.arduino.cc/wp-content/uploads/2026/06/Arduino.cc-Blogpost-Featured385x289.jpg","width":385,"height":289},"2048x2048":{"url":"https://blog.arduino.cc/wp-content/uploads/2026/06/Arduino.cc-Blogpost-Featured385x289.jpg","width":385,"height":289}}}],"comment_count":0,"comment_status":"closed","thumbnail":"https://blog.arduino.cc/wp-content/uploads/2026/06/Arduino.cc-Blogpost-Featured385x289.jpg","custom_fields":{"algolia_searchable_posts_records_count":["5"]},"thumbnail_size":"thumbnail","thumbnail_images":{"full":{"url":"https://blog.arduino.cc/wp-content/uploads/2026/06/Arduino.cc-Blogpost-Featured385x289.jpg","width":385,"height":289},"thumbnail":{"url":"https://blog.arduino.cc/wp-content/uploads/2026/06/Arduino.cc-Blogpost-Featured385x289.jpg","width":385,"height":289},"medium":{"url":"https://blog.arduino.cc/wp-content/uploads/2026/06/Arduino.cc-Blogpost-Featured385x289-300x225.jpg","width":300,"height":225},"medium_large":{"url":"https://blog.arduino.cc/wp-content/uploads/2026/06/Arduino.cc-Blogpost-Featured385x289.jpg","width":385,"height":289},"large":{"url":"https://blog.arduino.cc/wp-content/uploads/2026/06/Arduino.cc-Blogpost-Featured385x289.jpg","width":385,"height":289},"1536x1536":{"url":"https://blog.arduino.cc/wp-content/uploads/2026/06/Arduino.cc-Blogpost-Featured385x289.jpg","width":385,"height":289},"2048x2048":{"url":"https://blog.arduino.cc/wp-content/uploads/2026/06/Arduino.cc-Blogpost-Featured385x289.jpg","width":385,"height":289}}}],"hubProjects":[{"id":"7f3c7b0d-e7fb-4456-aa35-79616ede42b0","name":"Build a voice based Kiosk for Retail store using Moorcheh-edge and Arduino Uno Q","one_liner":"On-device retail kiosk on Arduino UNO Q: Moorcheh vector search, local RAG + LLM, Whisper STT, Piper TTS - private, fast, no cloud API keys. Power with USB-C after you load your catalog.","attachments":[{"id":"e3bdefa3-e909-4959-899b-1f93896e6539","type":"CoverImage","url":"https://projects.arduinocontent.cc/cover-images/c29cf637-e681-4731-8912-18b2dfcd2746.png","web_thumbnail_url":"https://projects.arduinocontent.cc/thumbnails/resized-web-c29cf637-e681-4731-8912-18b2dfcd2746.png","mobile_thumbnail_url":"https://projects.arduinocontent.cc/thumbnails/resized-mobile-c29cf637-e681-4731-8912-18b2dfcd2746.png"}],"views":7664,"respects":3,"authors":[],"is_bookmarked":false,"difficulty":"advanced","is_respected":false,"trending_value":131.24,"posted_by":{"username":"neelbuilds","uuid":"0de364bc-99c9-4bf2-8be4-18cdc7d1ccc2","dashboard_image":null},"created_by":null,"type":"tutorial","comments_count":0,"status":"published","can_edit":false,"updated_at":"2026-08-06T00:43:38.571842Z","created_at":"2026-06-19T21:39:27Z","review_request_date":"2026-06-22T15:57:01Z","publication_date":"2026-06-30T10:10:15Z","is_winner":false,"slug":"build-a-voice-based-kiosk-for-retail-store-using-moorcheh-edge-and-arduino-uno-q-7f3c7b","contest_date":null},{"id":"b7f41138-384d-4243-acf1-85ae9f32f1ed","name":"Controlling led using HC-05 bluetooth module","one_liner":"Controling and led using bluetooth","attachments":[{"id":"17529797-0e7d-4792-94ea-a03d6f7060d0","type":"CoverImage","url":"https://projects.arduinocontent.cc/cover-images/b0adeb5a-c7fa-49e5-a836-67f822e1a647.blob","web_thumbnail_url":"https://projects.arduinocontent.cc/thumbnails/resized-web-b0adeb5a-c7fa-49e5-a836-67f822e1a647.blob","mobile_thumbnail_url":"https://projects.arduinocontent.cc/thumbnails/resized-mobile-b0adeb5a-c7fa-49e5-a836-67f822e1a647.blob"}],"views":466203,"respects":9,"authors":[],"is_bookmarked":false,"difficulty":"easy","is_respected":false,"trending_value":14.17838,"posted_by":{"username":"syedmahamood","uuid":"5152e392-9fae-4af2-8311-17138a7c585b","dashboard_image":null},"created_by":null,"type":"tutorial","comments_count":12,"status":"published","can_edit":false,"updated_at":"2026-08-06T00:44:54.380472Z","created_at":"2020-08-04T07:17:18.719905Z","review_request_date":null,"publication_date":null,"is_winner":false,"slug":"controlling-led-using-hc-05-bluetooth-module-b7f411","contest_date":null},{"id":"ab8c80ce-1242-4044-a3e8-b8be9762aa0c","name":"Arduino UNO Q Smart Solar Panel System","one_liner":"A small solar pannel system that orient solar pannels automatically to get as much energy as possible, protects them from overheat and extreme weather conditions, and autoclean them using the Arduino UNO Q advanced Edge AI Features.","attachments":[{"id":"3ce09cef-c89c-473d-a2c9-985bd00b6c0c","type":"CoverImage","url":"https://projects.arduinocontent.cc/cover-images/3ab3ad21-3822-4fb3-83d1-7e98475479f7.jpg","web_thumbnail_url":"https://projects.arduinocontent.cc/thumbnails/resized-web-3ab3ad21-3822-4fb3-83d1-7e98475479f7.jpg","mobile_thumbnail_url":"https://projects.arduinocontent.cc/thumbnails/resized-mobile-3ab3ad21-3822-4fb3-83d1-7e98475479f7.jpg"}],"views":6135,"respects":13,"authors":[],"is_bookmarked":false,"difficulty":"intermediate","is_respected":false,"trending_value":13.26,"posted_by":{"username":"jcarolinares","uuid":"c5550bdb-de87-4715-8c79-2cfcf4a645f2","dashboard_image":null},"created_by":"","type":"showcase","comments_count":1,"status":"published","can_edit":false,"updated_at":"2026-08-06T00:28:15.005806Z","created_at":"2026-07-14T15:49:00.292328Z","review_request_date":"2026-07-15T08:23:25.582056Z","publication_date":"2026-07-15T09:48:47.933234Z","is_winner":false,"slug":"arduino-uno-q-smart-solar-panel-system-ab8c80","contest_date":null},{"id":"36b845f7-ddf4-4efb-92c5-ebfb446b2f52","name":"Real-Time Air Traffic Radar using ESP32 + ADS-B Data","one_liner":" It uses free API key with Live ADS-B data, presented in a beautiful visual display with smooth animation, and a custom-built radar interface.","attachments":[{"id":"303e13dd-ed64-4a7f-abad-51ac7337cafb","type":"CoverImage","url":"https://projects.arduinocontent.cc/cover-images/07ed33d8-716a-434e-9040-24eae78c2360.png","web_thumbnail_url":"https://projects.arduinocontent.cc/thumbnails/resized-web-07ed33d8-716a-434e-9040-24eae78c2360.png","mobile_thumbnail_url":"https://projects.arduinocontent.cc/thumbnails/resized-mobile-07ed33d8-716a-434e-9040-24eae78c2360.png"}],"views":3616,"respects":5,"authors":[],"is_bookmarked":false,"difficulty":"easy","is_respected":false,"trending_value":12.16,"posted_by":{"username":"mircemk","uuid":"3cbf92e4-3424-4480-ba31-fad8a55be482","dashboard_image":null},"created_by":"","type":"tutorial","comments_count":0,"status":"published","can_edit":false,"updated_at":"2026-08-06T00:44:52.607806Z","created_at":"2026-07-03T07:13:29.277278Z","review_request_date":"2026-07-04T11:02:29.155147Z","publication_date":"2026-07-10T07:56:04.189965Z","is_winner":false,"slug":"real-time-air-traffic-radar-using-esp32-ads-b-data-36b845","contest_date":null},{"id":"f514bcef-a03d-4eff-ab8e-719d21a13192","name":"Clawrophyll: A Houseplant That Runs Its Own AI Agent on an Arduino UNO Q","one_liner":"A potted cedar with a face, a pincer, senses, and a voice: a full AI agent on the Arduino UNO Q, held inside firmware-enforced limits.","attachments":[{"id":"5cc1793c-3ca8-4484-8991-07aef10c145a","type":"CoverImage","url":"https://projects.arduinocontent.cc/cover-images/446d3638-3cd2-42b6-86d1-01e22a8ba48f.gif","web_thumbnail_url":"https://projects.arduinocontent.cc/thumbnails/resized-web-446d3638-3cd2-42b6-86d1-01e22a8ba48f.gif","mobile_thumbnail_url":"https://projects.arduinocontent.cc/thumbnails/resized-mobile-446d3638-3cd2-42b6-86d1-01e22a8ba48f.gif"}],"views":3826,"respects":5,"authors":[],"is_bookmarked":false,"difficulty":"intermediate","is_respected":false,"trending_value":8,"posted_by":{"username":"samy_alxndr","uuid":"8f8d184a-b53f-40b6-aa4f-e38167a97aed","dashboard_image":null},"created_by":"","type":"showcase","comments_count":0,"status":"published","can_edit":false,"updated_at":"2026-08-06T00:43:50.733892Z","created_at":"2026-07-10T15:27:42.980196Z","review_request_date":"2026-07-12T07:28:48.443460Z","publication_date":"2026-07-13T13:37:14.736370Z","is_winner":false,"slug":"clawrophyll-a-houseplant-that-runs-its-own-ai-agent-on-an-arduino-uno-q-f514bc","contest_date":null},{"id":"d7278026-fc7b-4eef-b378-570ca6456c8a","name":"Parking Sensor Distance Detector","one_liner":"A small LCD screen that tells the relative distance between your car and another as you attempt to park your car and warns you depending on how close you are.","attachments":[{"id":"76990b81-b894-4099-aa6b-5a3b15ae0af3","type":"CoverImage","url":"https://projects.arduinocontent.cc/cover-images/196d4eb8-00d3-4ef8-a858-4314a5ca6dc7.jpg","web_thumbnail_url":"https://projects.arduinocontent.cc/thumbnails/resized-web-196d4eb8-00d3-4ef8-a858-4314a5ca6dc7.jpg","mobile_thumbnail_url":"https://projects.arduinocontent.cc/thumbnails/resized-mobile-196d4eb8-00d3-4ef8-a858-4314a5ca6dc7.jpg"}],"views":13478,"respects":17,"authors":[],"is_bookmarked":false,"difficulty":"easy","is_respected":false,"trending_value":6.68421,"posted_by":{"username":"wonderfulviking","uuid":"fd9b25bf-5364-4c14-b28e-4e6b66c5635a","dashboard_image":null},"created_by":"","type":"tutorial","comments_count":0,"status":"published","can_edit":false,"updated_at":"2026-08-06T00:38:23.933957Z","created_at":"2026-05-21T19:23:07.587706Z","review_request_date":"2026-05-21T20:04:34.575766Z","publication_date":"2026-05-27T16:03:01.760913Z","is_winner":false,"slug":"parking-sensor-distance-detector-d72780","contest_date":null},{"id":"45ee6f34-e6fe-42b0-8a63-9665fcb2f6a3","name":"Soil Knows Best: Build a Smart Irrigation System with Arduino Uno","one_liner":"Forget fixed watering schedules, this Arduino-powered system reads your soil's moisture in real time and only waters your plants when they actually need it.","attachments":[{"id":"fe5b7229-ebc1-4362-a7e4-f3e6532a3c26","type":"CoverImage","url":"https://projects.arduinocontent.cc/cover-images/3c8b7fb2-7a54-4a94-88ab-01ef8bf87b86.png","web_thumbnail_url":"https://projects.arduinocontent.cc/thumbnails/resized-web-3c8b7fb2-7a54-4a94-88ab-01ef8bf87b86.png","mobile_thumbnail_url":"https://projects.arduinocontent.cc/thumbnails/resized-mobile-3c8b7fb2-7a54-4a94-88ab-01ef8bf87b86.png"}],"views":643,"respects":1,"authors":[],"is_bookmarked":false,"difficulty":"intermediate","is_respected":false,"trending_value":5.64,"posted_by":{"username":"danieldsouza21","uuid":"46d5173b-c6de-41c2-aaf7-b150594bde3d","dashboard_image":null},"created_by":"danieldsouza21","type":"tutorial","comments_count":0,"status":"published","can_edit":false,"updated_at":"2026-08-06T00:40:41.114169Z","created_at":"2026-07-14T12:08:05.032246Z","review_request_date":"2026-07-14T12:54:27.073830Z","publication_date":"2026-07-20T07:30:20.548446Z","is_winner":false,"slug":"soil-knows-best-build-a-smart-irrigation-system-with-arduino-uno-45ee6f","contest_date":null},{"id":"f859c2bd-49cb-47c4-98c5-ab653c54125d","name":"REFLEXES MACHINE — A Reaction Game That Starts When It Sees You (Arduino UNO Q \u0026 12 Modulinos)","one_liner":"An arcade reaction game that challenges you the moment you walk up to it. A USB camera detects your face and the countdown begins on its own — or you hit Start, if you prefer. Four illuminated arcade buttons, eight Modulino LED Matrix displays running a live stopwatch, and sound effects on the Linux side. Built entirely on the Arduino UNO Q, using both of its brains at once.","attachments":[{"id":"ecaf937e-a707-46c2-9107-fdce0d8c8ab8","type":"CoverImage","url":"https://projects.arduinocontent.cc/cover-images/2c452c12-56b0-4b30-820b-90fc89f47232.png","web_thumbnail_url":"https://projects.arduinocontent.cc/thumbnails/resized-web-2c452c12-56b0-4b30-820b-90fc89f47232.png","mobile_thumbnail_url":"https://projects.arduinocontent.cc/thumbnails/resized-mobile-2c452c12-56b0-4b30-820b-90fc89f47232.png"}],"views":299,"respects":0,"authors":[],"is_bookmarked":false,"difficulty":"intermediate","is_respected":false,"trending_value":5.48,"posted_by":{"username":"lucadilo","uuid":"1ee9a10a-f5d6-46b4-9013-56f6cb620f3d","dashboard_image":null},"created_by":"","type":"tutorial","comments_count":0,"status":"published","can_edit":false,"updated_at":"2026-08-06T00:14:18.793074Z","created_at":"2026-07-24T10:07:55.494787Z","review_request_date":"2026-07-29T14:50:29.478914Z","publication_date":"2026-07-31T11:17:04.228607Z","is_winner":false,"slug":"reflexes-machine-a-reaction-game-that-starts-when-it-sees-you-arduino-uno-q-12-modulinos-f859c2","contest_date":null},{"id":"bb8a4a69-3f9c-458b-919b-e64e7ae816b2","name":"Jaime Arduino UNO Q AI Robot","one_liner":"An Agentic AI Robot Built on the Arduino UNO Q","attachments":[{"id":"ed926a59-b60f-439a-9f11-939d883abf69","type":"CoverImage","url":"https://projects.arduinocontent.cc/cover-images/17650ea5-9bd8-4e76-b2ec-11c4de77713a.png","web_thumbnail_url":"https://projects.arduinocontent.cc/thumbnails/resized-web-17650ea5-9bd8-4e76-b2ec-11c4de77713a.png","mobile_thumbnail_url":"https://projects.arduinocontent.cc/thumbnails/resized-mobile-17650ea5-9bd8-4e76-b2ec-11c4de77713a.png"}],"views":586,"respects":0,"authors":[],"is_bookmarked":false,"difficulty":"intermediate","is_respected":false,"trending_value":5.48,"posted_by":{"username":"ronibandini","uuid":"9d432016-4747-42cd-91c3-bed6409f38a9","dashboard_image":null},"created_by":"","type":"tutorial","comments_count":0,"status":"published","can_edit":false,"updated_at":"2026-08-06T00:13:49.894547Z","created_at":"2026-07-28T01:48:28.579465Z","review_request_date":"2026-08-03T01:33:13.465942Z","publication_date":"2026-08-04T12:49:43.369528Z","is_winner":false,"slug":"jaime-bb8a4a","contest_date":null},{"id":"331b730e-bebf-43e7-b71b-eebbaff402e3","name":"DIY Smart Weather Station with ESP32-S3 Touch Display and Environmental Sensors","one_liner":"Create your own weather station with the ESP32-S3 Smart Display, BME280 sensor, rain sensor, and LDR module. Featuring a modern LVGL dashboard, the system continuously displays real-time environmental conditions including temperature, humidity, pressure, altitude, rainfall status, and day/night detection, making it a great project for IoT and embedded systems enthusiasts.\n","attachments":[{"id":"a1baec6e-0893-4cea-8cb3-56eb9f9b81d1","type":"CoverImage","url":"https://projects.arduinocontent.cc/cover-images/68879c29-2be8-4a83-bb9f-864ad007aacf.png","web_thumbnail_url":"https://projects.arduinocontent.cc/thumbnails/resized-web-68879c29-2be8-4a83-bb9f-864ad007aacf.png","mobile_thumbnail_url":"https://projects.arduinocontent.cc/thumbnails/resized-mobile-68879c29-2be8-4a83-bb9f-864ad007aacf.png"}],"views":3664,"respects":1,"authors":[],"is_bookmarked":false,"difficulty":"advanced","is_respected":false,"trending_value":4.64516,"posted_by":{"username":"jrachana","uuid":"d20b9096-ba85-4f7f-b8e9-f12faff580e6","dashboard_image":null},"created_by":"","type":"tutorial","comments_count":0,"status":"published","can_edit":false,"updated_at":"2026-08-06T00:09:27.998214Z","created_at":"2026-06-04T17:02:21.736319Z","review_request_date":"2026-06-04T17:42:34.346347Z","publication_date":"2026-06-08T12:57:28.851722Z","is_winner":false,"slug":"diy-smart-weather-station-with-esp32-s3-touch-display-and-environmental-sensors-331b73","contest_date":null},{"id":"0265ba2c-db25-44e1-8d89-e3038769c7e4","name":"Talk to Your Arduino: Build an On-Device AI Agent in Arduino App Lab","one_liner":"Type plain English, and a language model running on the board itself controls real hardware. No cloud, no API keys, fully offline.","attachments":[{"id":"8e9bee60-2e87-4024-ba85-cafbe09295cd","type":"CoverImage","url":"https://projects.arduinocontent.cc/cover-images/26c61ec2-86b7-4b4e-bf95-5a500a456e81.jpg","web_thumbnail_url":"https://projects.arduinocontent.cc/thumbnails/resized-web-26c61ec2-86b7-4b4e-bf95-5a500a456e81.jpg","mobile_thumbnail_url":"https://projects.arduinocontent.cc/thumbnails/resized-mobile-26c61ec2-86b7-4b4e-bf95-5a500a456e81.jpg"}],"views":5924,"respects":11,"authors":[],"is_bookmarked":false,"difficulty":"intermediate","is_respected":false,"trending_value":4.5,"posted_by":{"username":"hardik_chadda","uuid":"a9064039-0728-431b-9e02-0b5abfce5e03","dashboard_image":null},"created_by":null,"type":"tutorial","comments_count":5,"status":"published","can_edit":false,"updated_at":"2026-08-06T00:00:10.609067Z","created_at":"2026-06-26T10:24:30Z","review_request_date":"2026-06-26T11:29:00Z","publication_date":"2026-07-01T12:07:00Z","is_winner":false,"slug":"talk-to-your-arduino-build-an-on-device-ai-agent-in-arduino-app-lab-0265ba","contest_date":null}]},"__N_SSG":true},"page":"/[[...slug]]","query":{},"buildId":"1r5y5DCrmta4CuTlUvlyN","isFallback":false,"dynamicIds":[19722,92297,18504,66461,90023,63584,77297,25304],"gsp":true,"scriptLoader":[{"id":"data-layer","strategy":"afterInteractive","children":"\n            (function () {\n              window.dataLayer = window.dataLayer || [];\n              window.dataLayer.push({\n                event: 'pageMetaData',\n                page: {\n                  type: 'home',\n                  title: 'Arduino Education',\n                  path: window.location.pathname,\n                  environment: \"prod\",\n                  region: 'global',\n                  brand: 'arduino',\n                  language: 'EN'\n                }\n              });\n            })()\n          "},{"id":"gtm","strategy":"afterInteractive","children":"\n            (function (w, d, s, l, i) {\n              w[l] = w[l] || [];\n              w[l].push({ 'gtm.start': new Date().getTime(), event: 'gtm.js' });\n              var f = d.getElementsByTagName(s)[0],\n                j = d.createElement(s),\n                dl = l != 'dataLayer' ? '\u0026l=' + l : '';\n              j.async = true;\n              j.src = 'https://www.googletagmanager.com/gtm.js?id=' + i + dl;\n              f.parentNode.insertBefore(j, f);\n            })(window, document, 'script', 'dataLayer', 'GTM-NK2TW8L');\n          "},{"id":"profitwell-js","data-pw-auth":"53f534183f43f5110cb688bef343b0bd","strategy":"afterInteractive","children":"\n            (function (i, s, o, g, r, a, m) {\n              i[o] = i[o] || function () { -(i[o].q = i[o].q || []).push(arguments); };\n              a = s.createElement(g);\n              m = s.getElementsByTagName(g)[0];\n              a.async = 1;\n              a.src = r + '?auth=' + s.getElementById(o + '-js').getAttribute('data-pw-auth');\n              m.parentNode.insertBefore(a, m);\n            })(window, document, 'profitwell', 'script', 'https://public.profitwell.com/js/profitwell.js');\n            if (sessionStorage.getItem('userEmail')) {\n              profitwell('start', { user_email: sessionStorage.getItem('userEmail') });\n            } else {\n              profitwell('start', {});\n            }\n          "},{"id":"segment","strategy":"afterInteractive","children":"\n            (function () {\n              var analytics = (window.analytics = window.analytics || []);\n              if (!analytics.initialize)\n                if (analytics.invoked) window.console \u0026\u0026 console.error \u0026\u0026 console.error('Segment snippet included twice.');\n                else {\n                  analytics.invoked = !0;\n                  analytics.methods = ['trackSubmit', 'trackClick', 'trackLink', 'trackForm', 'pageview', 'identify', 'reset', 'group', 'track', 'ready', 'alias', 'debug', 'page', 'once', 'off', 'on', 'addSourceMiddleware', 'addIntegrationMiddleware', 'setAnonymousId', 'addDestinationMiddleware'];\n                  analytics.factory = function (e) {\n                    return function () {\n                      var t = Array.prototype.slice.call(arguments);\n                      t.unshift(e);\n                      analytics.push(t);\n                      return analytics;\n                    };\n                  };\n                  for (var e = 0; e \u003c analytics.methods.length; e++) {\n                    var key = analytics.methods[e];\n                    analytics[key] = analytics.factory(key);\n                  }\n                  analytics.load = function (key, e) {\n                    var t = document.createElement('script');\n                    t.type = 'text/javascript';\n                    t.async = !0;\n                    t.src = \"https://evs.aayinltcs.arduino.cc/5yy37B6M2UBwaTzKNi37Ls/qUh2Pce5EsyeGTFGda1mDz.min.js\";\n                    var n = document.getElementsByTagName('script')[0];\n                    n.parentNode.insertBefore(t, n);\n                    analytics._loadOptions = e;\n                  };\n                  analytics._writeKey = \"Mjvf0GrvmQYNDH0GfIhND5e8aGFynScR\";\n                  analytics._cdn = 'https://evs.aayinltcs.arduino.cc';\n                  analytics.SNIPPET_VERSION = '4.15.3';\n                  analytics.load(\"Mjvf0GrvmQYNDH0GfIhND5e8aGFynScR\");\n                }\n            })()\n          "}]}</script></body></html>